

Milecia McGregor
April 12, 2022
Note: This article has been archived as it may contain features or techniques not supported with the latest version of Cosmic.
There are a number of local and global issues happening right now and most of the time it feels like there's not much we can do to help. But there's always something we can do!
That's why we're going to build a simple non-profit app that will show off potential students and their stories and it will allow anyone who wants to donate to do so using Stripe. By the time you finish this tutorial, you'll have a basic template for a student-donor website that uses modern tools to build quickly and scale easily.
Tools we’ll be using
To build this app, we’re going to use the following technologies:
- Next.js - A React framework that makes it easy to spin up a full-stack application.
- Cosmic - A headless CMS that gives us the ability to manage our student and donation data quickly.
- Stripe - A payment system that will allow us to accept donations.
- Tailwind CSS - A style framework that lets us make responsive layouts.
TL;DR
Install the App Template<br/>
View the live demo<br/>
Check out the code
Making a Cosmic account
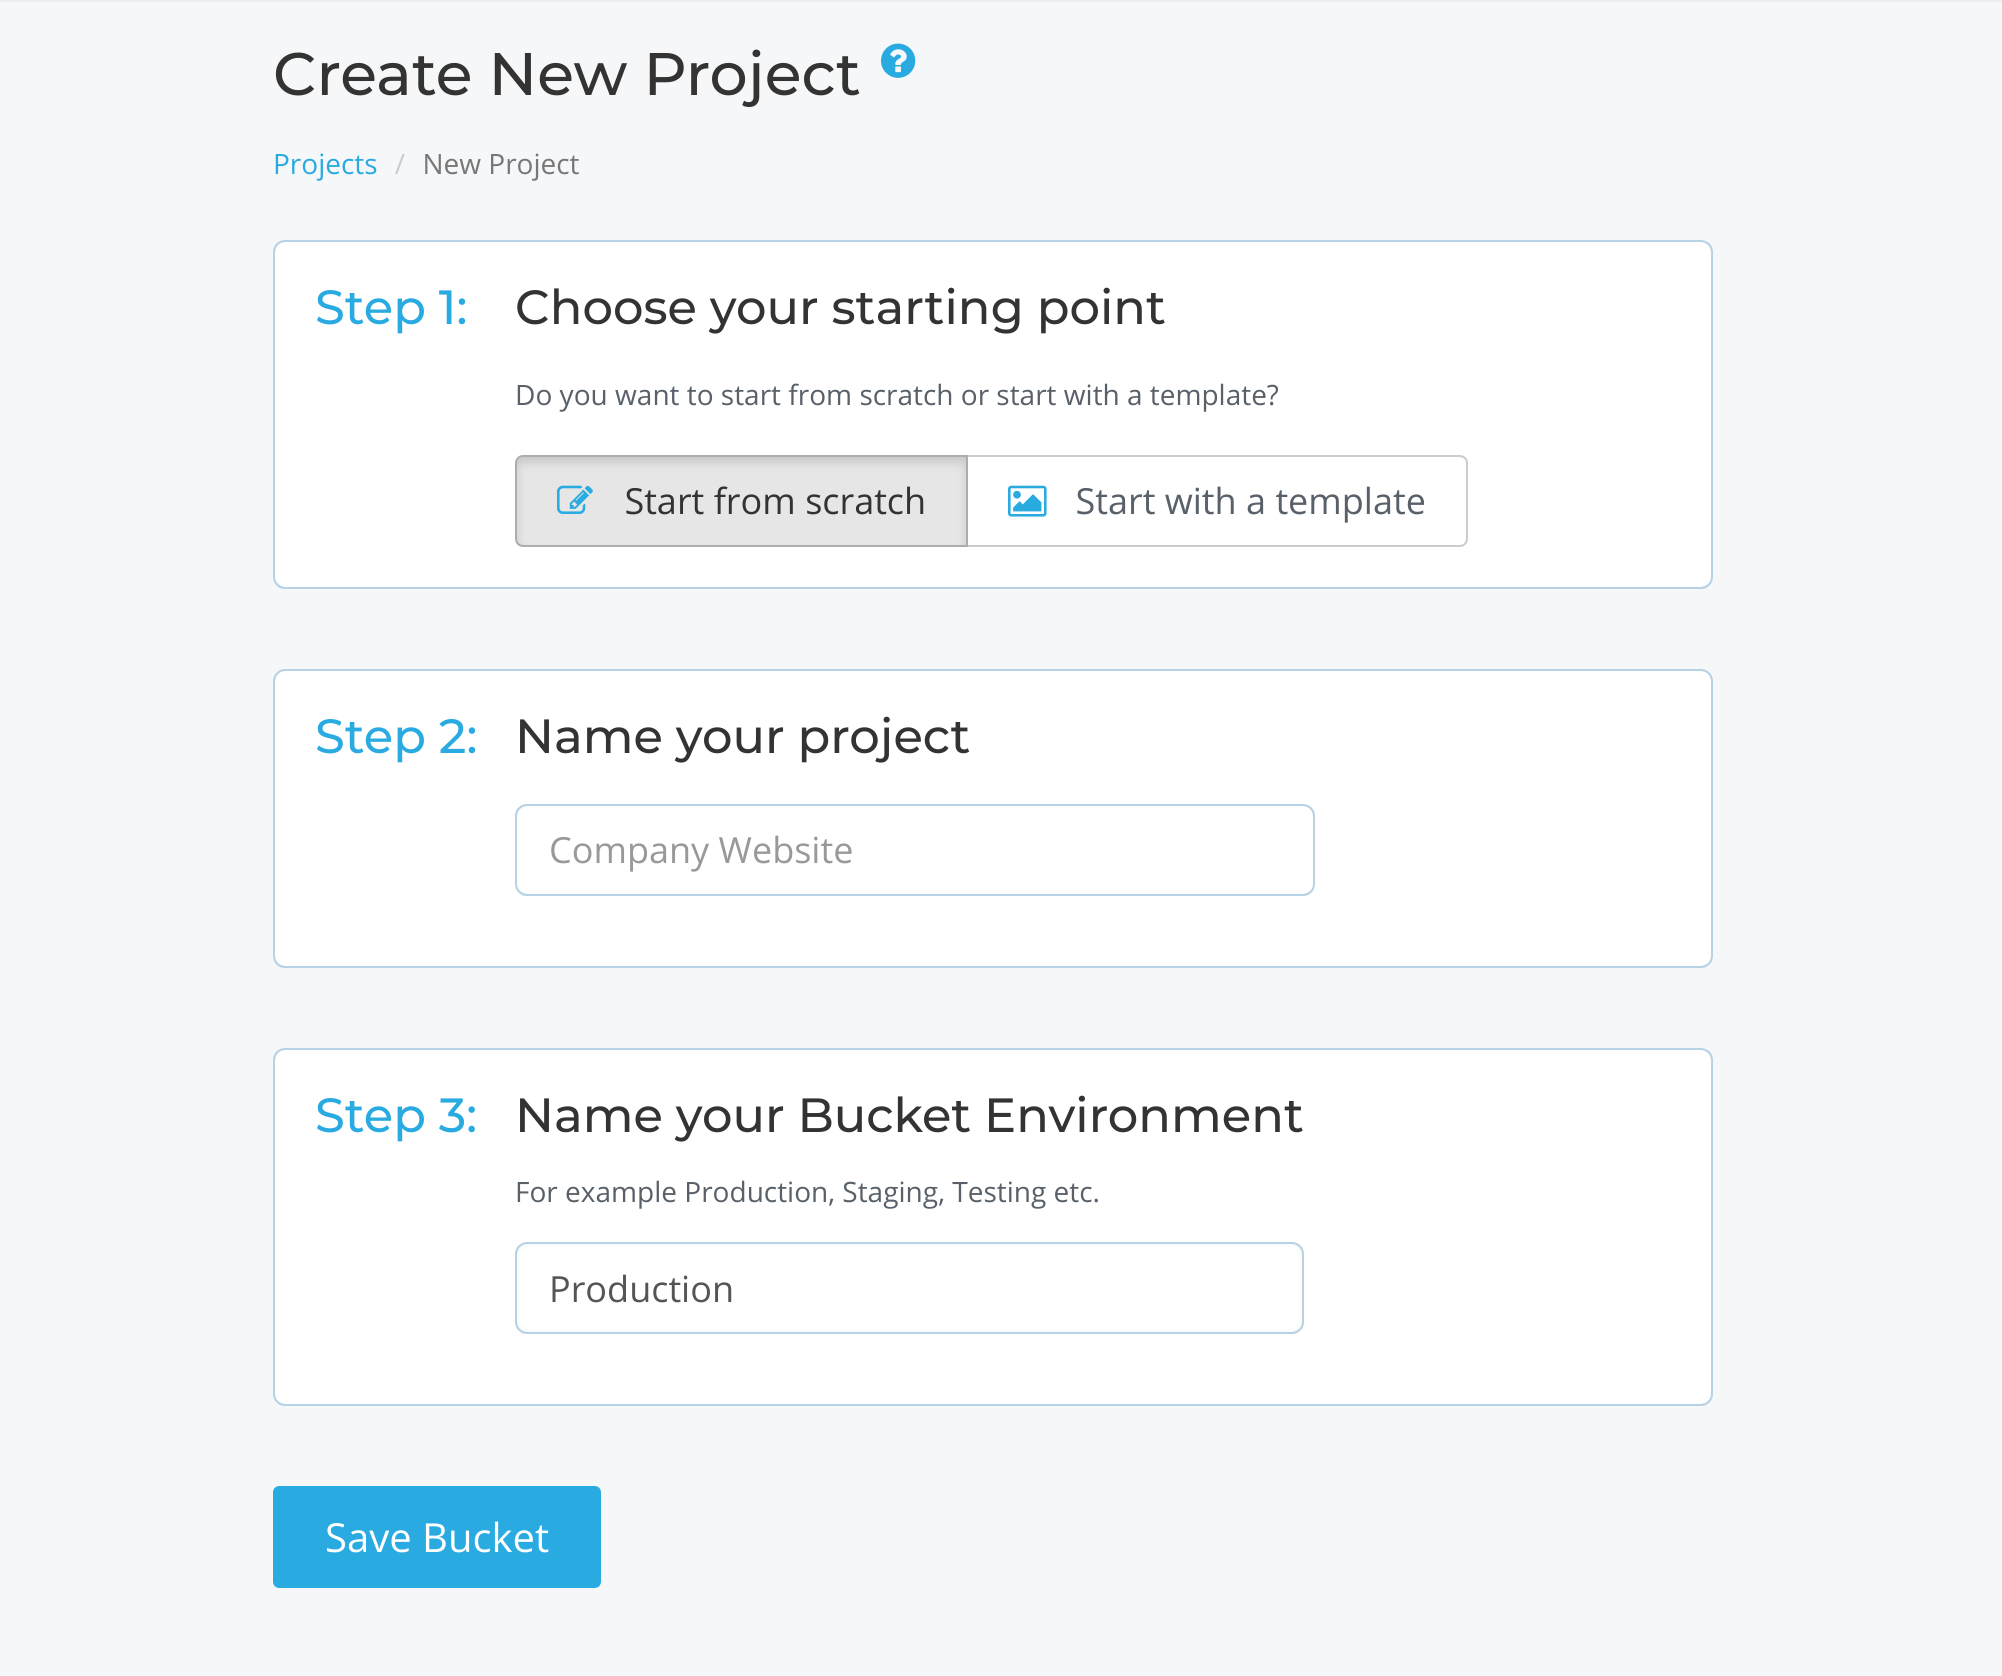
The first thing you'll need to set up is a free Cosmic account. Then you'll be prompted to create a new project. Make sure that you select the "Start from scratch" option. The name of the project is , but feel free to call it anything you want. You can leave the bucket environment as "Production".
Next, we'll need to make a few object types for our donors and students. In the Cosmic dashboard, go to "Add Object Type". You'll see this screen.
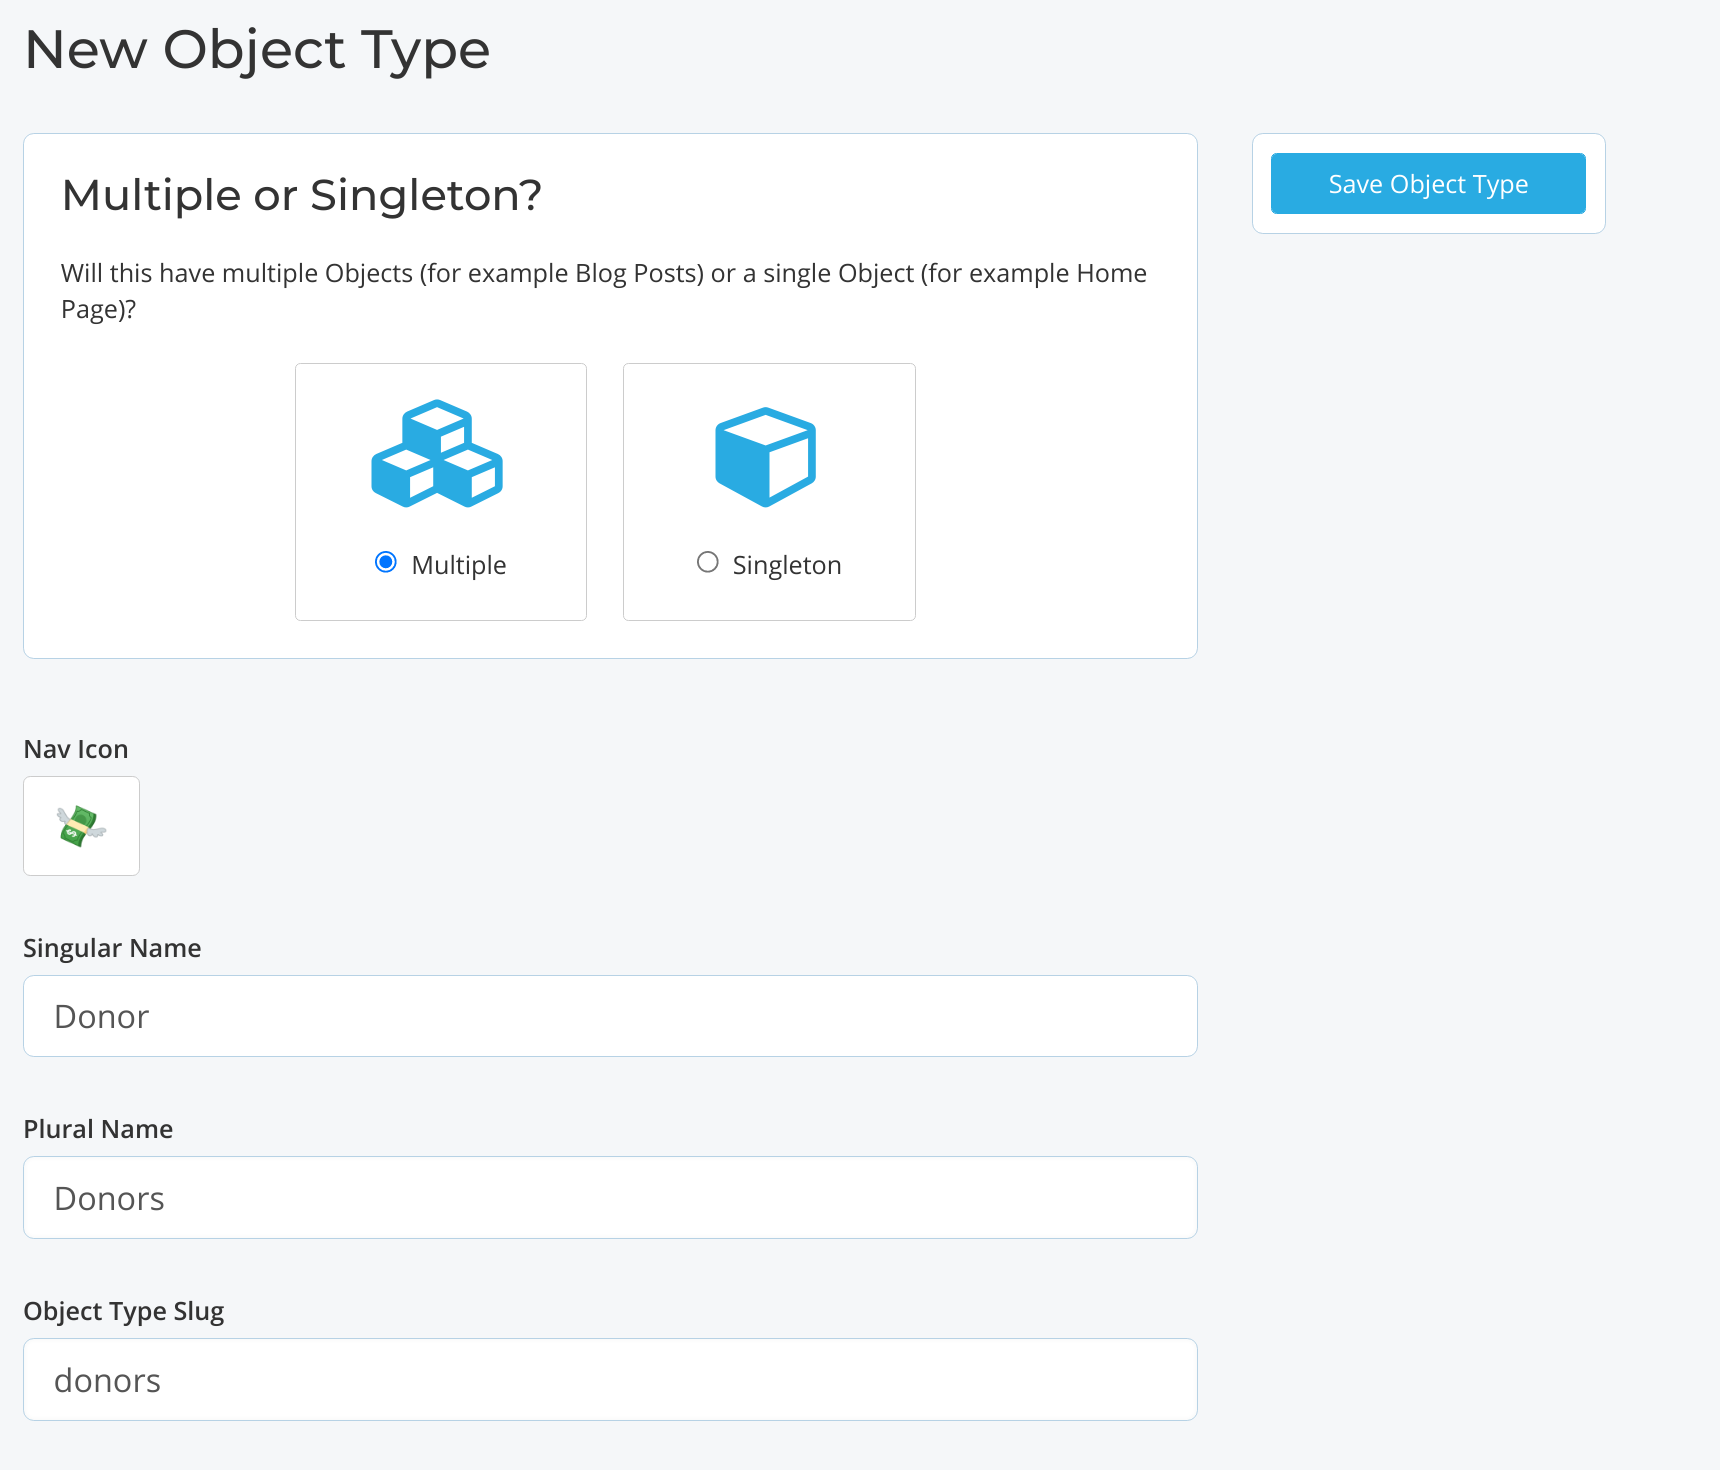
Make sure you choose the "Multiple" object option. You only have to fill in the "Singular Name" with and the other two fields auto-generate. Further down, we need to define the metafields in the "Content Model".
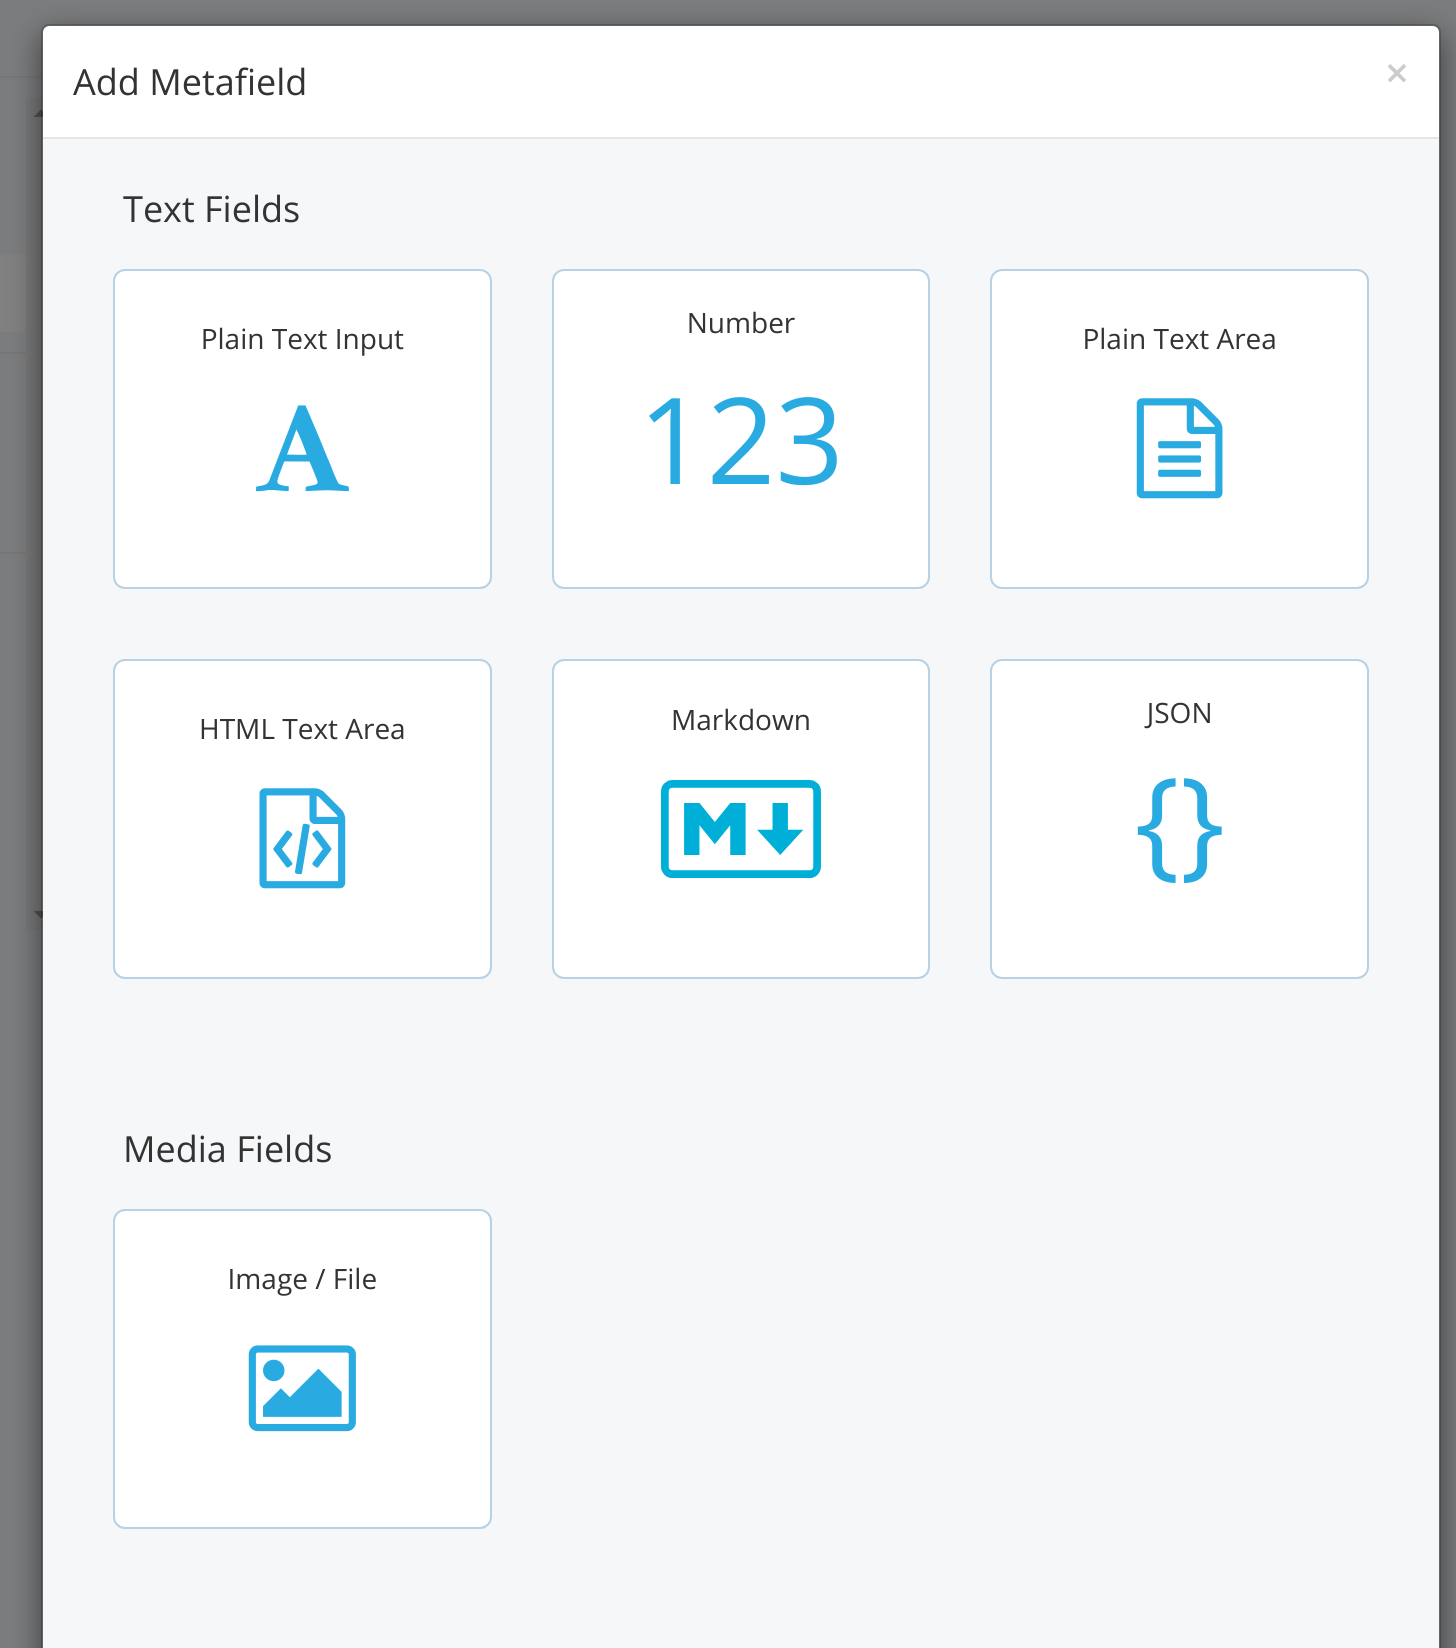
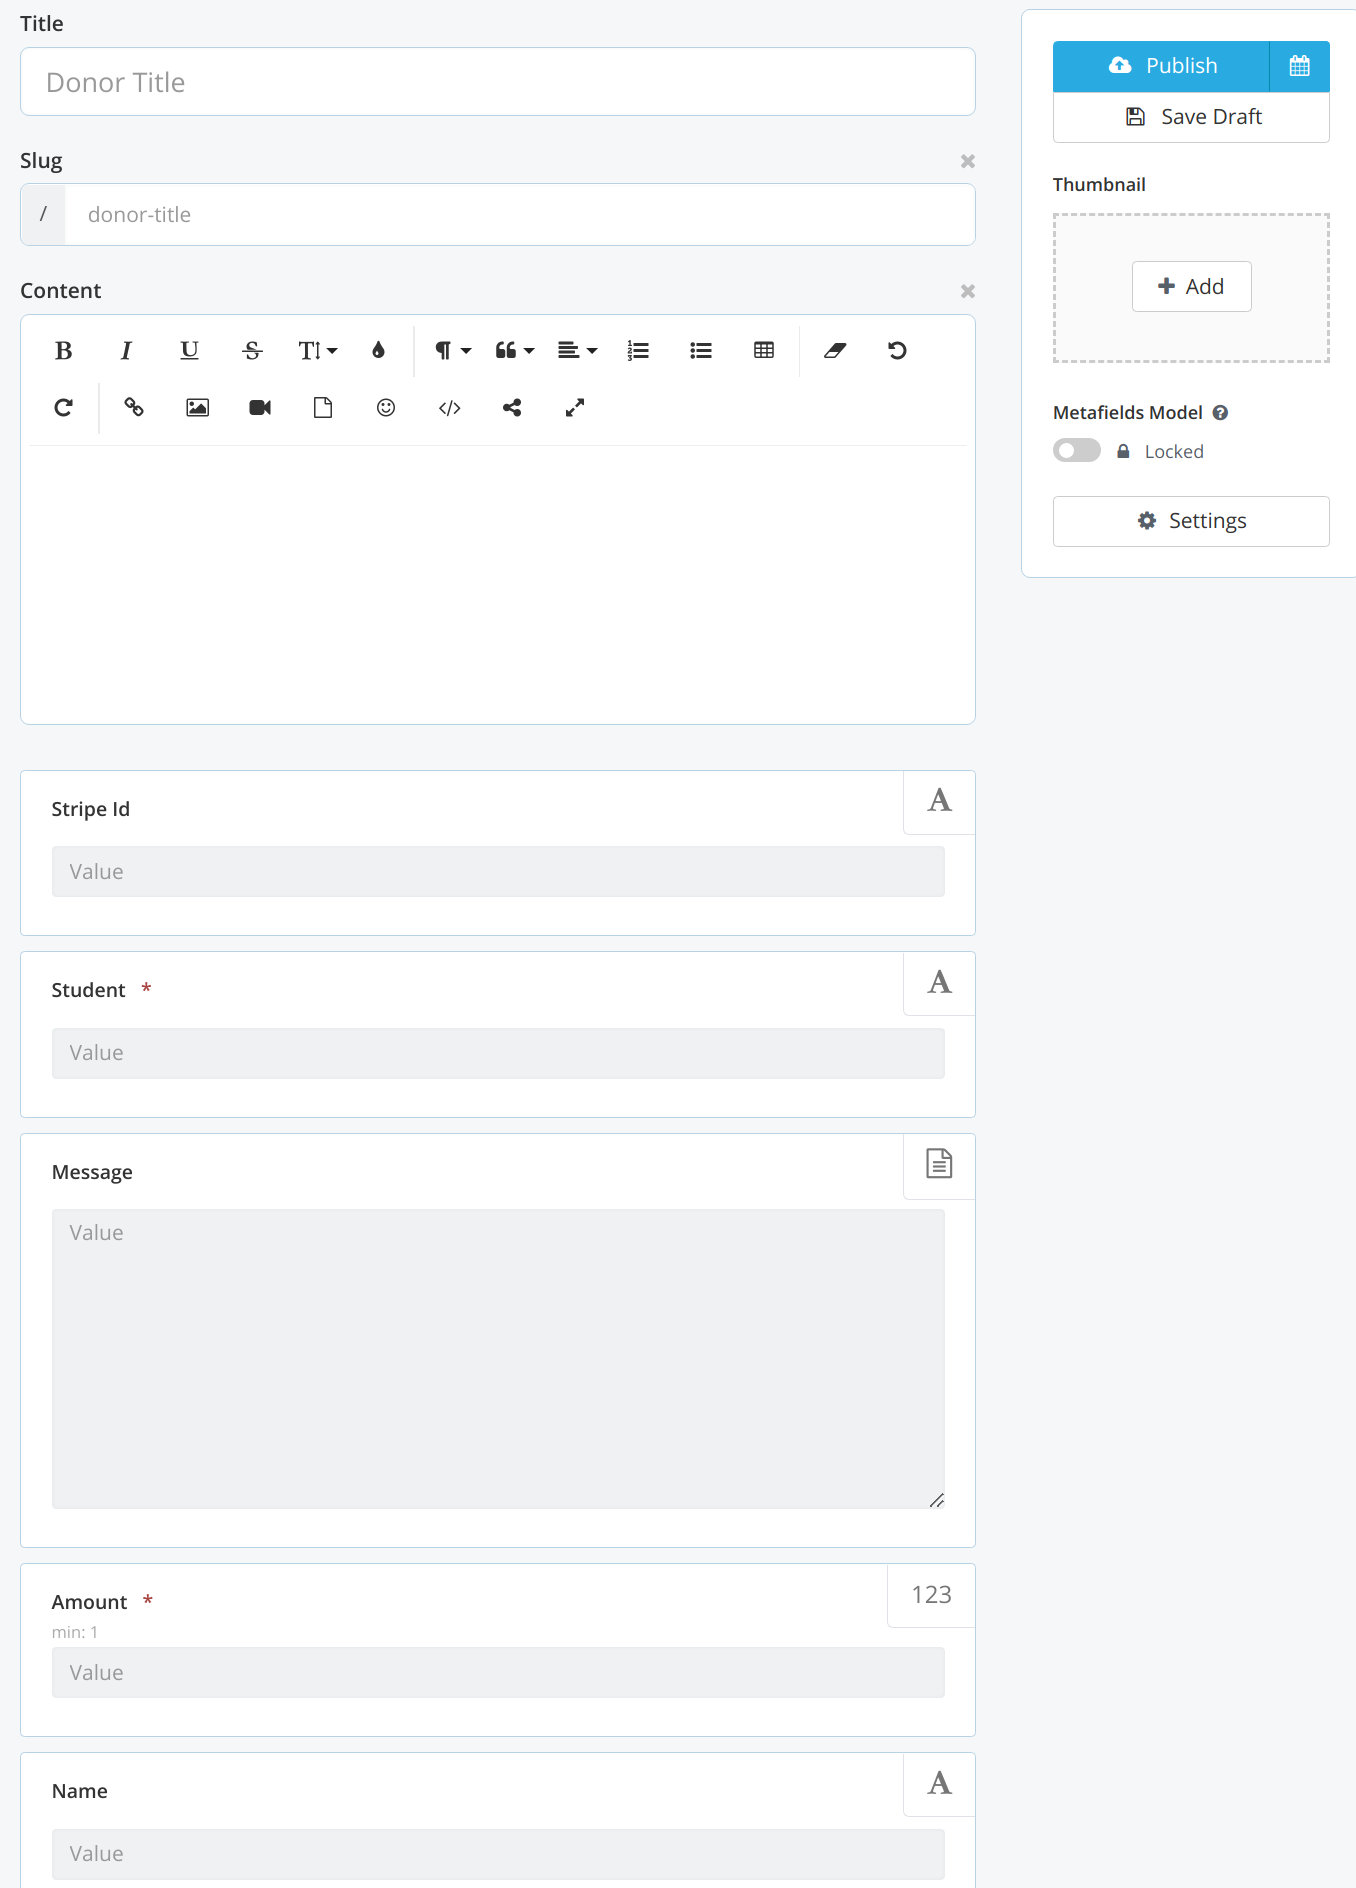
We'll have a few different fields for our donors: a student name, donation amount, the session id from Stripe, and optionally, a donor name and message. You should have the following metafields when you're done.
We'll add new donor objects every time a donation is made through Stripe and then we'll be able to show donations for each student once we start building the Next app. Before we get there, let's finish up the object types we'll need by adding another type called .
You'll go back to your Cosmic dashboard and create a "New Object Type". It will also have the "Multiple" type and this time the "Singular Name" will be . Once again, we need to create some metafields for this object type. So scroll down to the "Content Model" section and add these metafields: the student name, a major, a university, their story, and a headshot. Here's what all of the metafields should look like when you're finished.
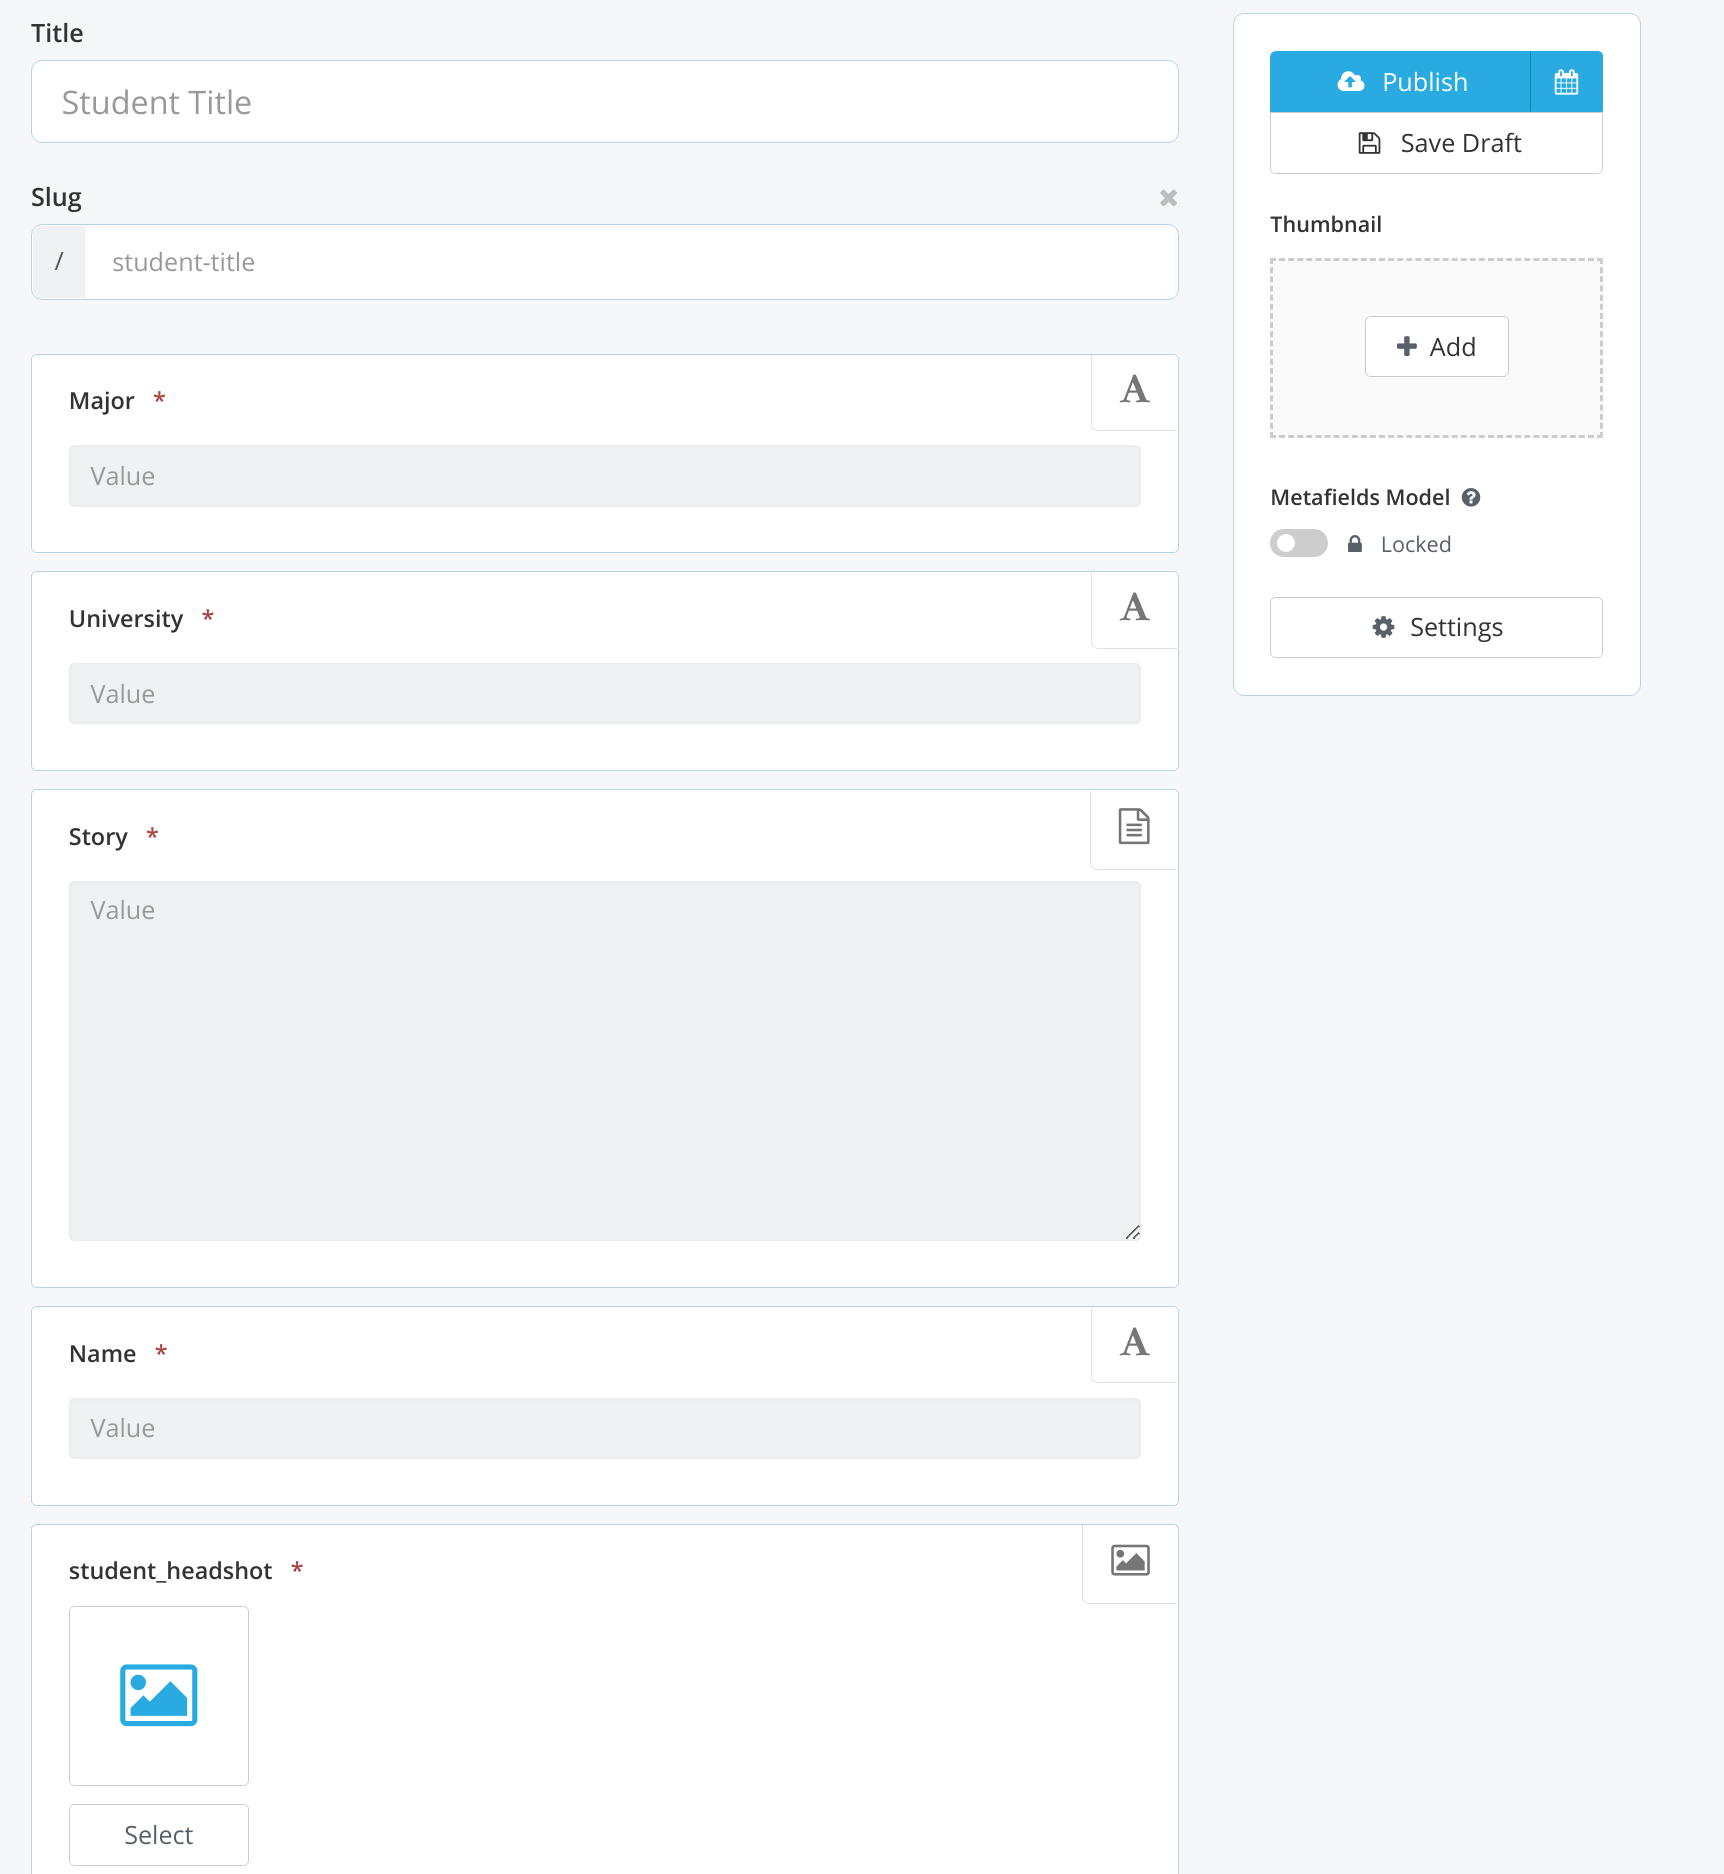
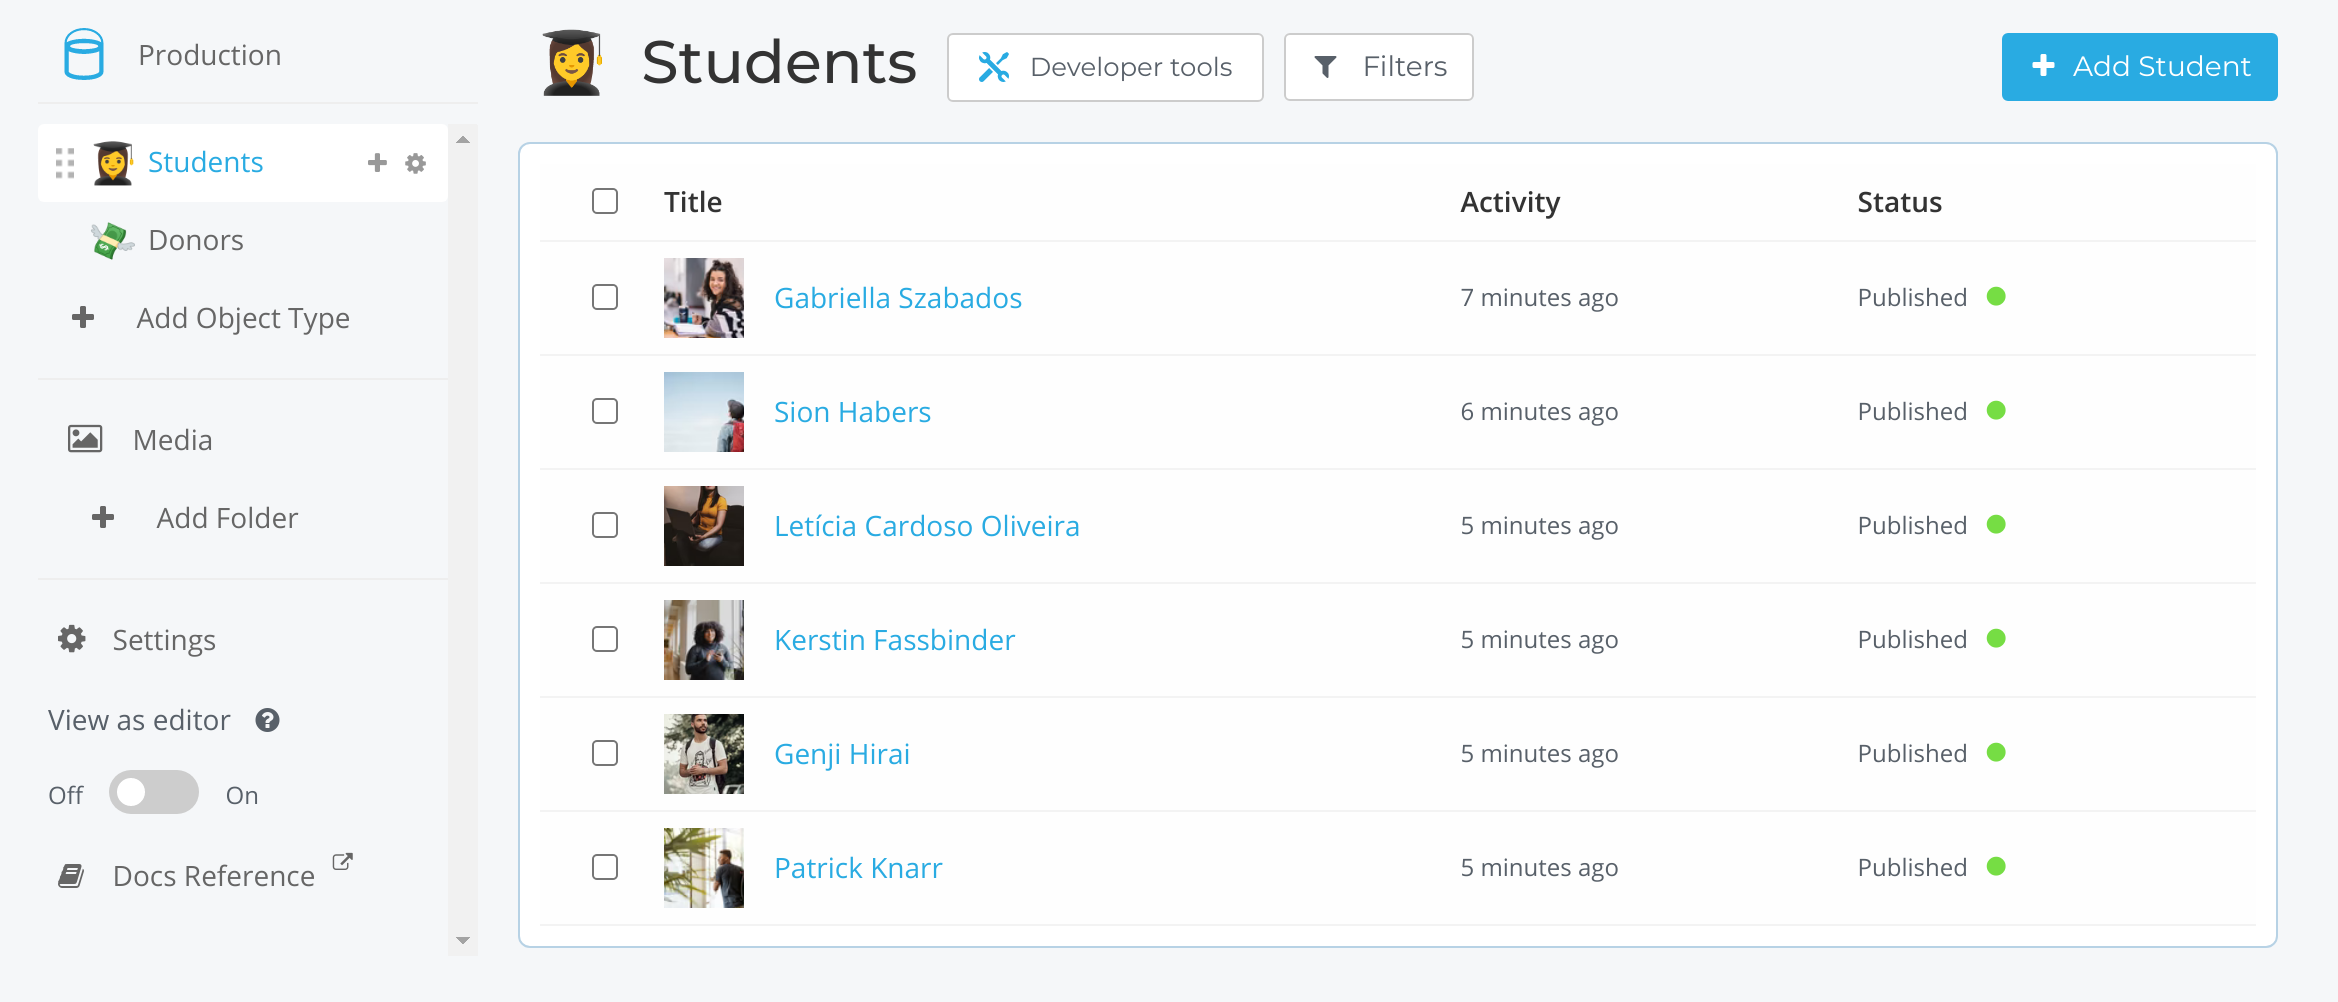
Now when you get data for your students and donors, you should see something similar to this for the students in your dashboard.
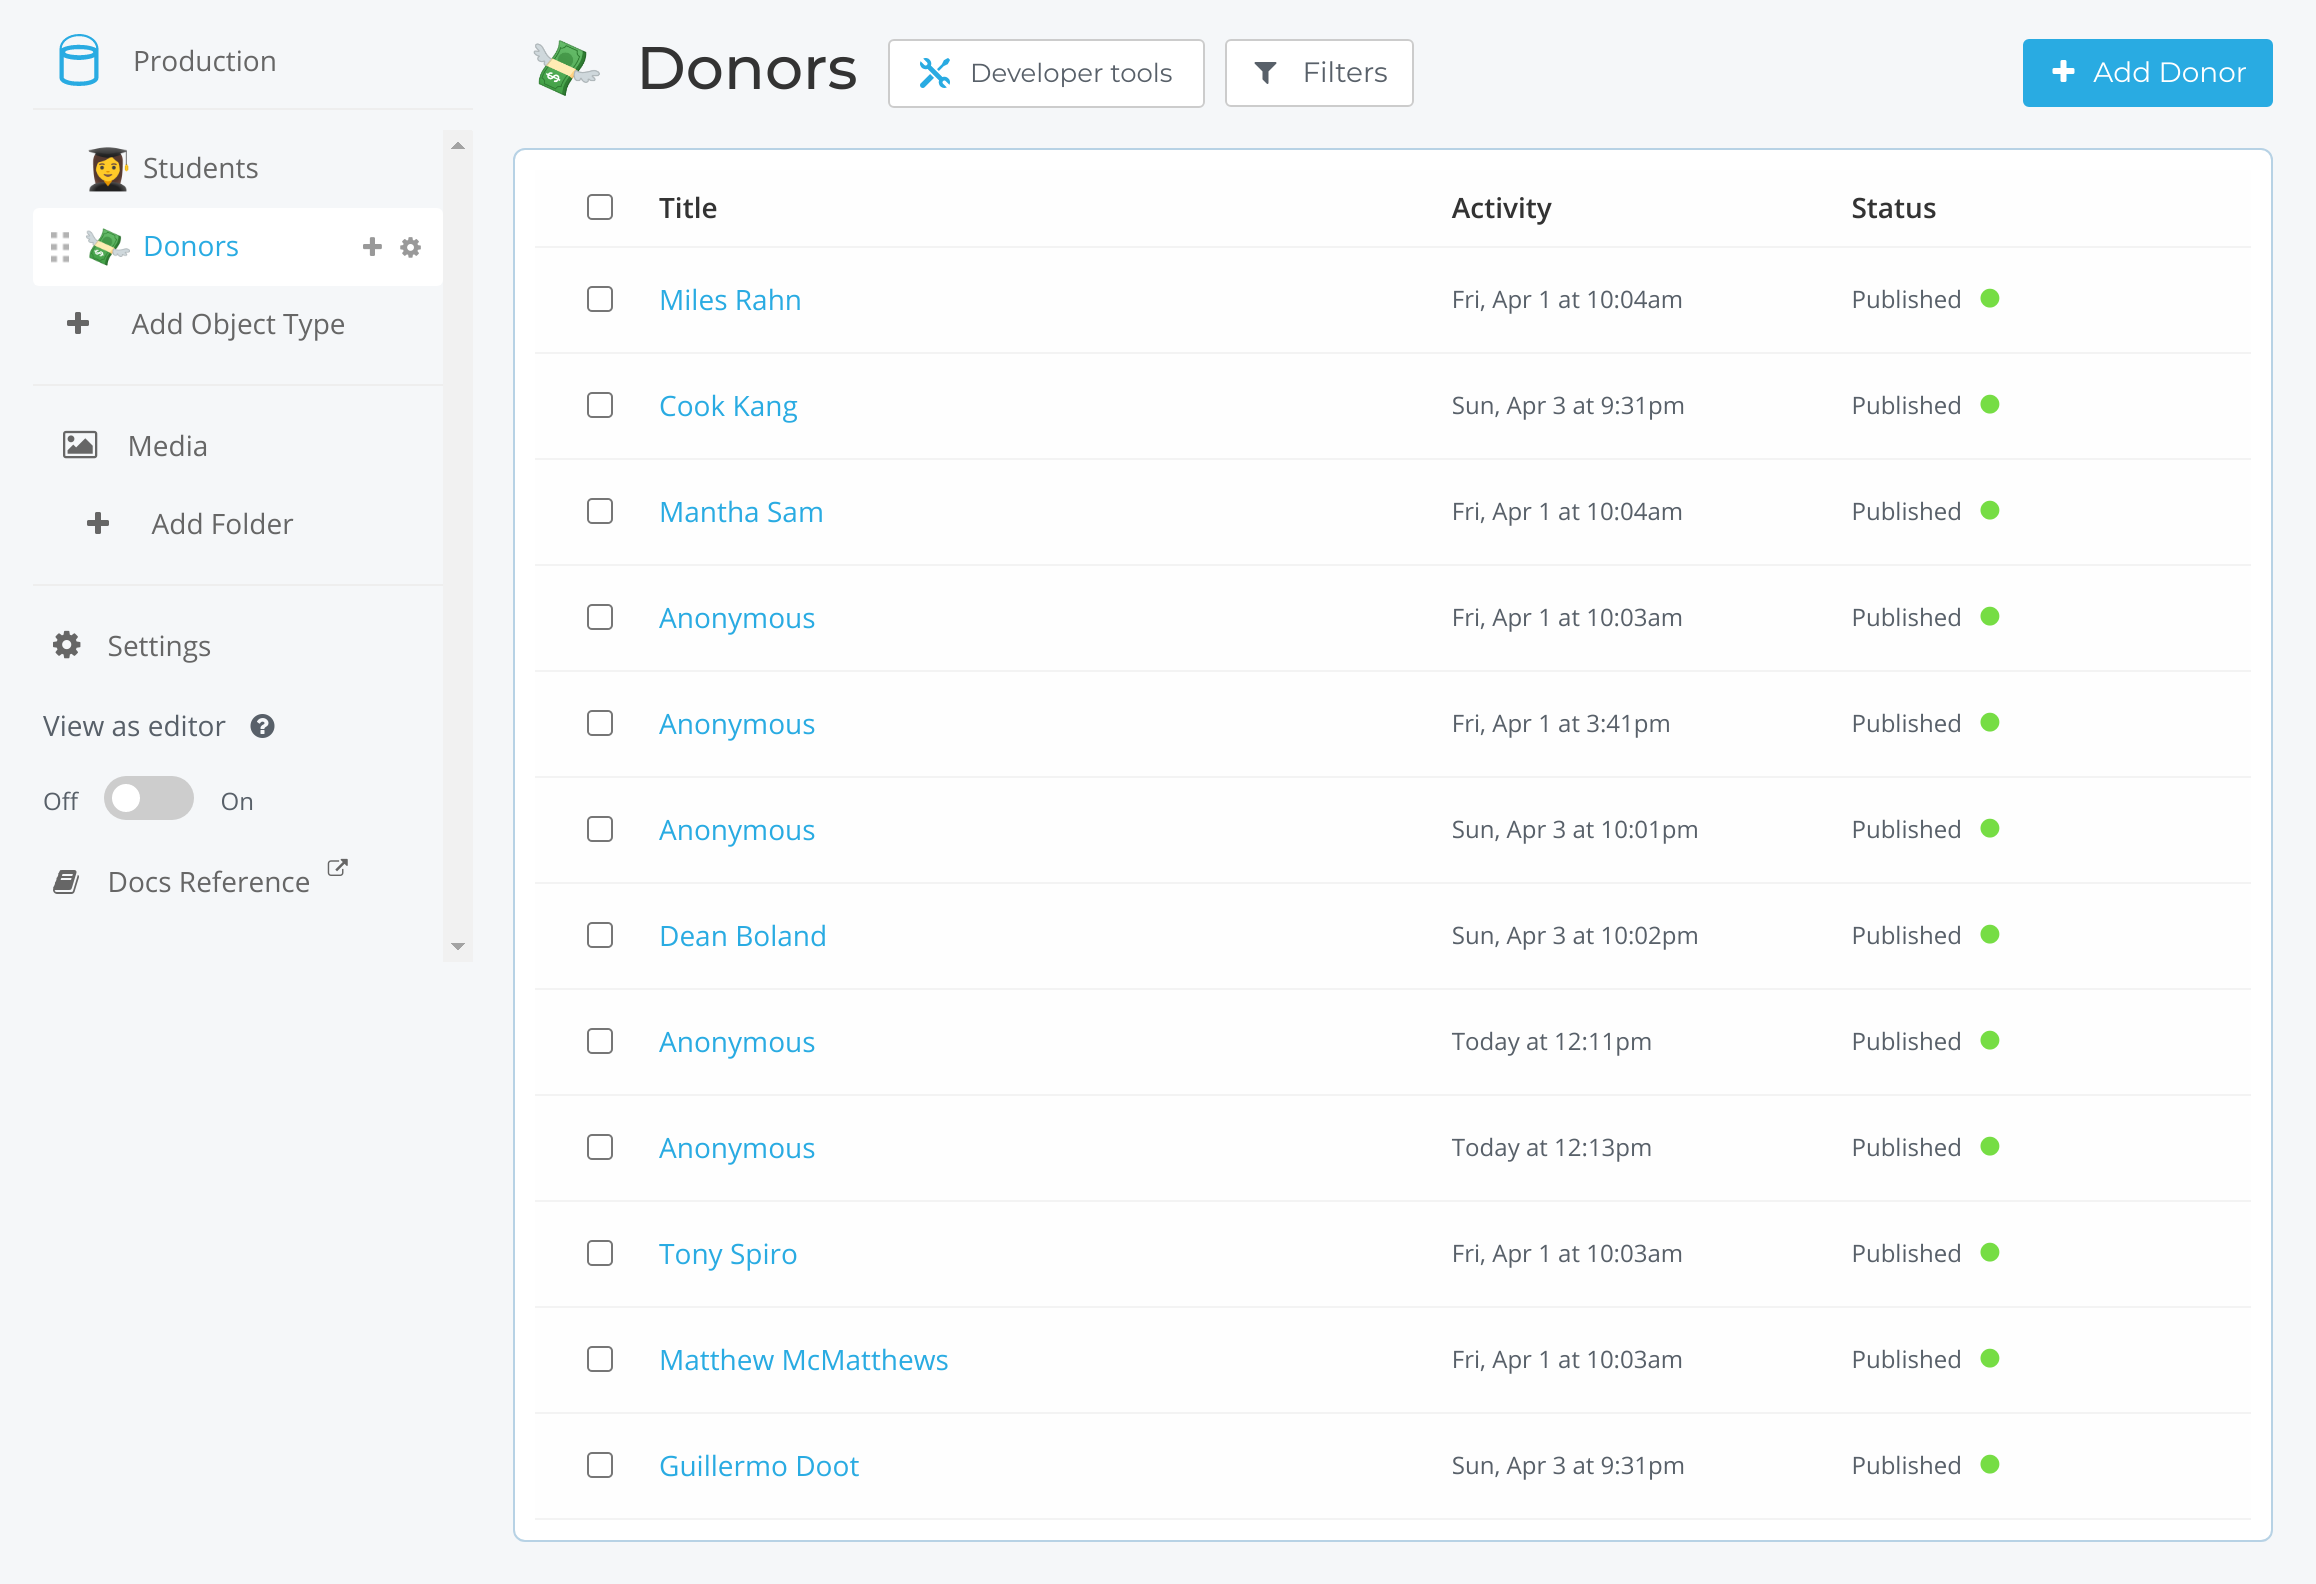
And something similar to this for the donors in your dashboard.
That's all we need to get everything set up in Cosmic.
Getting some values for the Next app
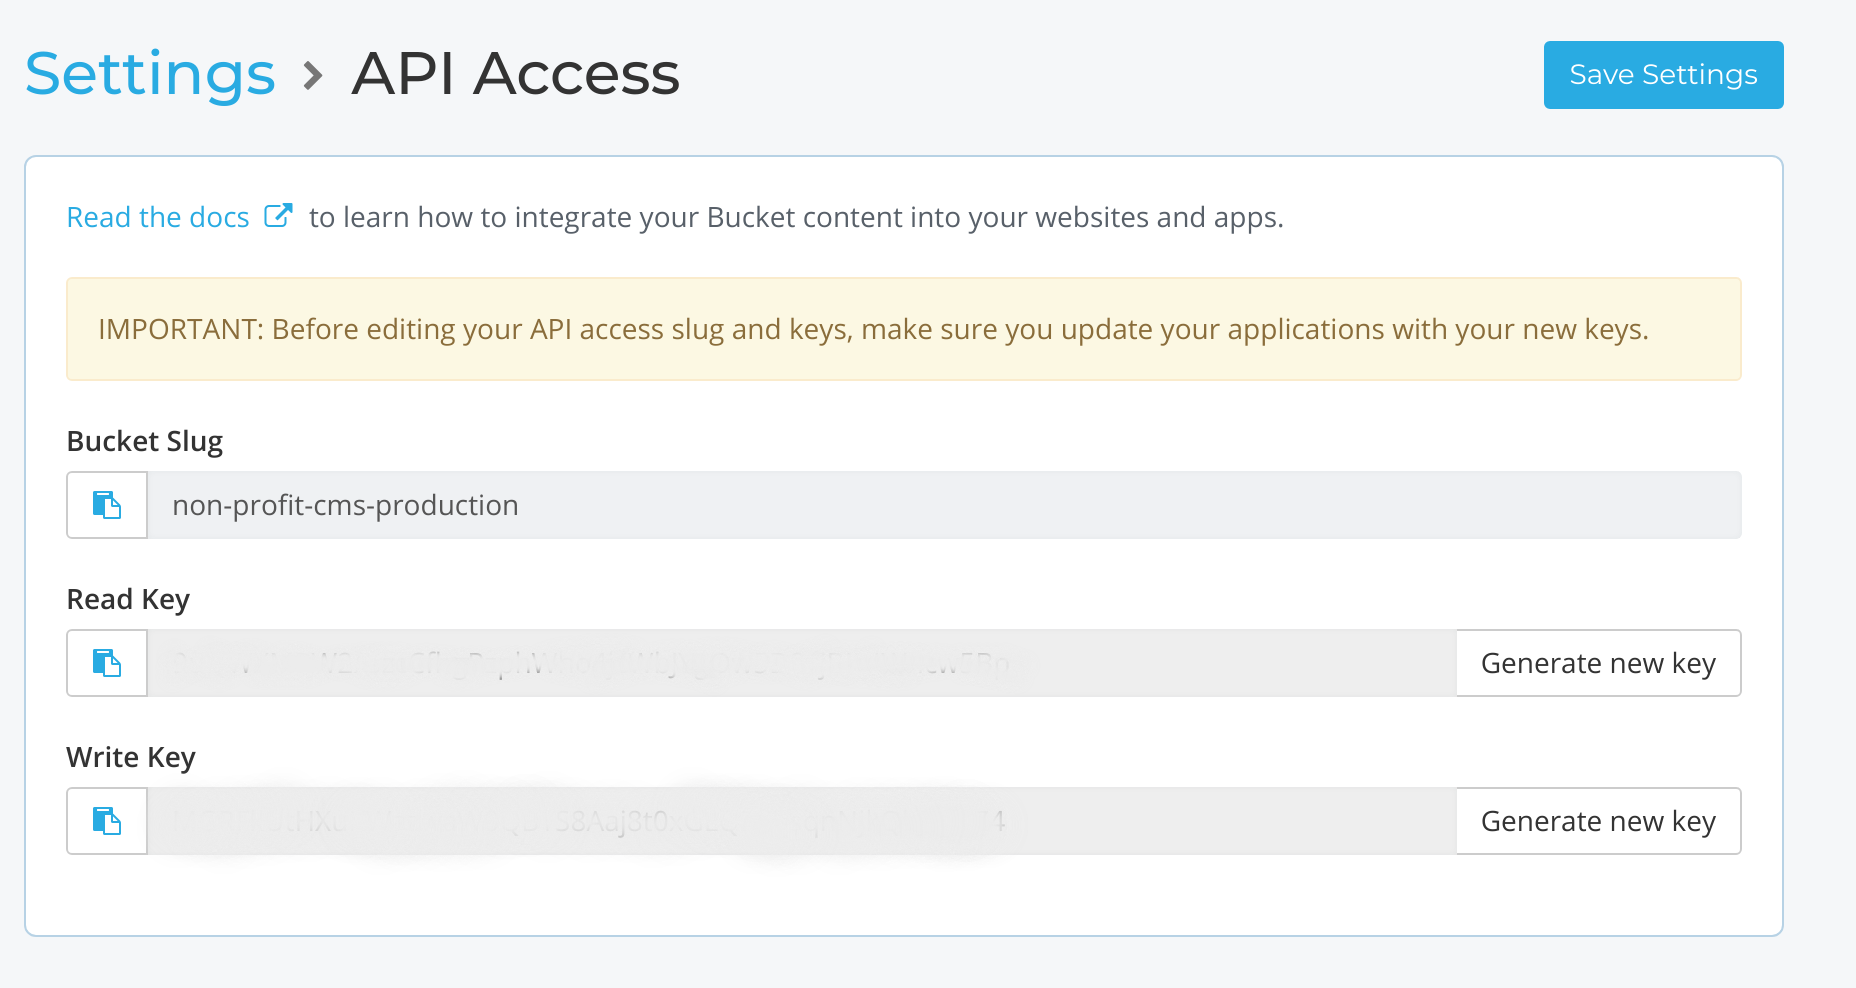
Now that we have Cosmic configured as we need, let's get a few environment variables we'll need for the Next app we are about to build. Go to your Cosmic Dashboard and go to . This will give you the ability to access, read, and write to your Cosmic project. We'll be working with the students and donors so that we're able to maintain good records of who to send the proper student updates.
Before we make the Next project, there's one more service we need to get configured correctly. We need to have Stripe so that we can accept donations.
Setting up your Stripe account
You'll need to go to the Stripe site to create a free account. The main things you'll want to make sure of here are that your dashboard is left in test mode and that you add a "Public business name" in .
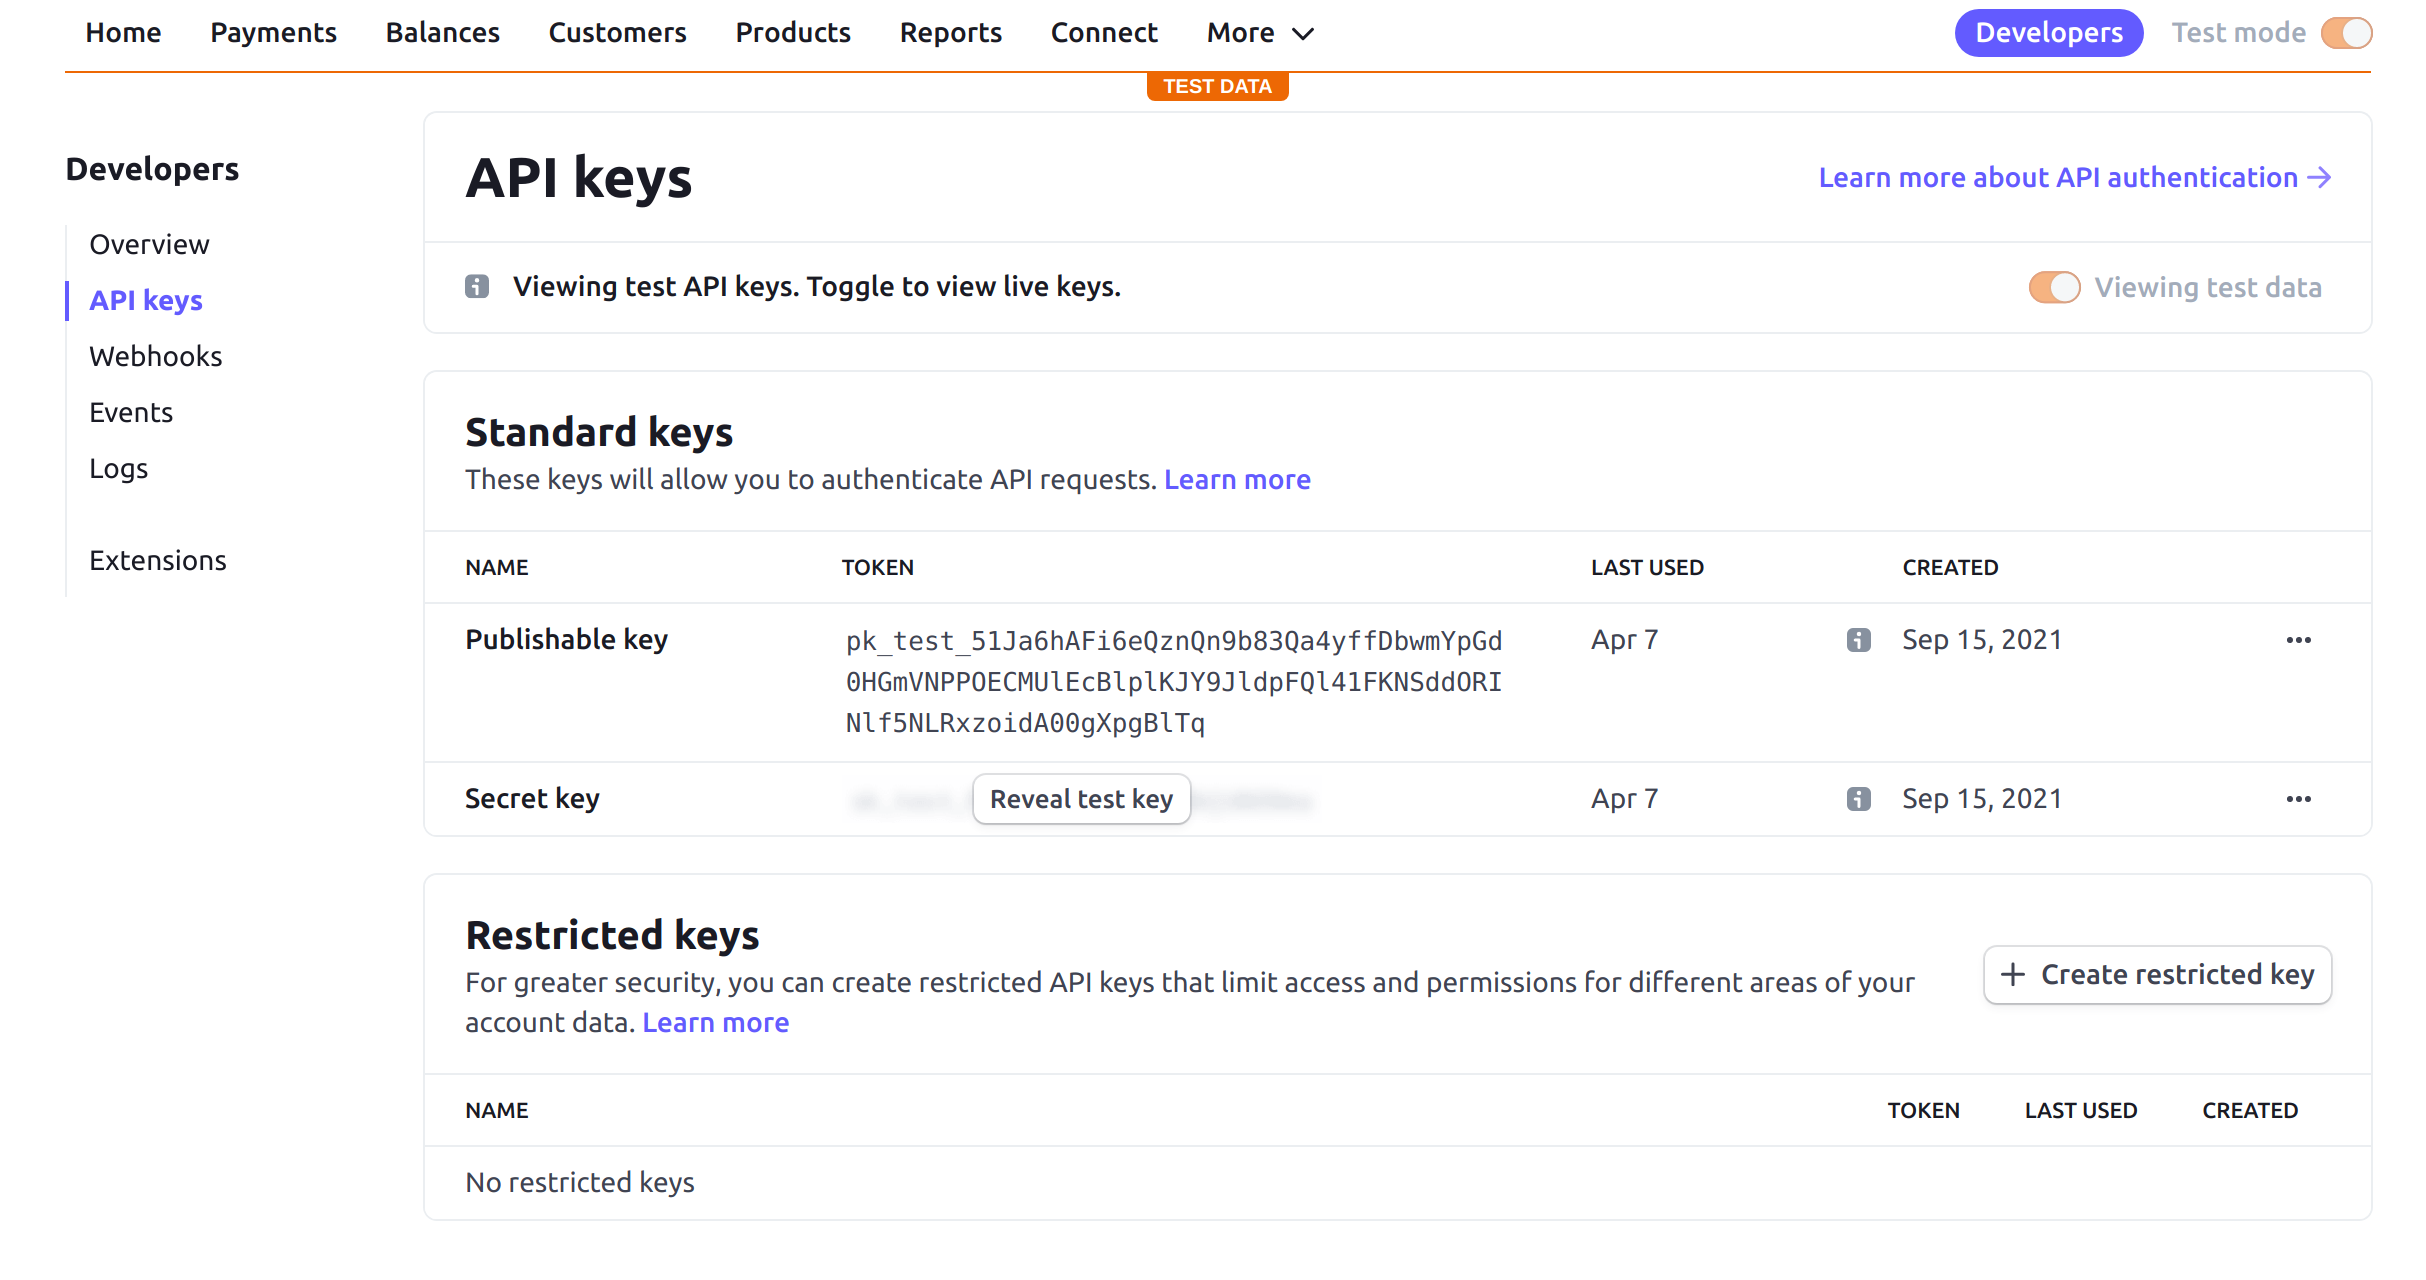
Now that your dashboard is configured, you can get the last two environment variables we'll need for the app. Go to and get your and .
With these values, we're ready to make this Next app.
Setting up the Next.js app
Lucky for us, there is a command to generate a new Next app with the configs in place. That way we can just jump into writing code. To generate this project, run the following command in your terminal:
Then we can add the packages we'll be working with the following command:
There's just one last piece of setup we need to do before we can dive into the code.
Adding the .env file
Remember those values we grabbed from our Cosmic dashboard and our Stripe dashboard? We're going to add them to the project in a file. At the root of the project, add a new file. Inside that file, add the following values:
With all of these values finally in place, we can get to the fun part of building the app.
Setting up Tailwind CSS
In order to take advantage of the Tailwind CSS package we install, there are a few configurations we need to add. There should be a file in the root of your project. Open that file and replace the existing code with the following.
Now take a look in the folder and you should see a file. This is how we will enable TailwindCSS in our project. Open this file and replace the existing code with the following.
That's all we need for our styles to work. Of course, you could write the CSS yourself, but sometimes it's just as good to go with an existing styles package.
A couple of utility components
Now that we can style the app, let's add a few components that will help tie the pages together. We're going to add a navigation bar so that we can get back to the home page all the time and there will be a branding footer so that you can always show the name of your organization. At the root of the project, add a new folder called .
We'll start by making the navigation, so inside the folder add a new file called . This will render a link back home. Add the following code to create this component.
The last little component we need to add is the footer. In the folder, add a new file called . This will render some text and an icon image at the bottom of each page. In this new file, add the following code.
Those are the only two components that we needed to make. Now you'll need to update your file to include the component. That way it will show on every page of the app. So open this file and update the existing component to match this:
Notice that there is a new import statement and that the whole app is now wrapped in a styled that also contains that footer element. We're only adding the element to individual student pages, which we'll get to later.
Displaying all of the students
We can start working on the Next app to display all of the students to anyone who visits the website. We'll start by updating the existing file to import and use Cosmic to pull in the student data. So add the following code right below the existing imports in the file.
Then, we'll need to add the function to fetch the student data from Cosmic:
This function only runs at build time for a page, so you won't be making a request each time. Inside this function, we're defining the that we'll send in the Cosmic request. Then we make the request to the we defined earlier and we get all of the student objects returned. Finally, we send the array to the props of the page component.
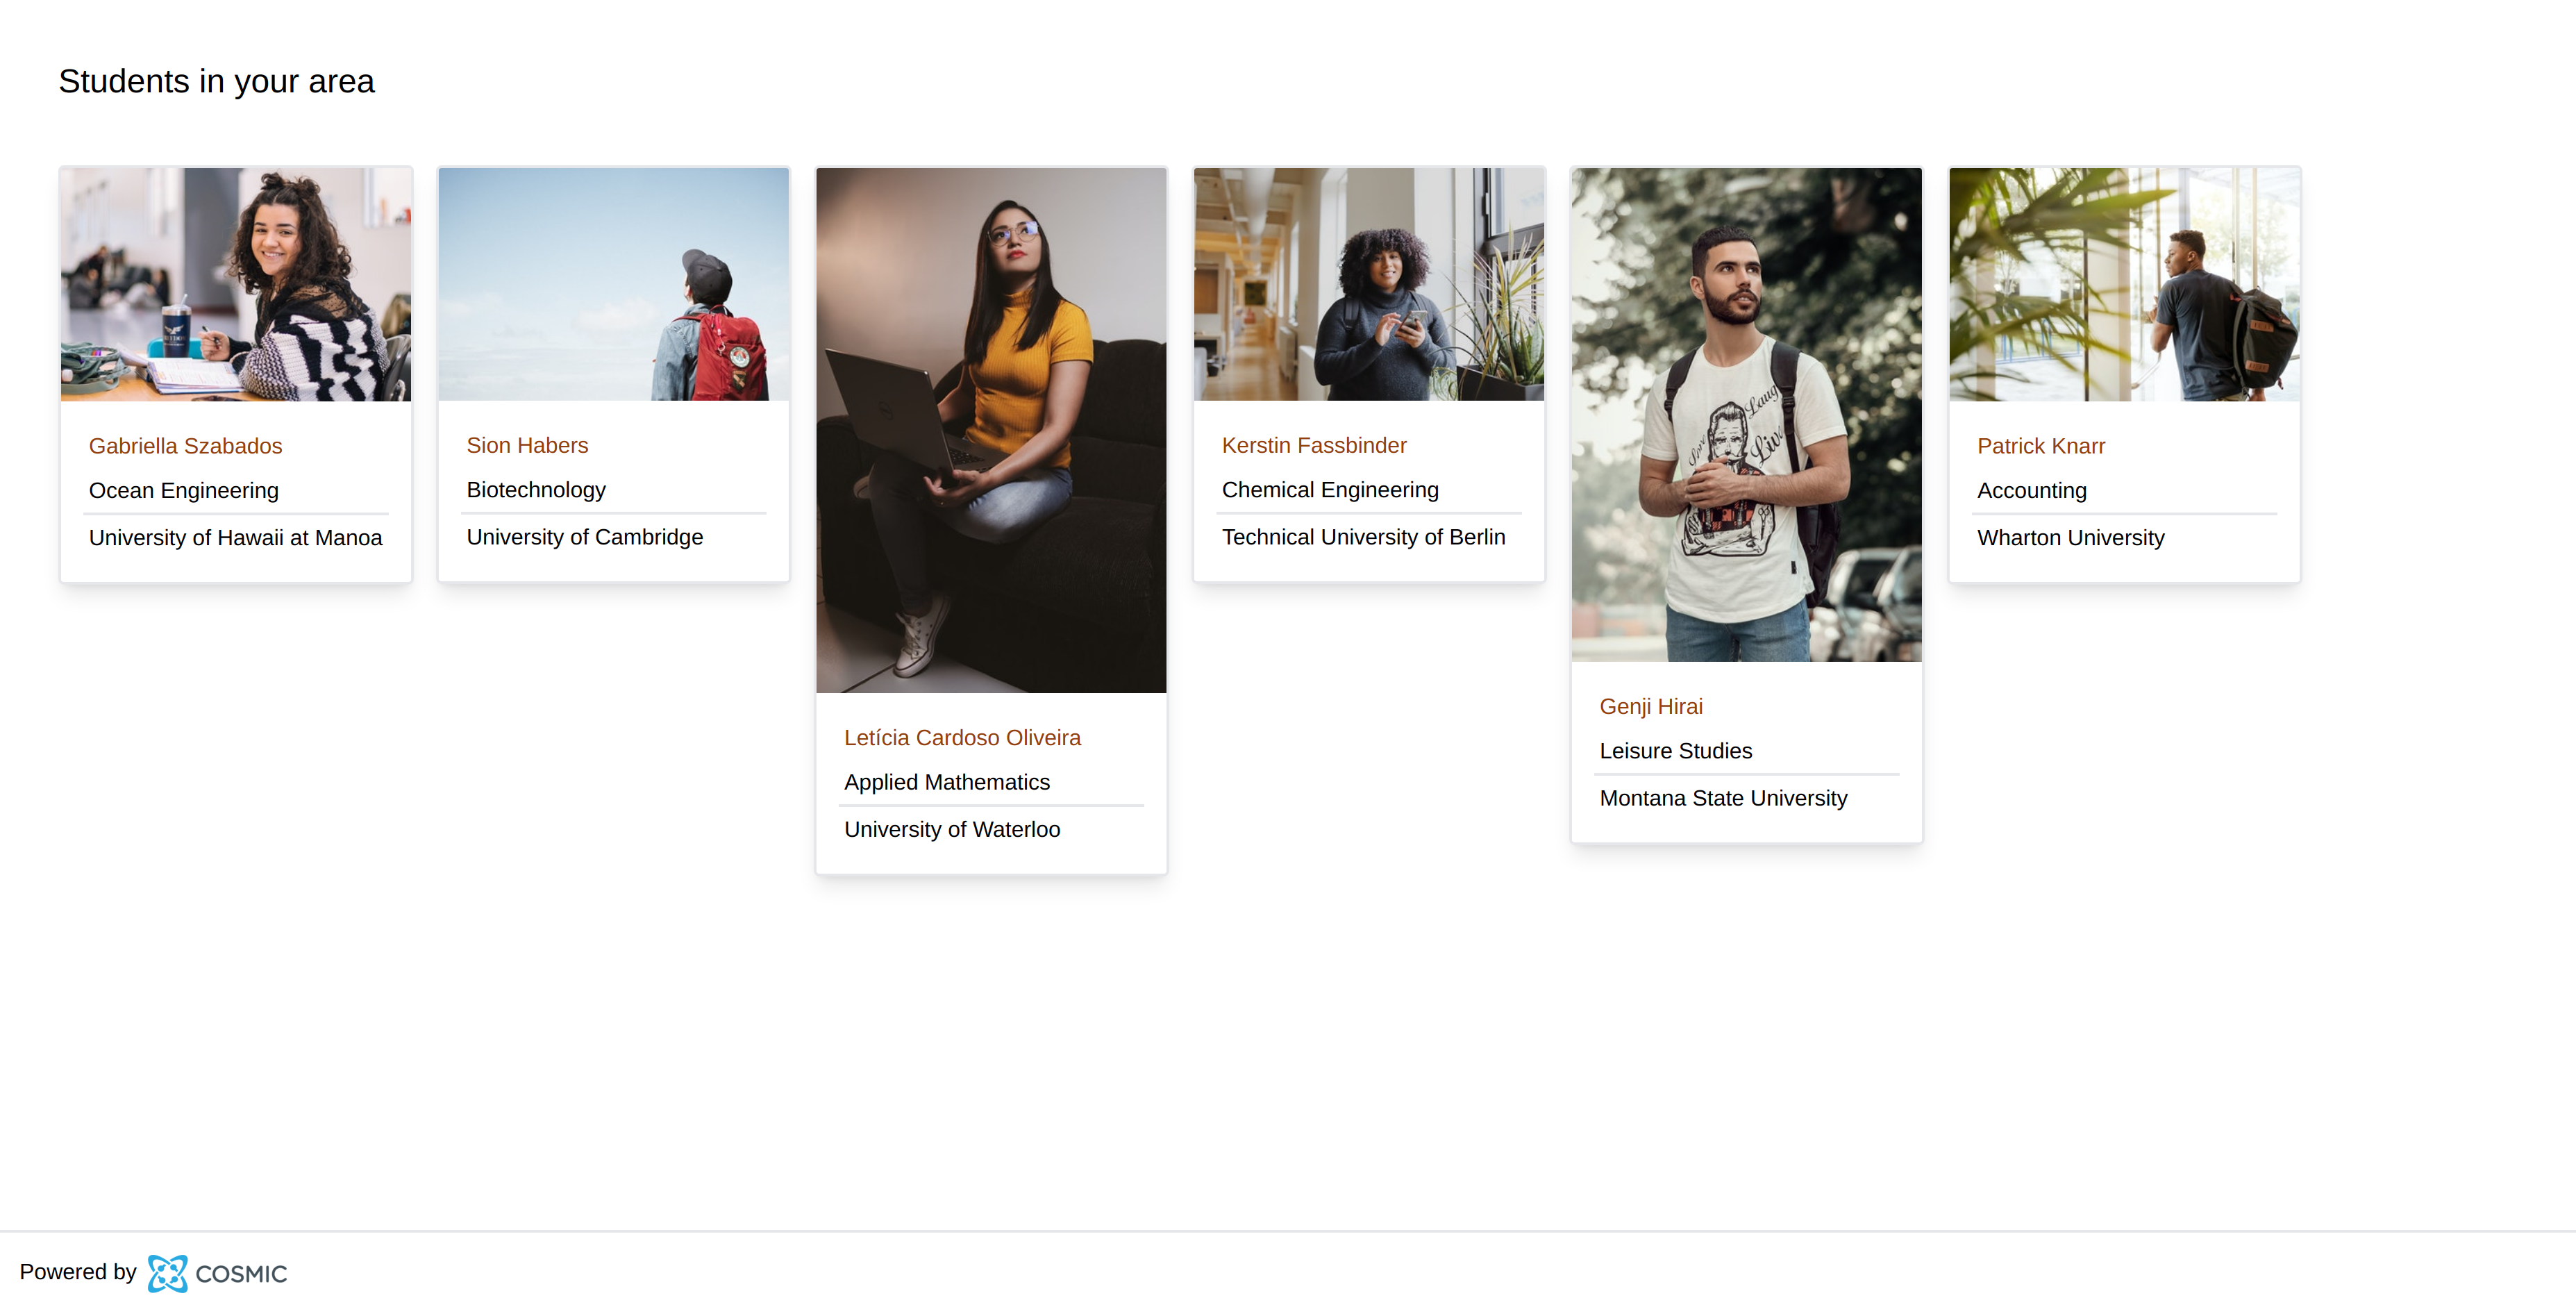
Now that we have this data, we can render some elements to the home page. You can remove all of the current code that's inside the component and replace it with the following:
It's mapping over the array to create an element to highlight each student. Each of these elements can be clicked on to learn more about a particular student and that's the page we're going to work on now. We'll come back and add more styling, but if you run the app with , you should see something similar to this.
Making a page for individual students
Now, we'll use Next's built-in dynamic routing to create pages for each student. Go ahead and add a new folder in the directory called . Inside that folder, add a new file called .
Let's start by adding the imports we'll need to get this page working. At the top of the file, add the following lines.
Don't worry about the file yet. We'll be adding that shortly. For now, let's add a skeleton for the component below our imports.
We'll be adding a lot more to this component, but we have to get the and data first. We'll use the function to pull the data for a specific student from Cosmic each time this route is called. None of this is happening in the browser, so the data is still secure.
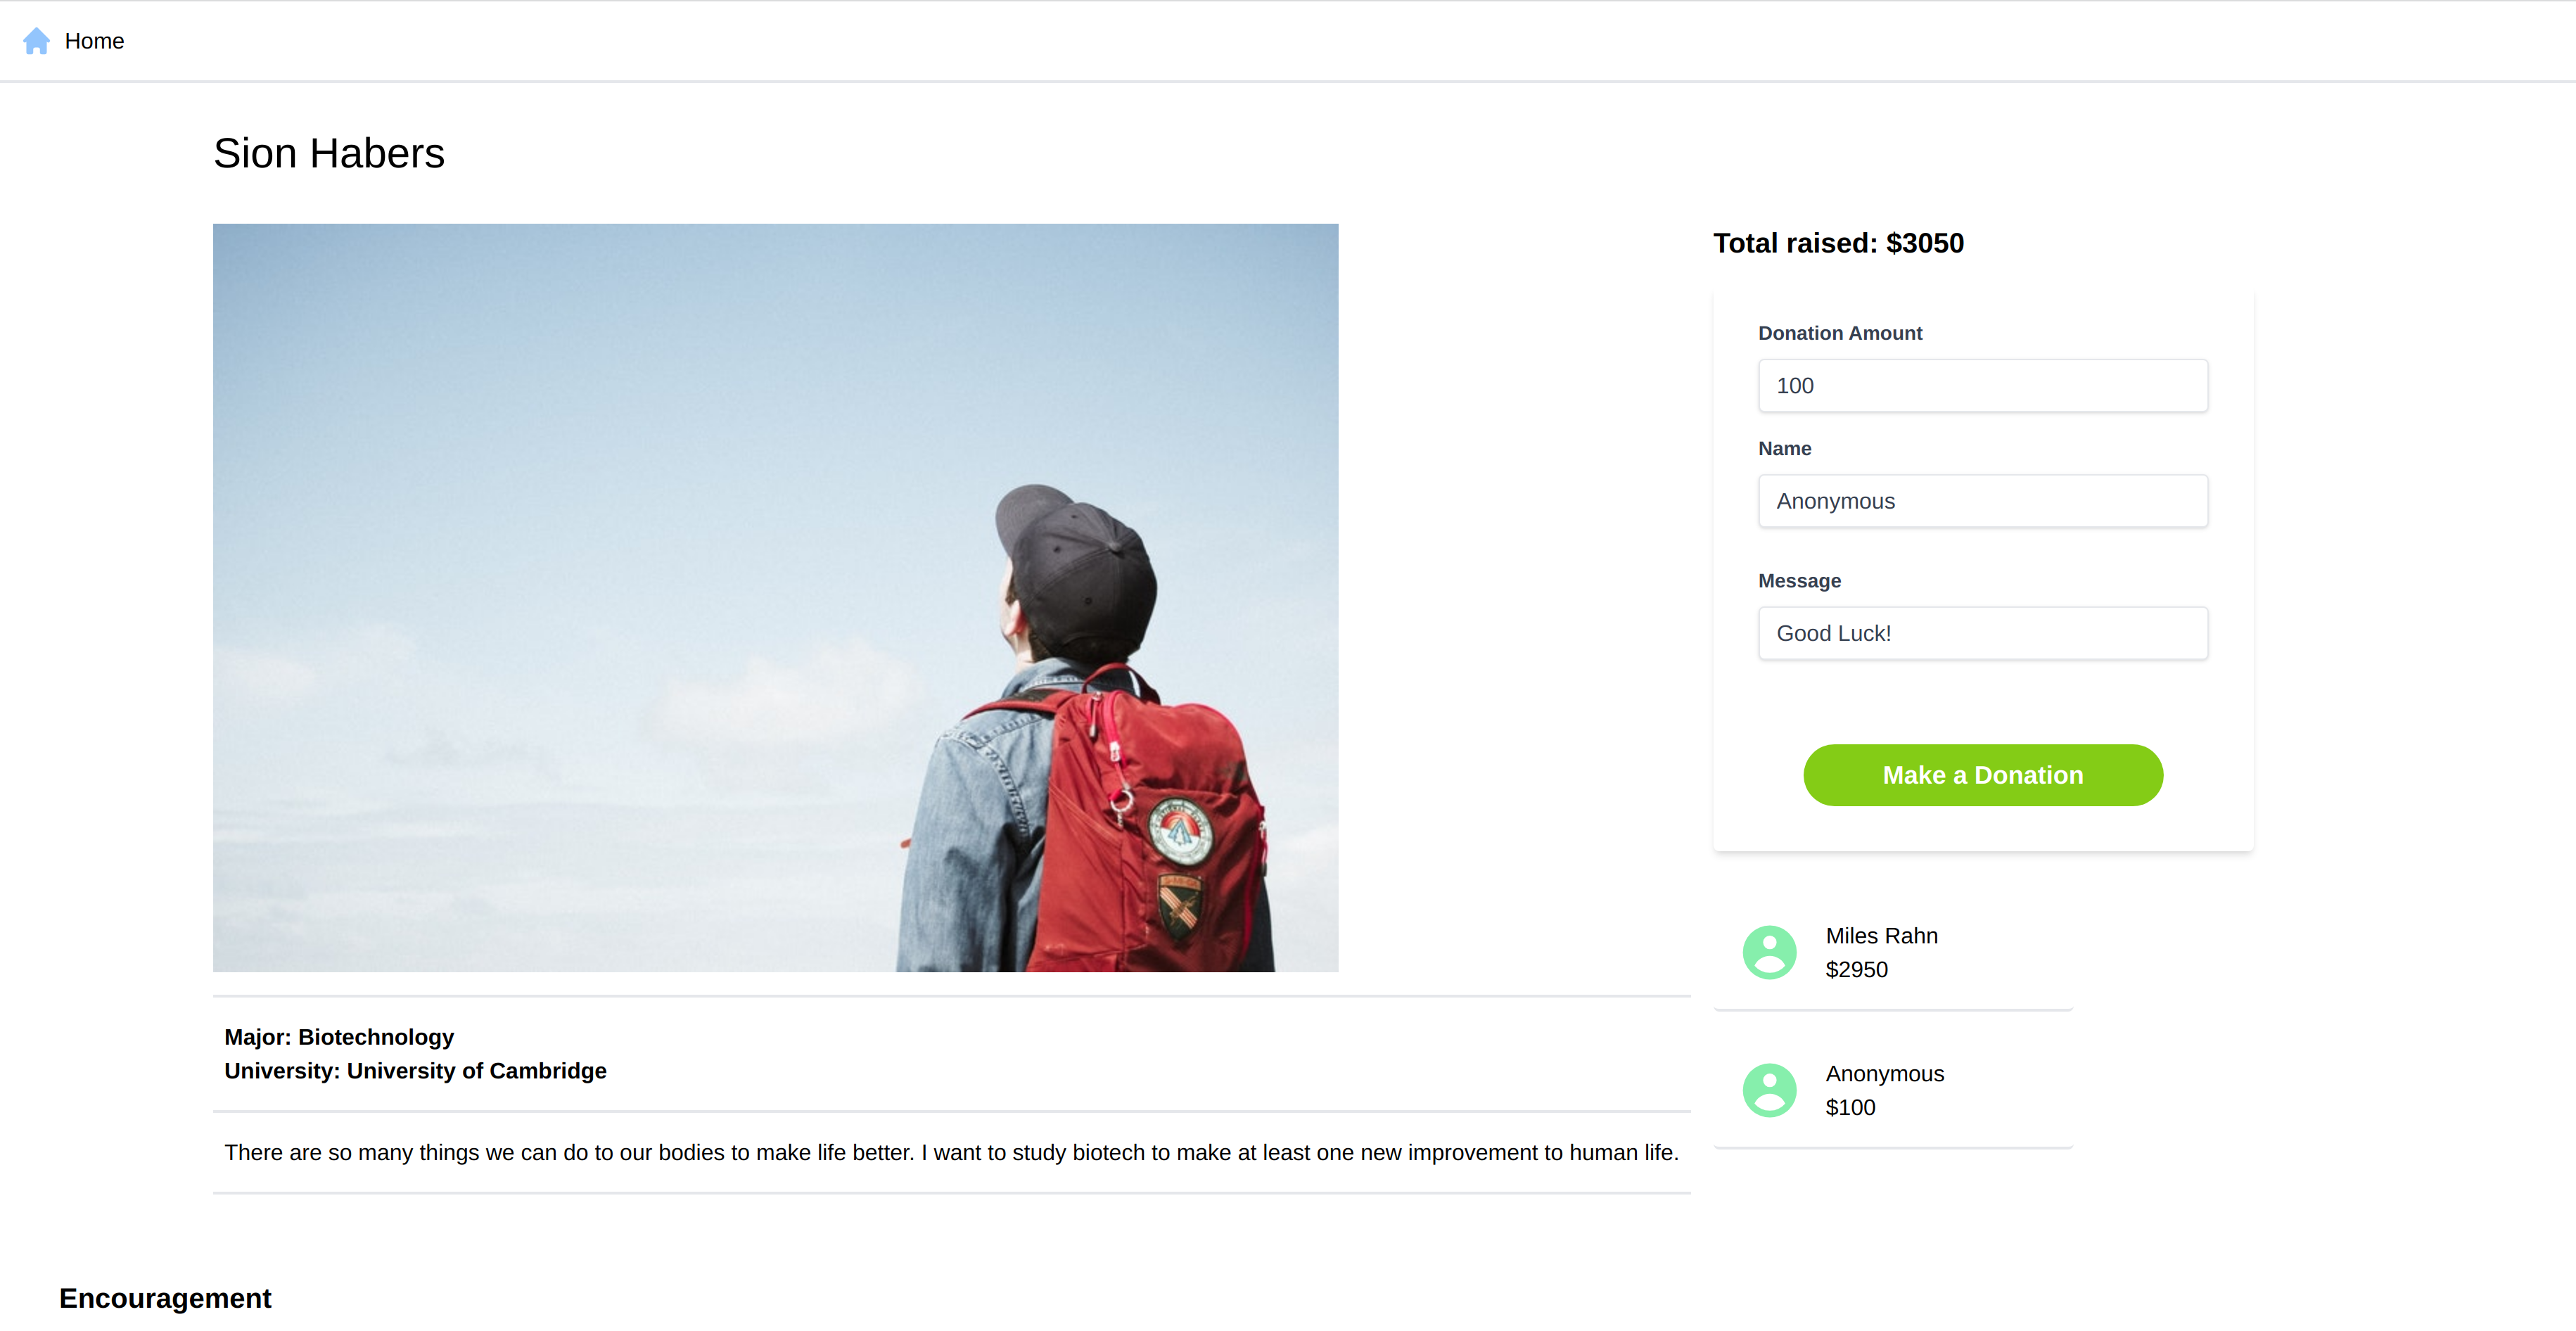
Then we'll pass this data to the component to highlight a specific student to the users and potential donors. In the component, we're going to do a few things. First, we'll check to see if the student page has been accessed via a redirect from the Stripe checkout page. Then we'll display the student info we have stored in Cosmic. Next, we'll have a form for donors to fill out if they want to make a donation to this particular student. Finally, we'll have a list of all the donors for this particular student.
So you can replace the outline of the component with the following, complete code.
If you run the app now with you should see something similar to this for one of the students.
Now that we've gotten all of the functionality filled out, let's go ahead and add that file so that we don't get any TypeScript errors.
Adding the types file
Having defined types for our data helps us know when APIs have changed and we won't get left with as many unexpected errors in production. At the root of your project, create a new file called and add the following code:
This helps us define the data that we expect to use from our API calls to Cosmic.
Adding the Stripe checkout functionality
The last thing we need to add is the API that gets called with the donation form is submitted and we're going to use Stripe to handle this. If you look in the directory in your project, you'll see a file called . You can delete this placeholder file and create a new file called .
Let's open this new file and the following imports.
Since we only have to handle one POST request, our handler function can be relatively simple. We'll do a quick check to make sure a POST request is being made. If any other type of request is made, then we will throw an error.
After that request check, we'll make a try-catch statement that will first see if we can make a connection to our Cosmic bucket to add a new donor. After that, we make a checkout session with Stripe using the form information passed from the front-end. Then we get the session from Stripe to add their data to Cosmic.
Lastly, we create the metafield data to add a new donor to our Cosmic dashboard and use the method to make sure this donor gets written to the correct object. Go ahead and add the following code to do all of this work.
Finished code
You can find all of the code for this project in this repo.
Deploy this to Vercel
You can deploy this template to Vercel by clicking here.
Conclusion
Now you have a fully-integrated donation website that you can customize for any type of fundraiser-donor non-profit. Feel free to clone this and change the styles to match your own organization's needs.
Continue Learning
Ready to get started?
Build your next project with Cosmic and start creating content faster.
No credit card required • Free forever