Flynn Buckingham
August 09, 2018
.jpg?w=1000&auto=format&dpr=2)
TL;DR:
Install the Cosmic Zapier Integration
One of the largest problems I’ve faced while working on projects is having to deal with integrating content and events into third-party services.
It’s time consuming, and as the demands in the application in question grows, so does the mental strain in having to keep up to pace with all the changes in the REST apis involved. If that wasn’t challenging enough, customer demands to integrate with all sorts of third-party services can (if left unchecked) be unsustainable in the long-run.
If you happen to be one of those opportunist developers who’d rather read into the ‘how’ instead of a glimpse into the ‘why’, skip ahead to the section Getting started

Thinking with Zapier (the basics)
As someone who is typically tasked with writing manual integrations in Node.js, thinking about solving the same problem with Zapier cuts down most of the work I’d typically need to do.
The reason being is that instead of having to deal with parsing and validating JSON schemas, and having to generate request payloads manually; all of this is handled by Zapier’s internal integrations, removing the need to develop and maintain code for every deprecated REST api under the sun.
Instead of relying on potentially unreliable JSON schemas, Zapier cuts out the middle-portion completely by examining response payloads directly.
In terms of Content Management, this can be incredibly useful for managing the flow of content across various channels, including other CMS systems. Cosmic already has a modern-webhook system, which integrates extremely well with Zapier’s backend system (and also here).
Because of this, all of the changes made on Cosmic are available nearly instantaneously* via Zapier’s ability to integrate with subscriber RestHook systems. This is a essential for making sure that all all the various channels receive the new content the moment they become published.
* Note: While Cosmic triggers support Zapier’s instant feature, several other integrations still use polling methods, which means Zapier will delay the firing of these events depending on your plan. For free Zapier accounts, this delay is typically 15 minutes.
Integrating Cosmic Objects into Your App with Zapier
Space isn’t the final frontier anymore, Zapier is. The moment you connect your Cosmic account to Zapier, you can more easily integrate your content into the web application of your choice. This can include:
- Wordpress (Create Wordpress posts or pages from new Cosmic Objects, create new Object
- Google Sheets (adding detailed data to your spreadsheets when a new Cosmic post is made).
- Emails (sending out emails when you create a new Cosmic Object, or creating new Objects when emails are sent to a Zapier email account)
- Twitter (storing and integrating your tweets in CMS, or vice versa)
- More webhooks
- And every other Zapier integration that allows for content to be sent to it or emits its own events.
Getting started
At the time of writing, the integration is still in private, so you’ll need to access it from here. Once enough users are using the integration, it’ll be viable to be published on Zapier.
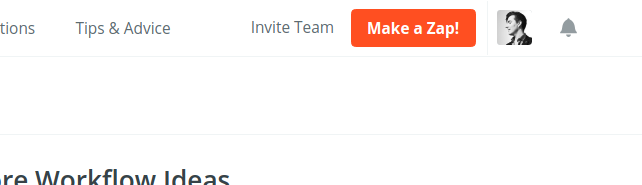
To create your first Cosmic Zap, sign in to your Zapier account and head to the Zapier Dashboard and click on the “Make a Zap!” button located near the top right of the page.
If you’re already logged in, you can visit this page directly at https://zapier.com/app/editor/
This should navigate you to the Zapier App Editor. Once there, you should be greeted by a screen that represents this:
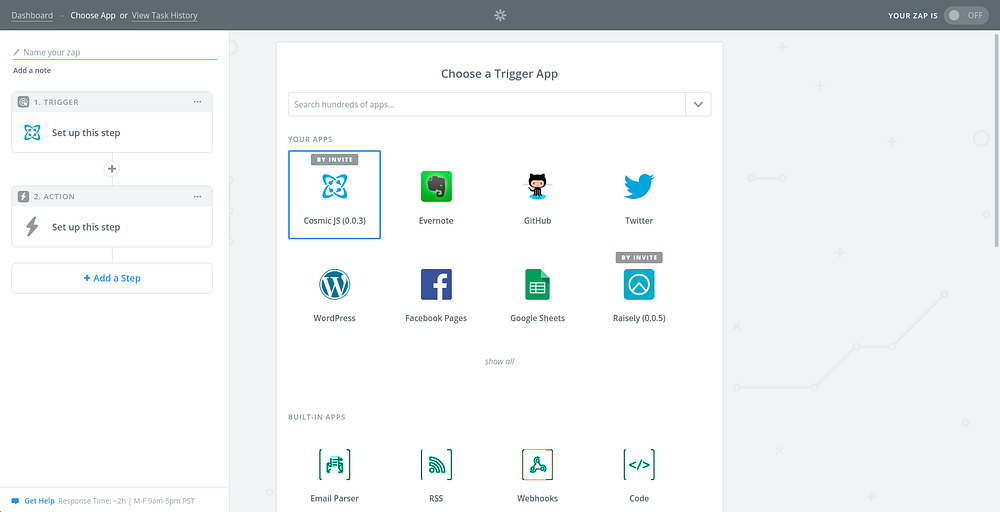
The Cosmic Application can be viewed by typing in “Cosmic” into the search bar (it’s typically hidden by default).
For demonstrations’ sake, let’s create an Instant Trigger that will add rows to Google Sheets whenever a new Cosmic Node is added. Click on the Cosmic icon under the Your Apps heading to start the Trigger creation process.
You should then be greeted with the following:
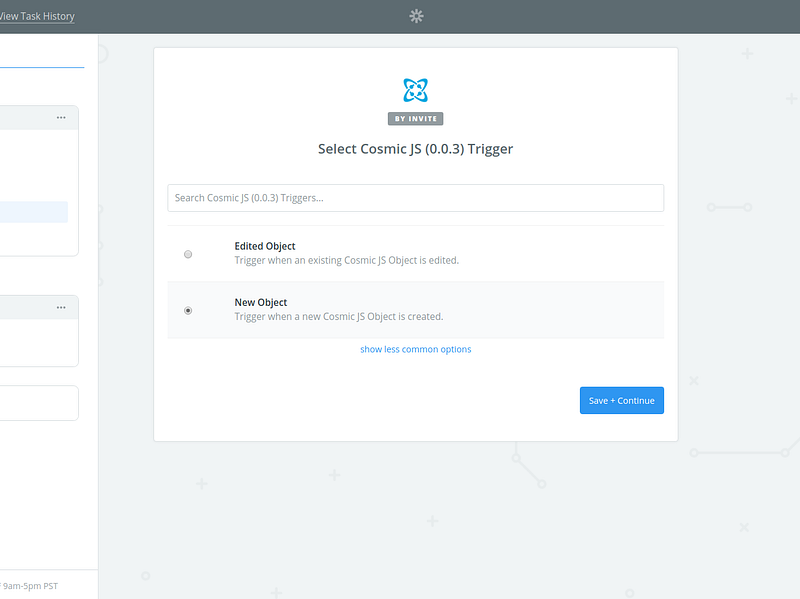
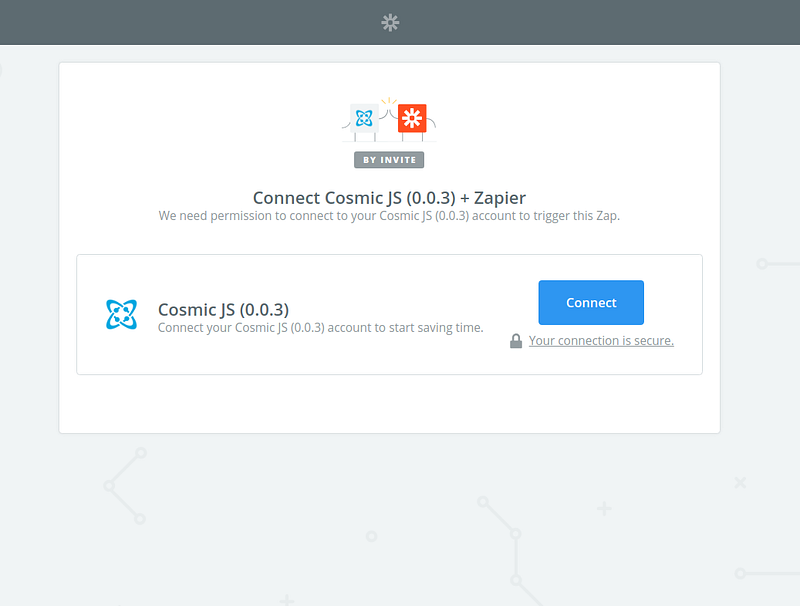
Select New Object, and then Save + Continue.
You should then be brought to the Cosmic Authentication page. If it’s your first time authenticating, you’ll be prompted to enter authentication info from a screen that looks like this:
Otherwise, you’ll be shown a button that lets you continue using your already existing authentication, as well as enter new authentication info if using another account (with different Cosmic Buckets).
To continue from the above, when clicking Connect a window should pop up from Zapier requesting your Cosmic Api Key linked to your profile. Zapier needs this key to create the required webhooks and new Objects within your Cosmic Buckets.
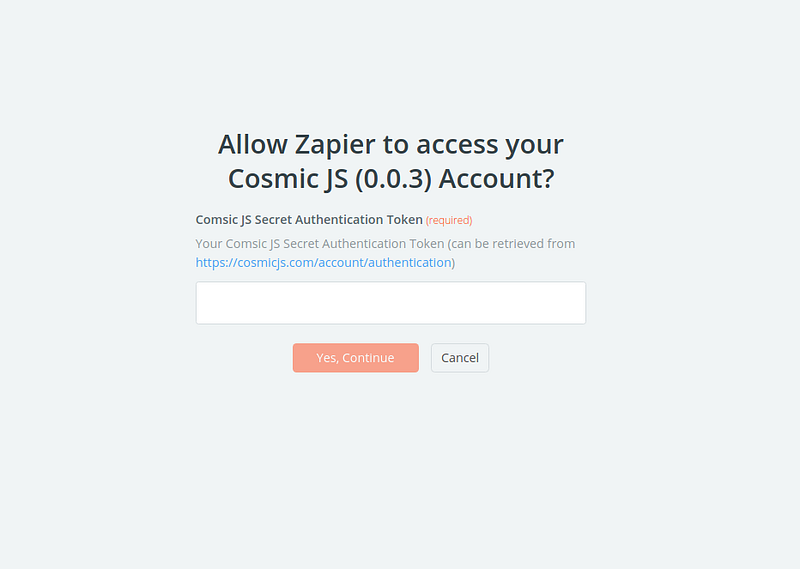
It will attempt to verify your Secret Authentication Token to ensure you are a registered user on Cosmic. Once that process is complete (and following Zapier’s specific prompts), you’ll be redirected to the Trigger Options part of the the Zap setup
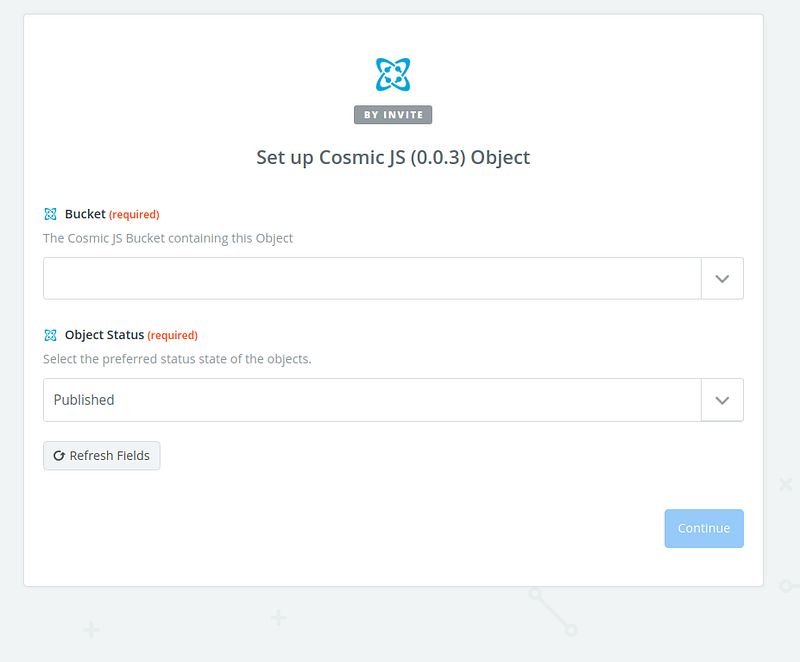
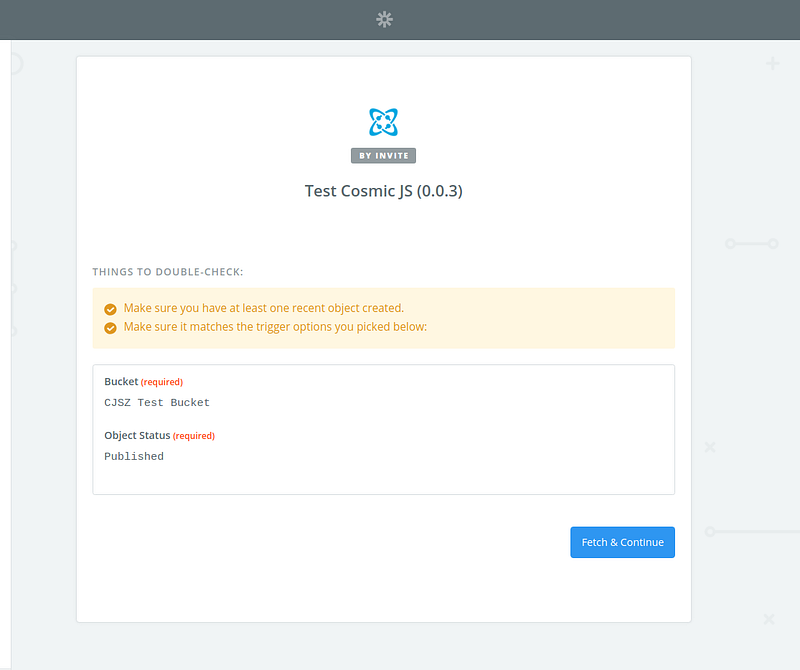
Firstly we need to select the Cosmic Bucket that Zapier will subscribe to. We do this by selecting it in the corresponding dropdown and waiting for Zapier to fetch a list of registered Buckets on your account. For me, it looks something like this:
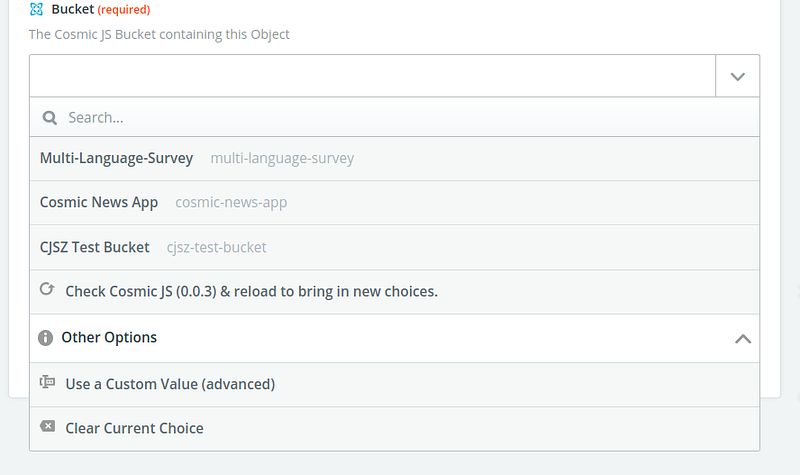
Note that selecting an expired disabled bucket will not work, so make sure you are using a bucket that you know is actively used. In the next step Zapier will show you an error since you are trying to access a disabled bucket.
Once a bucket is selected, the next (optional) step is to status of Object’s you want to track. This is set to Published by default, but also allows being set to Draft so you can track new pending Objects being created.
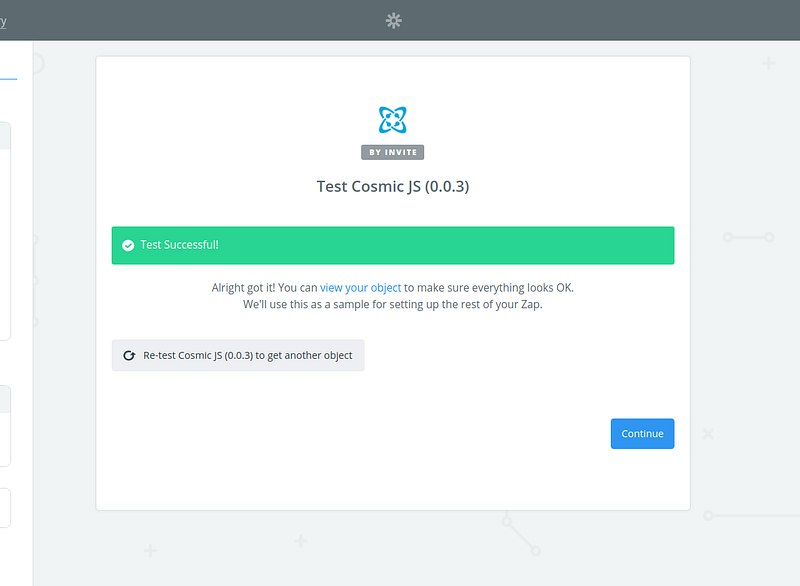
After pressing Continue again, you should be addressed by a pair of pages that test the validity of the bucket you’ve selected. It does this to internally map the values provided by that endpoint, so when creating Actions you have access to all values on that specific payload.
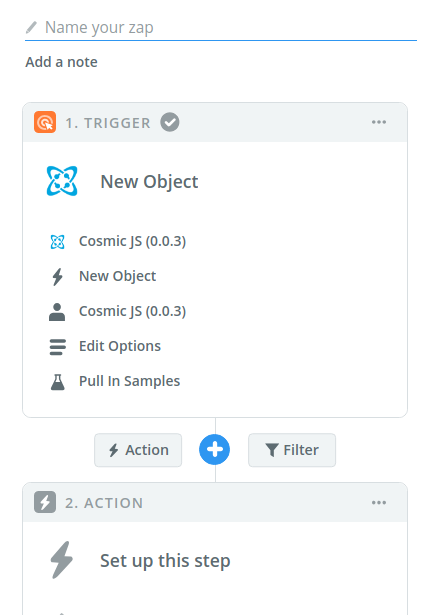
After pressing Continue, you’ll then be redirected to the Action part of the process, but we can take this further by setting up a Zapier Filter to logically filter these events to better control what data we specifically want to send to Google Sheets
Full disclaimer: for free accounts, Zapier limits the amount of Items in a Zap to only 2, with a maximum of 5 Zaps registered to an account. To implement a filter within your Zap you will need to upgrade from a free account to a paid one. Skip the below section if you’d rather stick to keeping a free account.
Using Zapier Filters to filter our Cosmic Objects
Zapier Filters give us a way to restrict incoming events, by processing selective values on an event and matching it against a predefined amount of conditions.
This is useful for Cosmic, because there will be instances where we’d like a specific Cosmic Object to be processed and nothing else, such as for a specific Object Type.
In the example below, we will configure the trigger to only process new Cosmic Objects that have a type of cool (a custom Object type I came up with, because it’s cool).
It’s dead simple. First, on the left-hand side of the page look for the + icon that sites beneath the New Object trigger we just set-up and the Action we are yet to create.
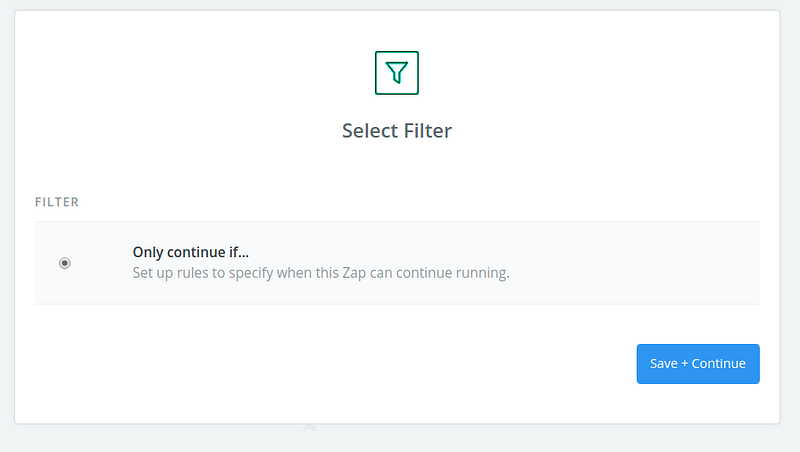
After pressing that glorious little + button, we should then see the Select Filter panel to the right. There’s only one option in this setup, so just hitting Save + Continue is sufficient.
Once we continue we are redirected into the Filter Setup & Testing UI, which allows us to specify the conditions that must pass in order for this event to proceed to it’s next Action.
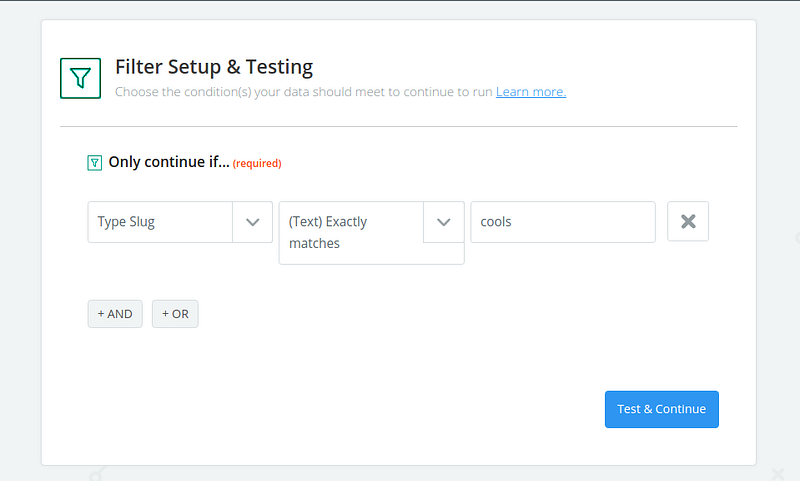
The first two dropdowns should match the Type Slug and (Text) Exactly matches respectively. The first dropdown represents the Cosmic Object field to map, and the second is the condition we are testing against. And the third column is where we can specify the exact value to be tested against.
After pressing the Test & Continue button, we are redirected to another screen that should confirm that our new condition matches existing objects, so failing it can be ignored if you’re confident your conditions match up to Objects that will exist in the future.
Configuring the Action
Now from this point we have established the following setup:
- Sets up a trigger that instantly fires when we create a new Object on our specified Cosmic Bucket
- (Premium) Set up a flexible Zapier filter to limit proceeding actions to a specific subset of Object Types.
Now for the final step, we need to setup an Action to be performed whenever out new Object is created. While this can be any aforementioned examples, for this example we will be inserting our Cosmic Objects into a Google Sheet document.
After creating our filter (or after defining and setting up our initial trigger), we should be redirected to the Action App page. From here we are given the ability to take our Cosmic Objects and use them to power events on several other platforms.
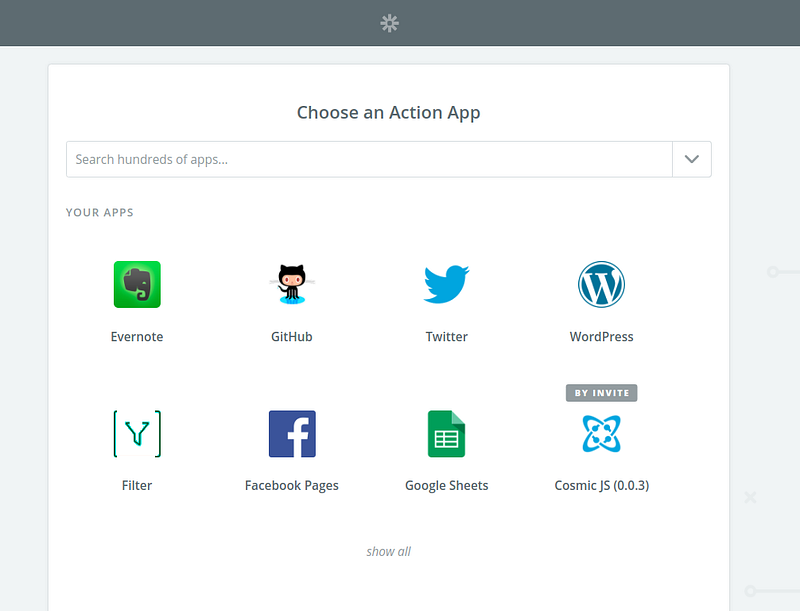
From the above screen, search and select the Google Sheets Action icon.
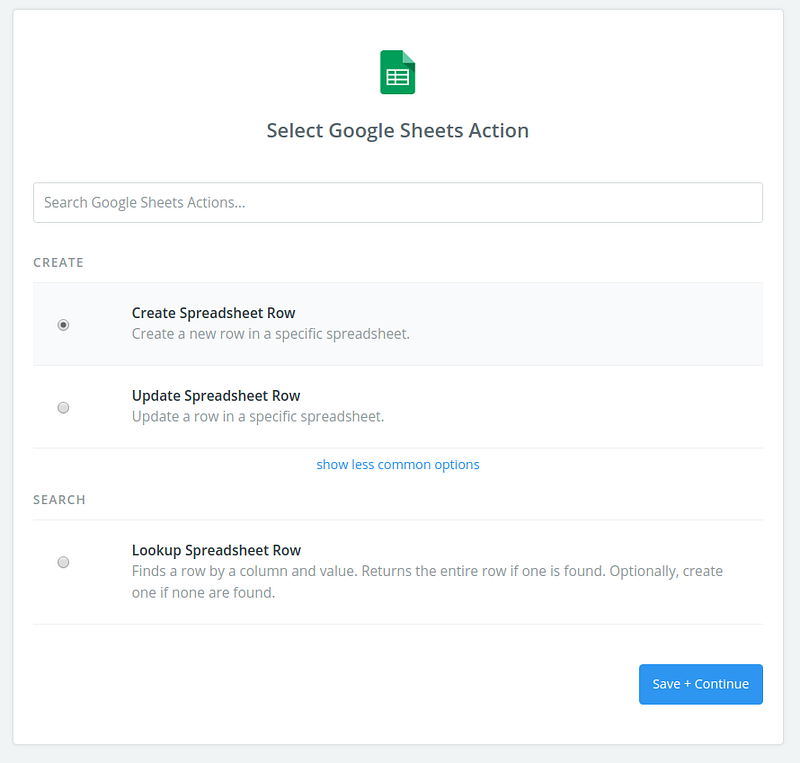
Once it’s been opened, you’ll be addressed with a Select Google Sheets Action page. We want to create a new spreadsheet row each time we add a Cosmic Object so we’ll select the Create Spreadsheet Row button.
After pressing Save and Continue you’ll be prompted to sign into your Google account if you haven’t already. Otherwise it’ll prompt you to select an existing account or add a new one.
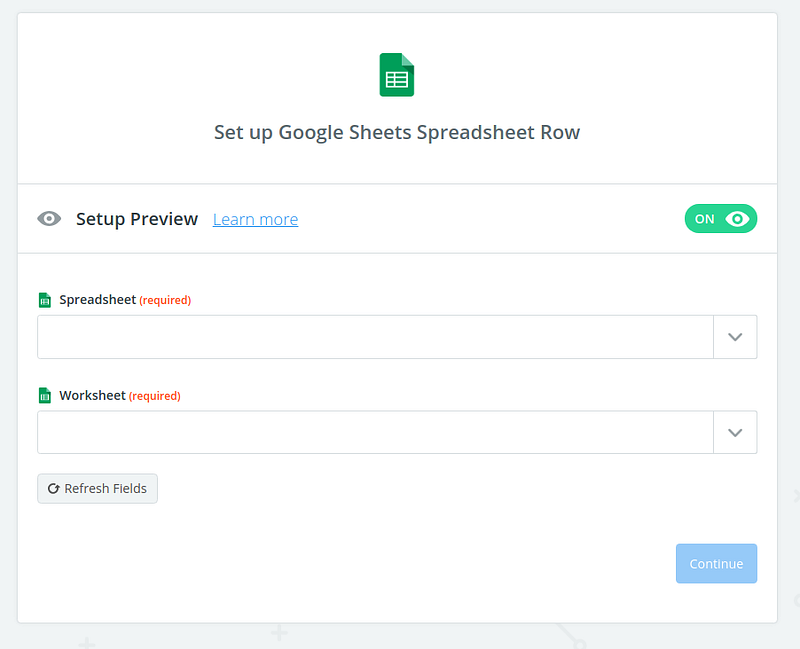
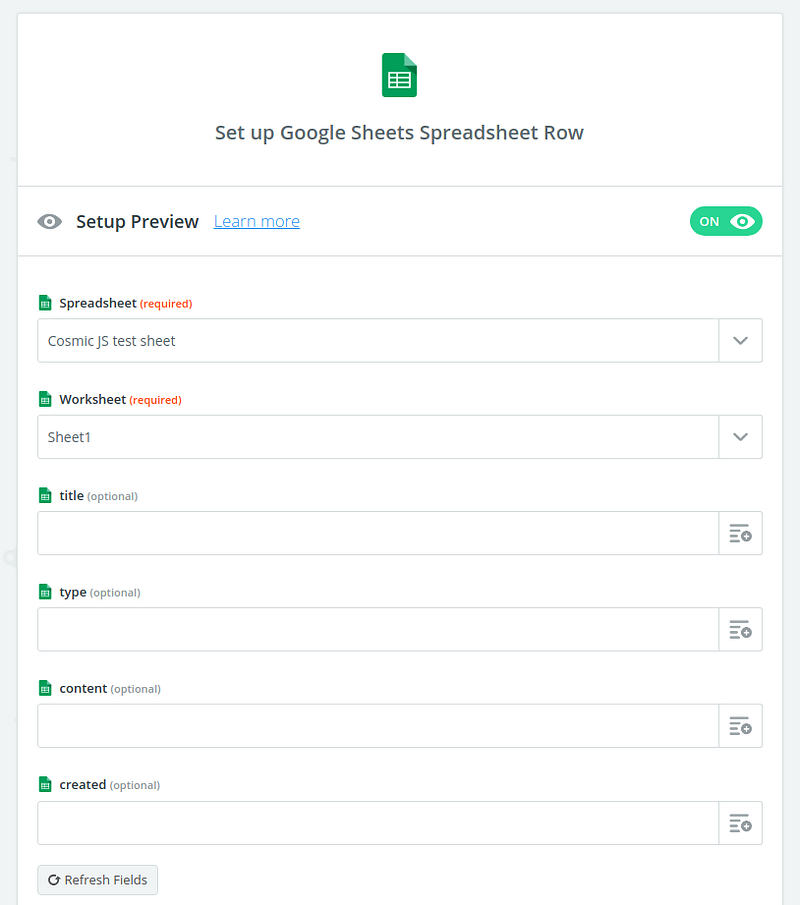
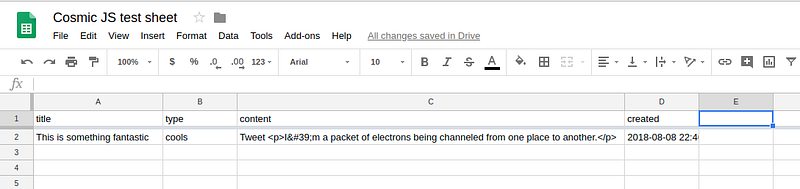
Once that’s done, it’s necessary to create a new Google Sheet. This way, the Google Sheet integration will have parsable columns to inject the data we will be passing in from. For this example, this is what my own Google Sheet looks like:
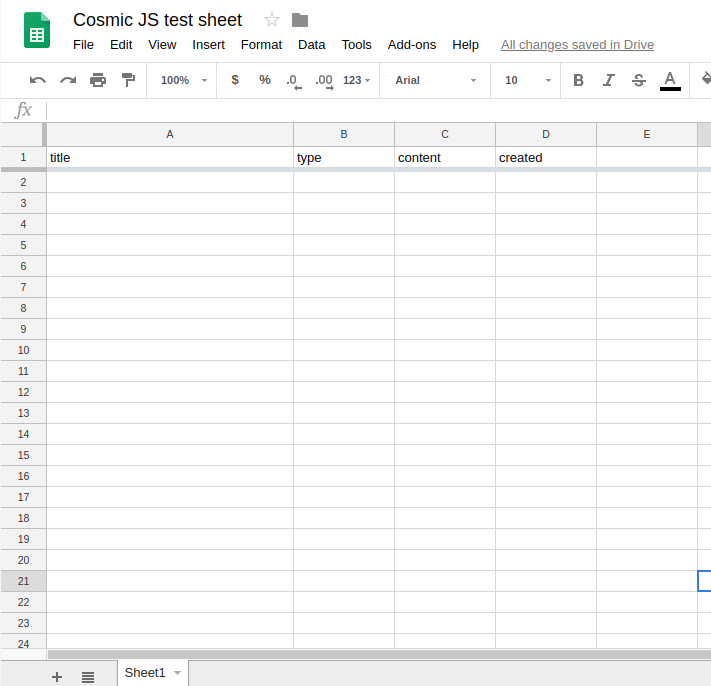
You can also use existing spreadsheets, even ones already populated with data
I’ve specified 4 columns that can be detected by the Google Sheet Zapier integration. We will need both the spreadsheet and it’s headers defined before we can use it. We also need to remember the specific sheet (in this case Sheet1) so Zapier knows where to add the content.
After doing this we can resume our signup pro
After specifying the Spreadsheet and Worksheet to load, Zapier will then load the specific headers from the the matching spreadsheet and page and we will be given the ability to specify the data of each new row we add.
The hamburger-like button to the right of the lower fields allows us to inject the fields from out Cosmic Objects directly into the cells of the spreadsheet. The interface for doing this should be fairly intuitive, but one thing that’s important to mention that that you can also interpolate text with values from your Cosmic Objects.
In example:
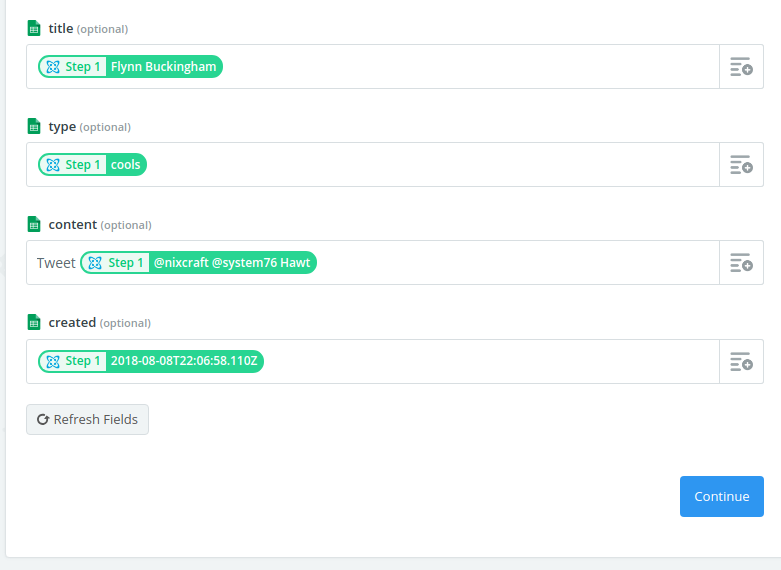
I already setup another simple Zap that populated by Cosmic Bucket with some tweets from my account, so it’s showing those specific values as examples.
After clicking the Continue button, we are then prompted to test the Spreadsheet integration. It’s very similar to the Cosmic test so it’s not essential for me to show you.
Once that is done (and after we confirm our spreadsheet with the Finish button), we are then prompted by this screen:
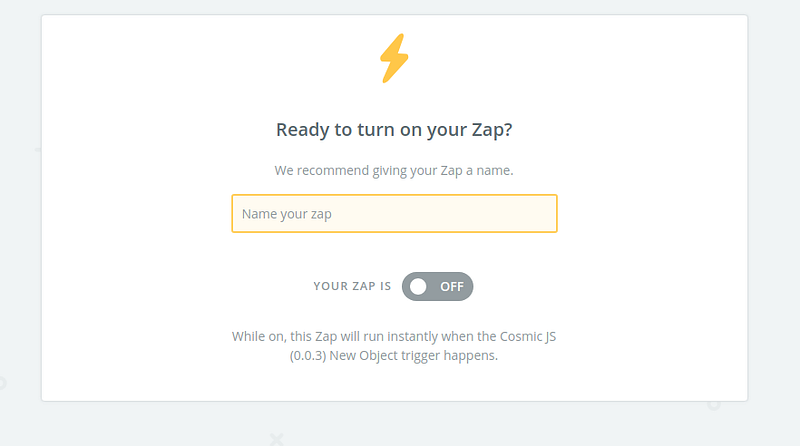
Be sure to turn on the Zap for this next step, since we are going to do a live test of the Cosmic integration.
Testing the Instant integration
Navigate to your Cosmic Buckets and navigate to the bucket that you’ve used for the Zapier Integration. Then select the the relevant Object Type from the list. For me that Object type is cool, but for you it can be your preferred type.
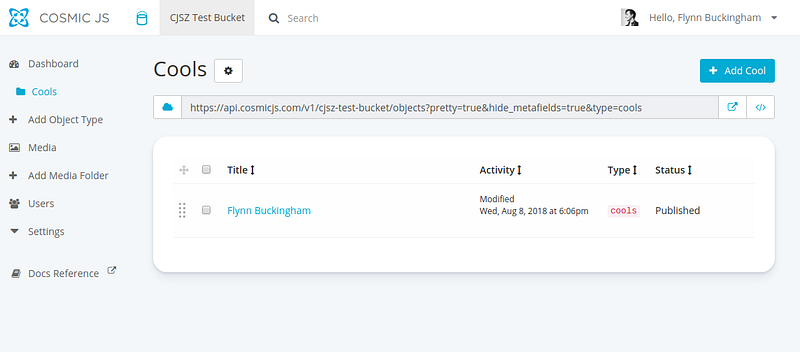
Select the + Add … button on the top right. That will bring up the Cosmic Object Editor interface. Fill in the fields your that Object:

Then press the Publish button on the top right (as specified by our Cosmic trigger)…
And then check your Google Sheet…
Voila, you’ve just hooked up your Cosmic account to a Spreadsheet with Zapier!
(which happens immediately after the Object is created, btw)
But what about Creating new Cosmic Objects?
The Cosmic Integration also supports the ability to create new Objects within a specified Bucket. I’ll let you figure how to do that on your own (hint: it’s almost exactly the same as the Google Sheet setup 😉).
Conclusion
Cosmic lets you integrate your content into almost any website and application due to the flexibility it has in regards to how you do so (REST endpoints, GraphQL, Webhooks), and now with a Zapier integration it can integrate with so much more!
If you have any comments or questions about building apps with Cosmic, reach out to us on Twitter and join the conversation on Slack.
Continue Learning
Ready to get started?
Build your next project with Cosmic and start creating content faster.
No credit card required • 75,000+ developers