Ankit Kumar
January 1, 2019
In this tutorial I’ll demonstrate how to build an Authentication app using Angular 6 and Cosmic. Starting from scratch, learn how to build, configure and deploy this Angular 6 Auth app to the Cosmic App Server for testing purposes.
TL;DR
Checkout the demo
Download the codebase
Prerequisites
Before you start, you will need to have installed the Angular CLI, Node.js and npm on your system. You can refer to these Angular docs to get some help in installation.
Getting Started
First we are going to create an Angular project. For this, go to your desired folder where you want to place your Angular project, open the terminal and type the following command:
ng new angular-auth
This command automatically creates the Angular project with titled “angular-auth”. Now go to the project folder and run the following command:
cd angular-auth
ng serve –open
This command opens the project on browser on port 4200, i.e. http://localhost:4200/. That means you have successfully created the basic structure of the Angular project.
Setting up Your Cosmic Dashboard
Start by signing in to Cosmic and creating your Bucket. After your Bucket is created you can begin by creating an Object Type called ‘Users’, which will store the registered users’ information. You can create different Object Types according to the requirements that fit your data specifications.
Now create a Bucket and copy the key from your dashboard, which will allow users to store their data in Cosmic. For this go to Bucket > Settings > Basic Settings and generate new key. Similarly, create a read key which we will use to fetch data from the Cosmic server. Copy these keys and store in a safe place in your system.

Import Bucket.json
You can download your bucket.json file from the Angular Auth git repo and directly import to your Bucket. This way you will not have to create Object Types. Just follow the steps: Login to Cosmic > Choose default bucket > Go to Settings > go to Import / Export and click the button "Add import file" to upload the bucket.json file.
Configuration of Cosmic in Angular Project
To add our Cosmic configuration in our Angular project we created the cosmic.config.ts file under src/config folder. Code is shown below:
Angular Service to Interact with Cosmic
Here we are creating a service in Angular which will interacts with Cosmic with the help of provided APIs. Let's create with command:
ng g s apicall
It will create two files and to separate from the rest of the code, place these files in a folder with name services, in the following location: src/app/services
In this code we are calling the Cosmic server for several different purposes. Here are the methods which are declared:
- login(): It is called to login the user with email and password.
- register(): It registers the user when the user provide all details through the register page.
- checkGoogleUser(): It checks the presence of the user in the database when they want to login with Google.
- googleRegister(): It registers the user when they clicked the Google icon to login.
Model Creation for Angular
Here we are creating a file named user.model.ts in folder models; the location is: src/app/models/user.model.ts
Here we declared a class named userModel which contains all the variables we are using in this project.dd
Register the New User
Here we are implementing the functionality of registering the new user. We are capturing user-supplied info and saving it in the Cosmic backend. We place all components in a single folder named 'components', so the location of this register component will be: src/app/components/register/register.component.ts
We can create the register component with the following command: ng g c register
In this component we are registering a new user. register() is the main function here which is calling login() function in first step to check whether user is already registered or not. If user is already registered she will get the message 'email already exists', otherwise, it will register the user. On this page we applied full validations on name, email, password and other fields.

Authentication Component
As the name says, it authenticates the registered user with their email and password. If you want to login with Google, you can click on the Google icon. The location of this component is: src/app/components/authentication/authentication.component.ts
Basically, this component contains two methods: the first is login() and the second is socialSignIn(). The first method calls the login() function from the API service and stores the returned data to local storage on successful attempt and then navigates to the dashboard. Similarly, the socialSignIn() method also first checks the user in Cosmic and depending on the result, registers or logs in the user.
Dashboard Component
This component is shown only to logged-in users, so this shows the authorization in our app. The location of this component in our project is: src/app/components/dashboard/dashboard.component.ts
After a successful login attempt, the user will be redirected to this page, where the local storage of the browser will be checked to fetch the details of the user to display on the dashboard.

What's Happening Here
In this auth app you need to register the first time, and after successful registration you only need to login. As you login, your email and password will be compared to the data on the Cosmic server and only registered users will be able to navigate to the dashboard where they can see their information (which is coming from the back-end data which you saved during registration).
If you're pressed for time, you can just click on the Google icon in the login form to navigate to the dashboard in single click. The main point is that all of these functionalities have been done with Cosmic APIs. We stored complete data in the Cosmic server and fetched the data when required.

Data Modeling in Cosmic
It is good practice to create different Object Types to store different data types. We created an Object Type named 'Users' to store the registered users with their emails. The second Object Type we created was 'googleusers', which contains the users which are using Google auth for authentication. Cosmic provides different Object Types to manage data in a simple way and can be accessed easily.
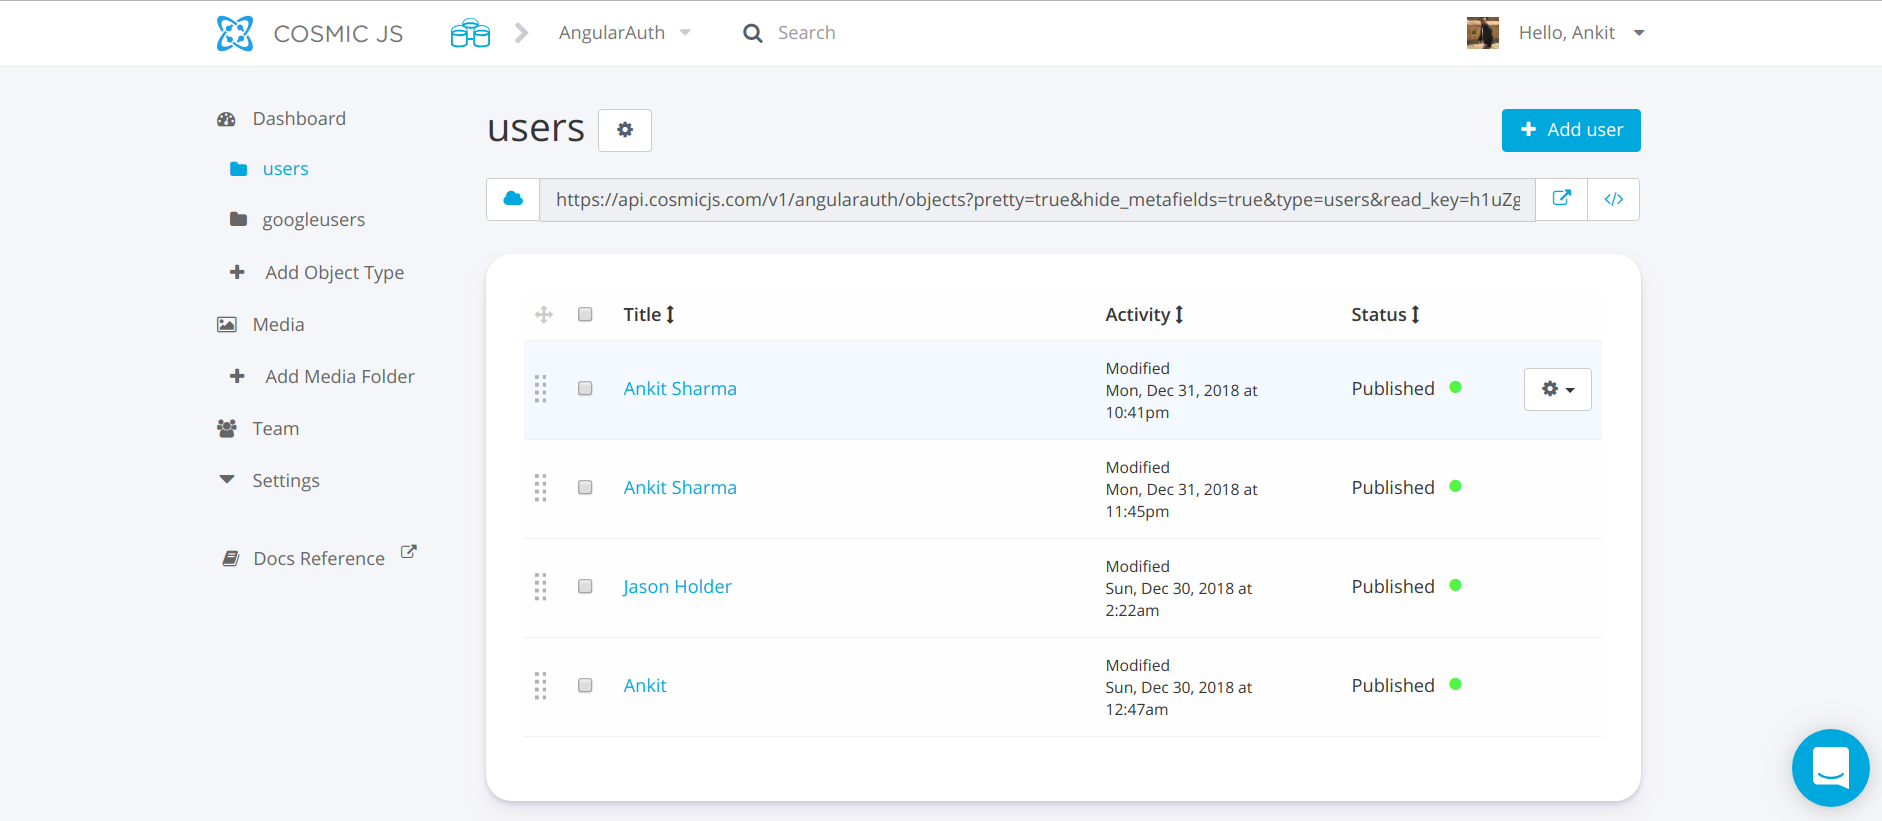
Registered users with the registration form

Above is the main dashboard, with a total of 7 Objects present (meaning there are 7 users that have been registered to our app with email, Google, or both.
Deploy on Cosmic
In this step we are going to deploy our Auth app to the Cosmic App Server. You should follow these requirements:
- You must have a public GitHub repo (private available if you connected yourGitHub account)
- These requirements must be met
Now follow the steps:
Modify the package.json file in Angular Project: Specify the versions of angular/cli and compiler/cli, so that at the time of deploy, server can configure according to these versions.
Install Express: Now install express on the project with following command:
npm install --save express
Now you need to add some code in package.json. Add scripts and engines as follows:
Now it is necessary to create app.js file which will run the with the express, add following code to it:
Deploy Now:

You will find the deploy option under Bucket > Settings > Web Hosting. Provide your git repo and deploy your app in single click.
Conclusion
With the help of Cosmic you can create powerful applications. In this example we were able to build an Angular 6 Auth App and deploy in seconds. You don't need to configure a server or install any software, just click and go. 🚀
If you have any comments or questions about building apps with Cosmic, reach out to us on Twitter and join the conversation on Slack.