Projects
Learn about projects; where you store and manage your Buckets, team members, usage, and billing plans.
Creating a project
Create a new project by going to Dashboard > New Project.
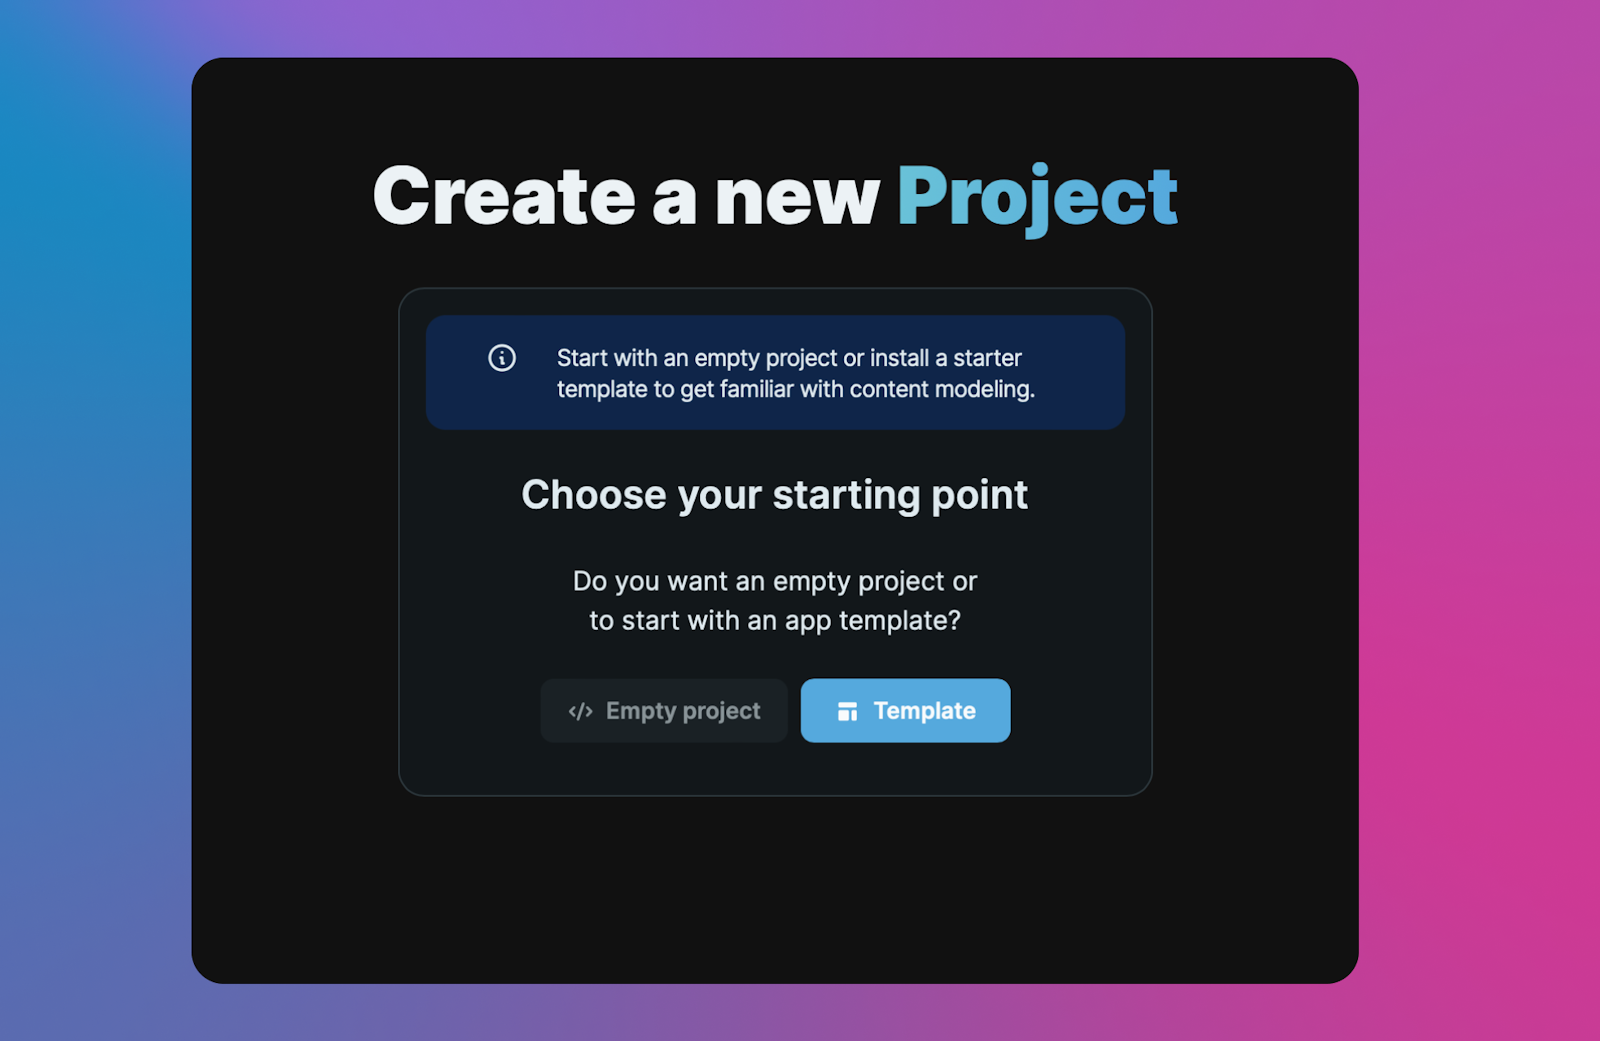
You can start with an empty project or a template. Selecting a template will install demo content into your Bucket and provide an open source code repository for you to either download locally or deploy to a hosting provider.
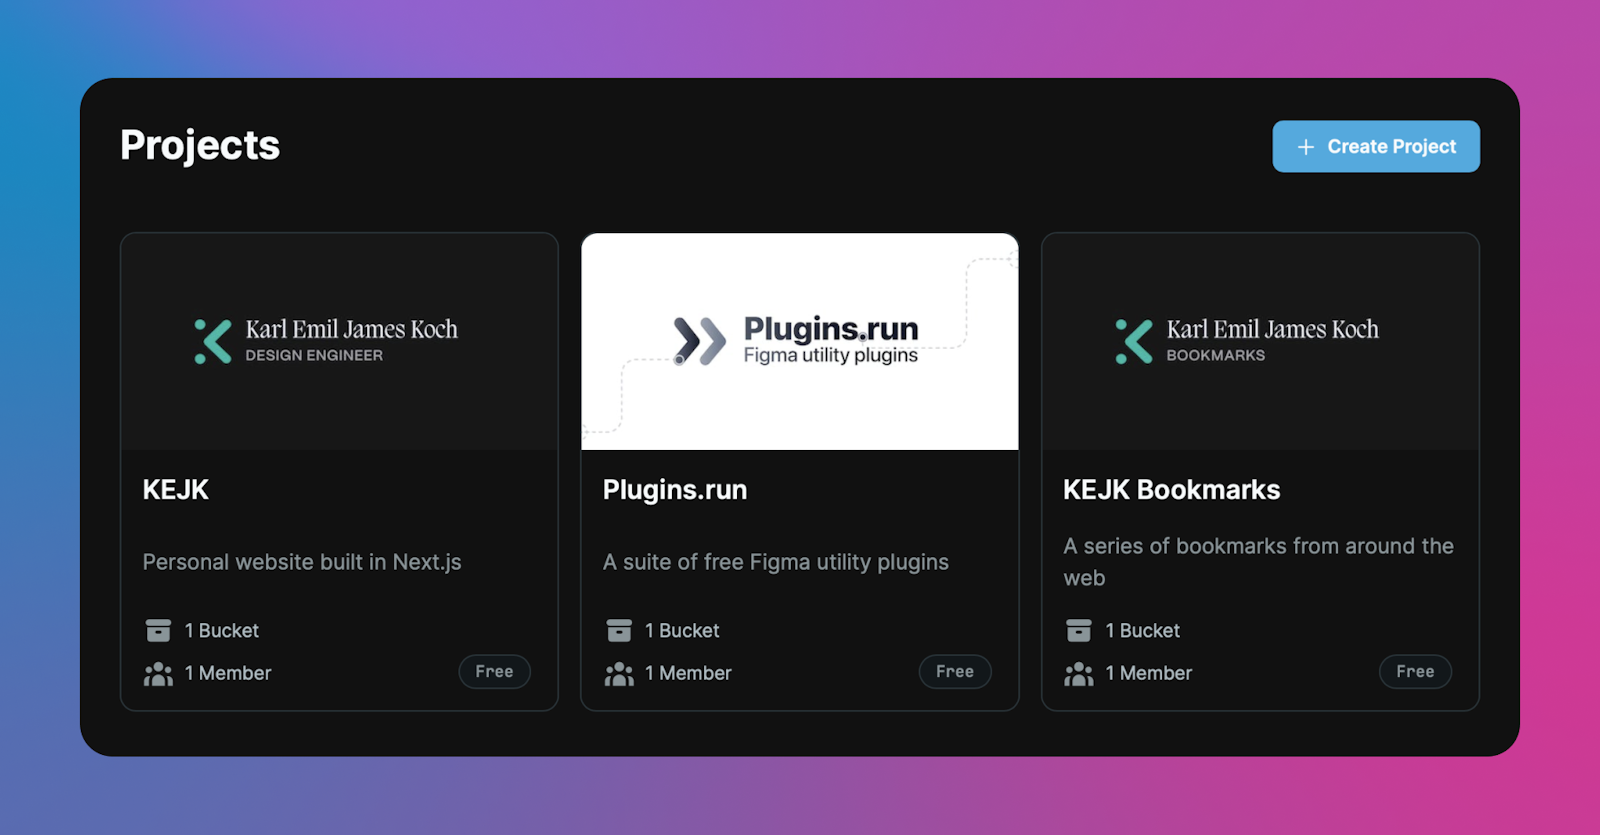
Projects home
Once you have added projects to your account, you will see your Projects available on the Projects home view.
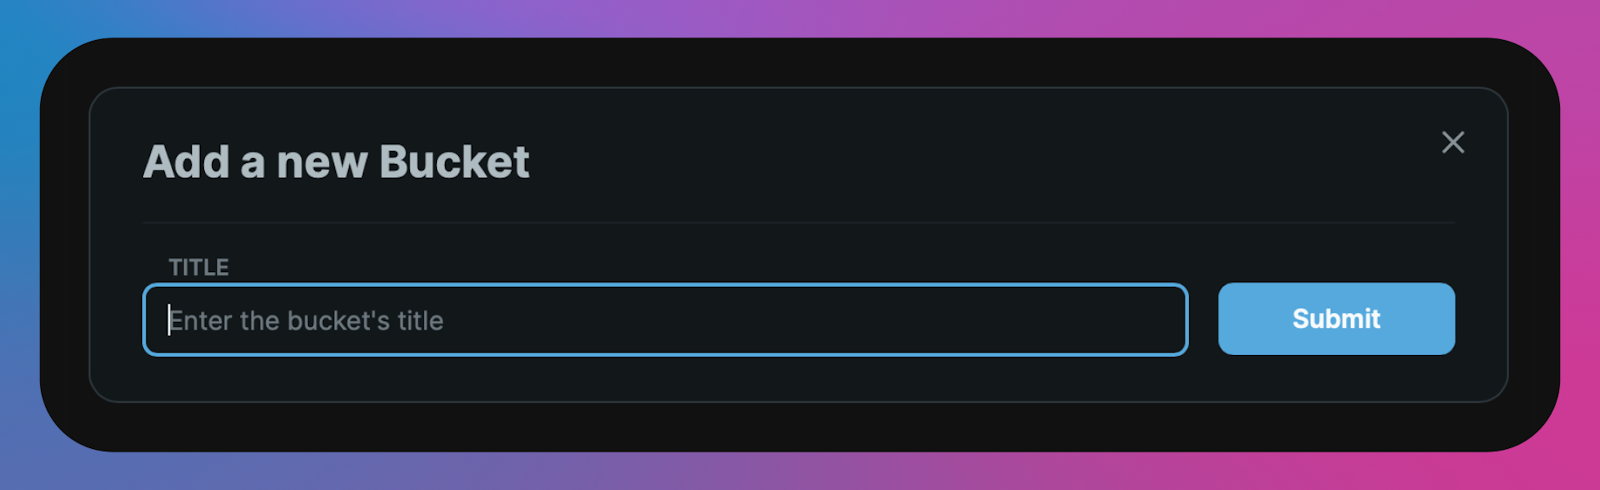
Adding Buckets
A project can have as many Buckets as you need. A common strategy for Buckets is to make them separate environments such as Production, Staging, Testing, etc.
Team
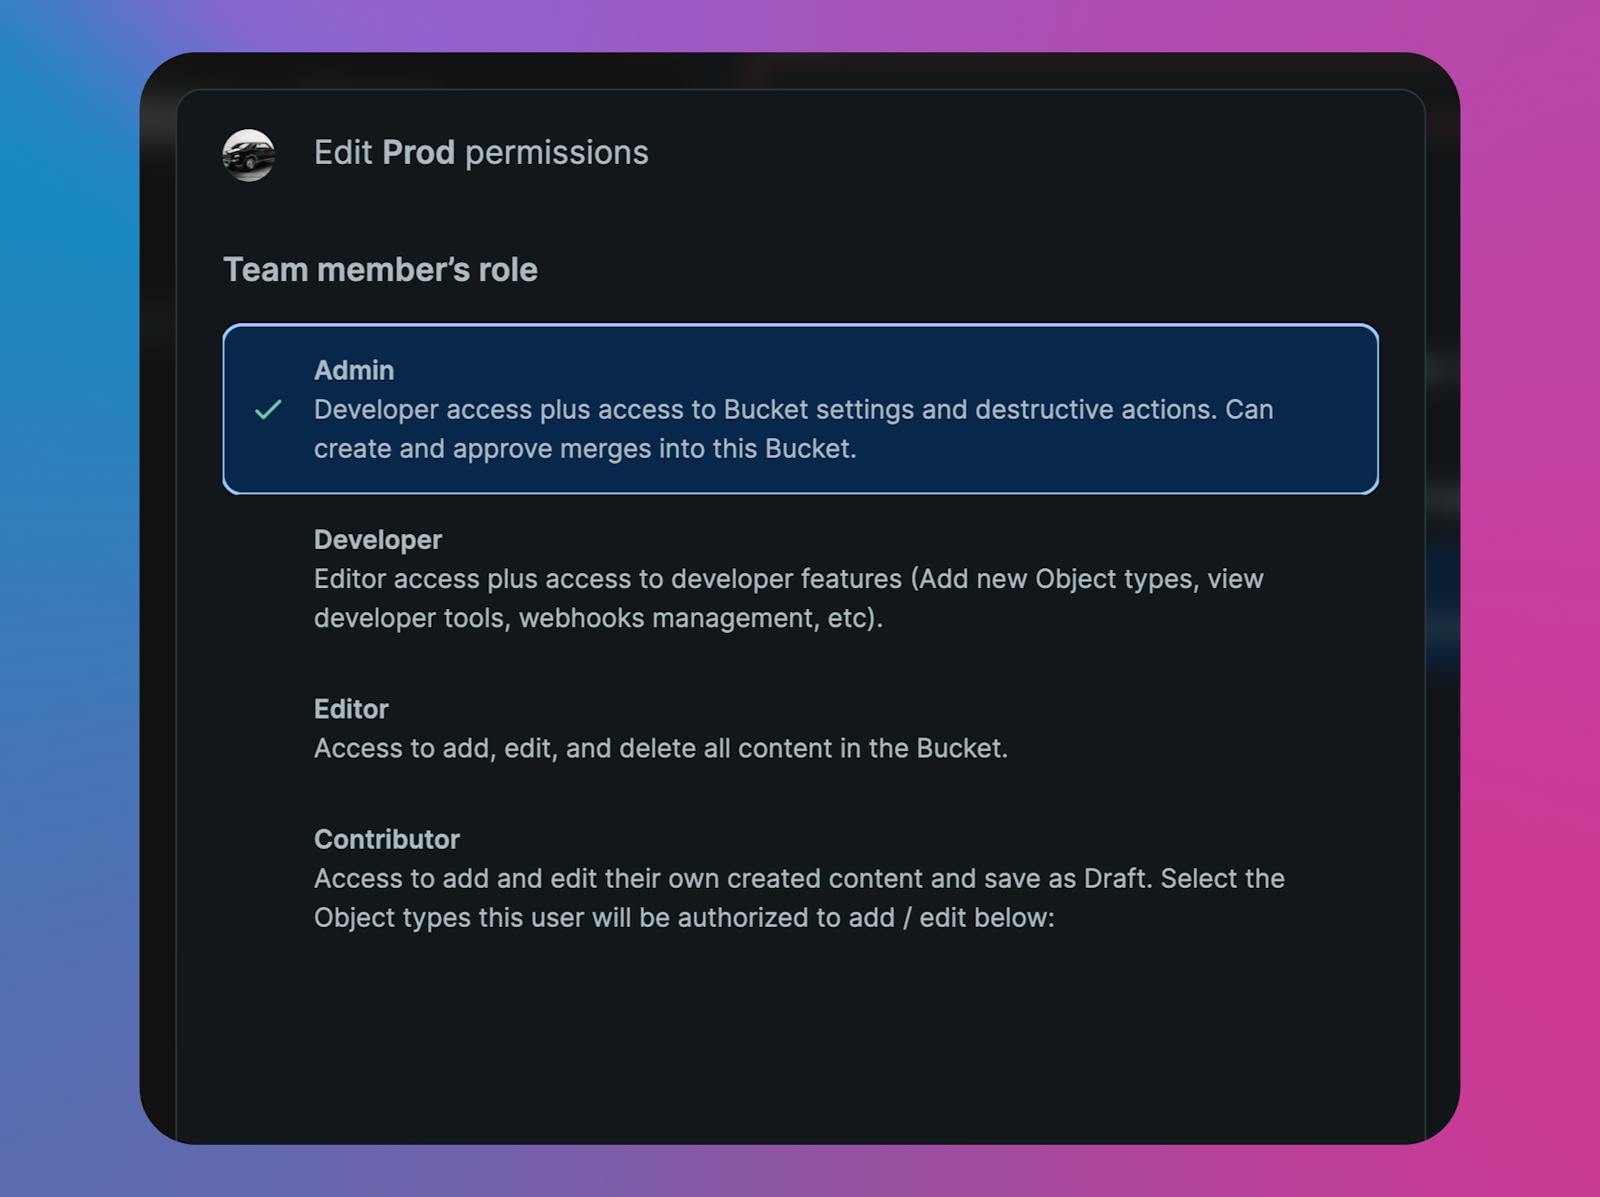
Go to Project > Team to add, edit, and remove team members from your project.
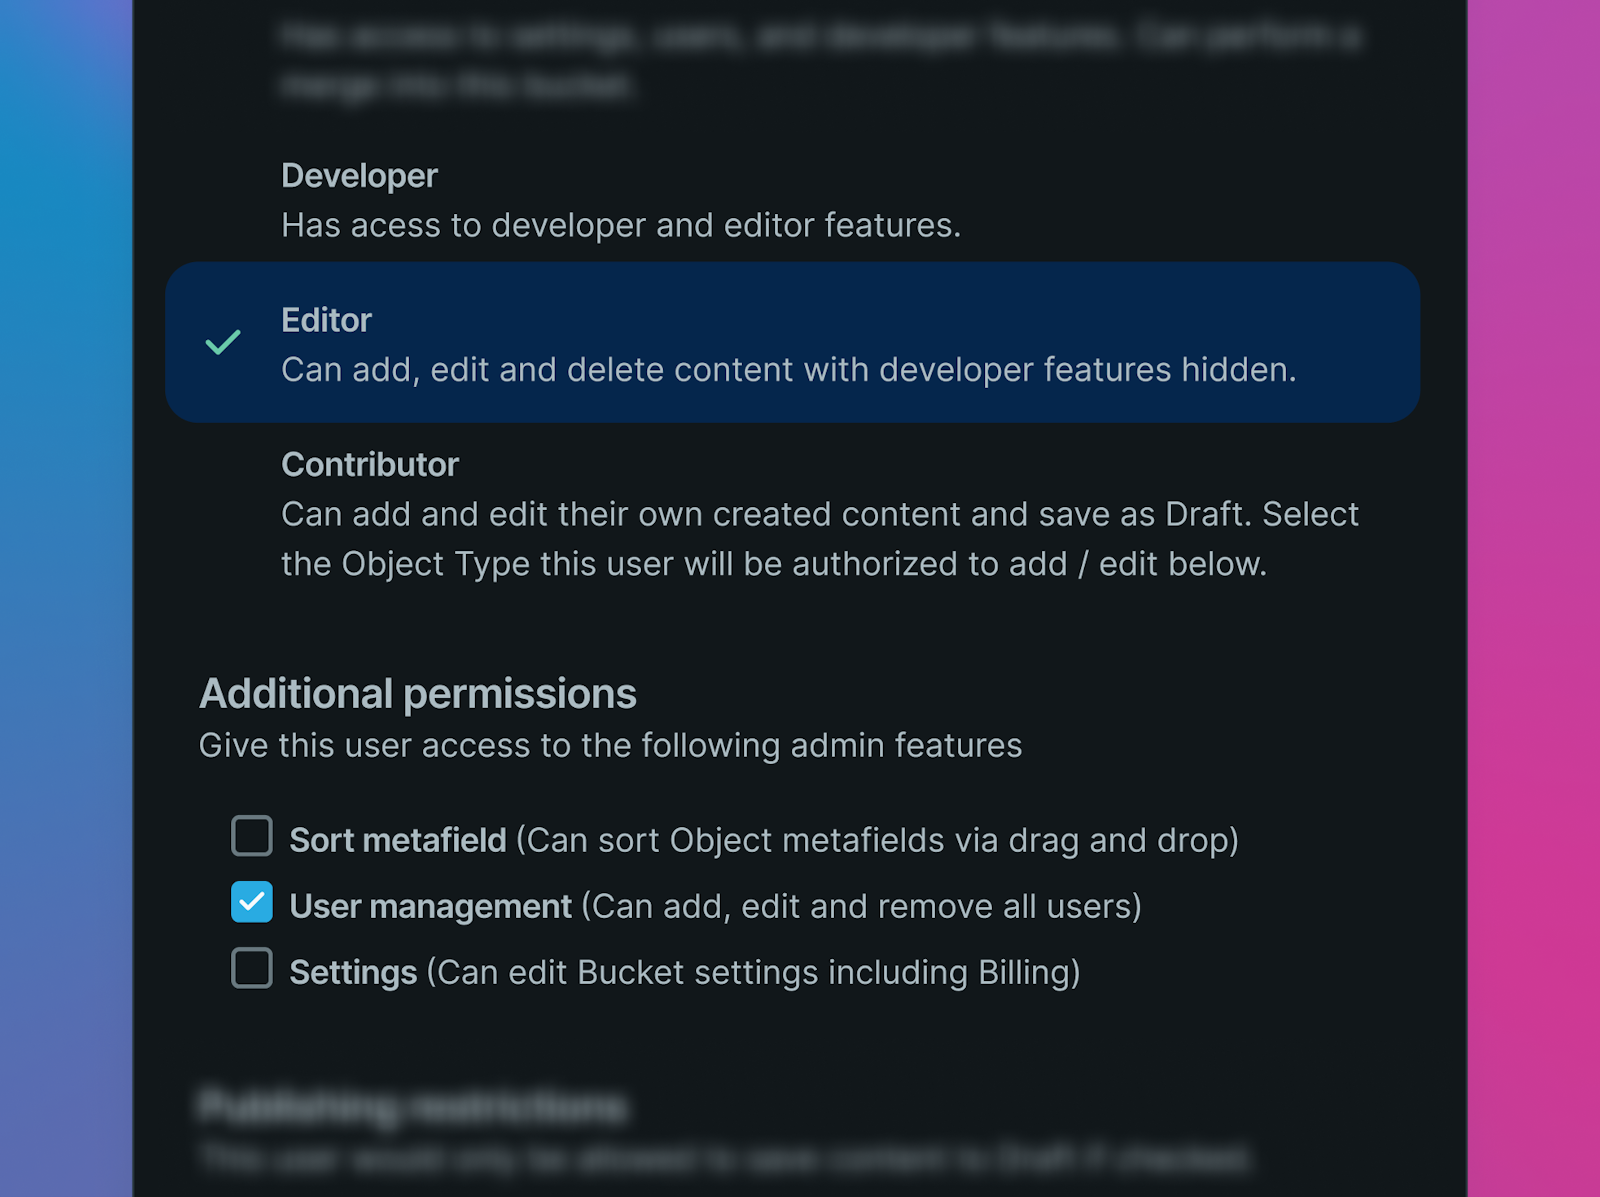
Available roles include:
Admin: All manager access plus access to project usage, settings, and billing.Manager: Access to all Buckets. Can add Buckets and manage members.User: Access to specific Buckets in the project. Cannot add Buckets. Set granular permissions for user roles for each Bucket.
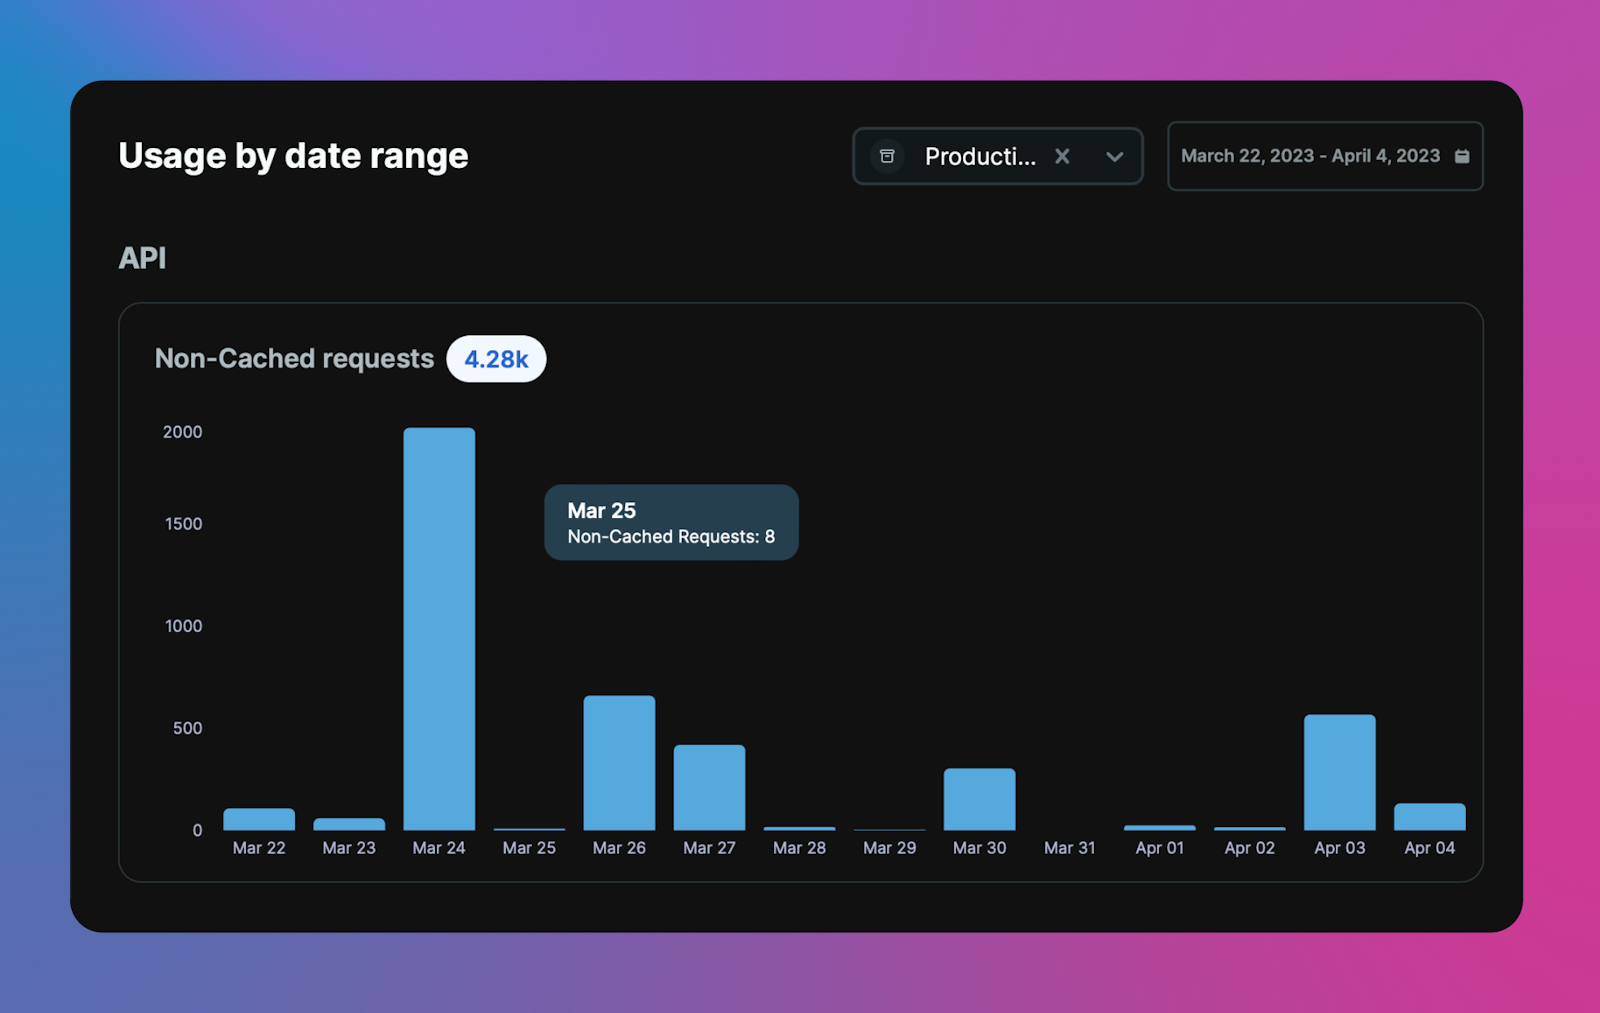
Usage
Go to Projects > Usage to keep track of your usage for your project. Available options include:
- Month-to-date usage: See totals for team, Buckets, media, etc. Keep track of API and media requests.
- Go to the Analytics tab to view historical data.
Note: Analytics data is retained for 90 days. Historical data older than 90 days will not be available for viewing.
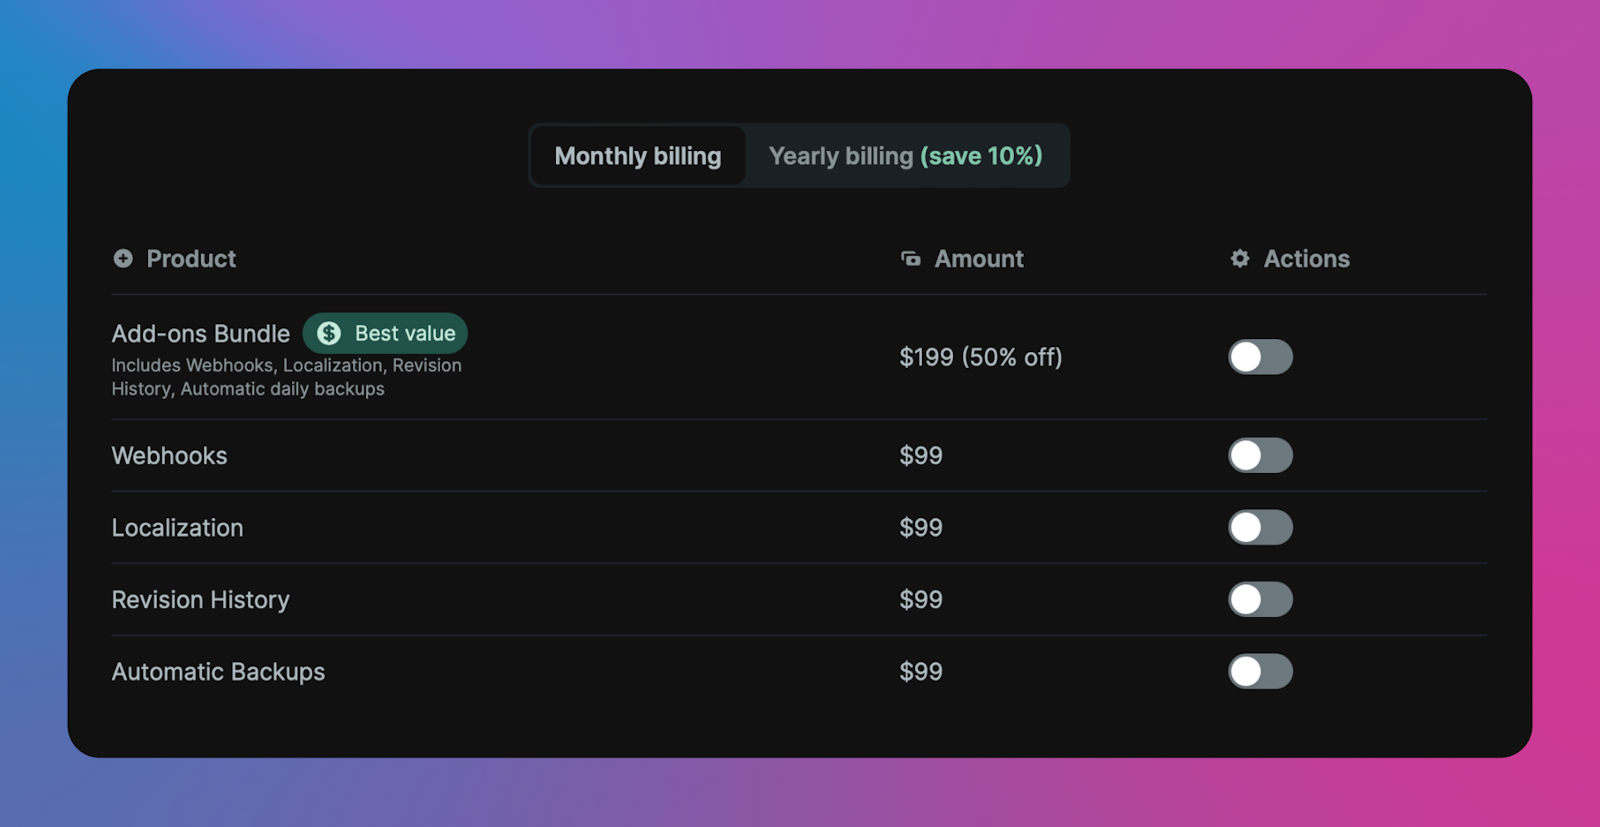
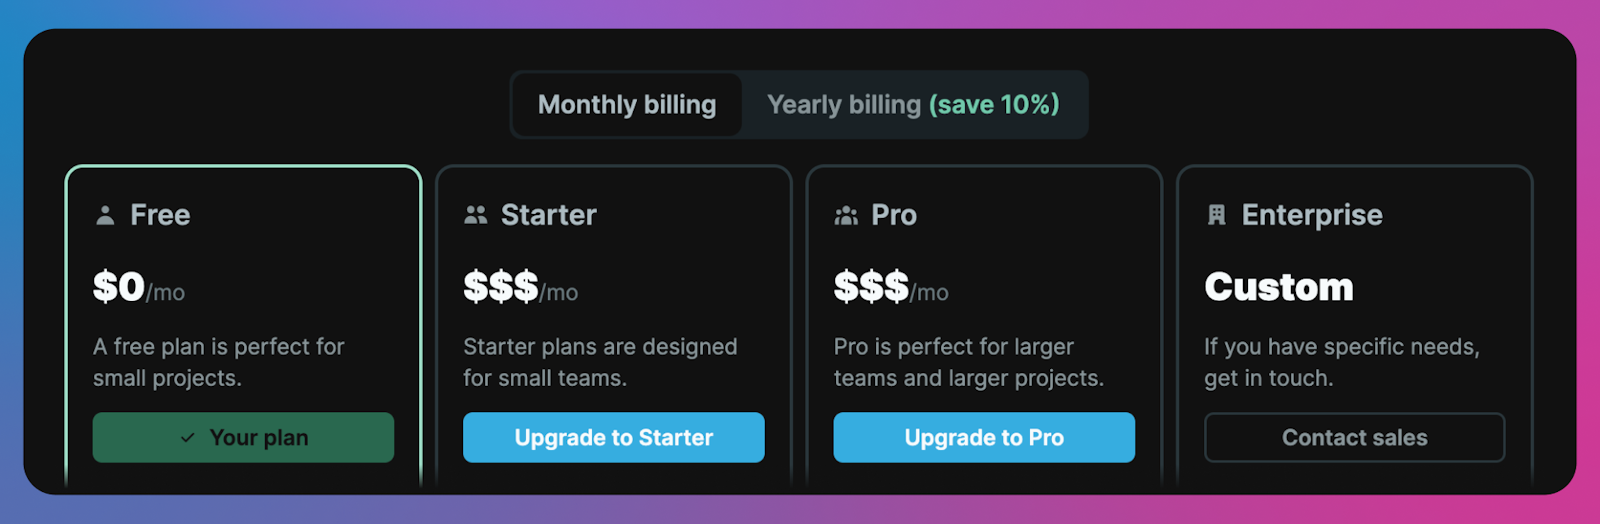
Billing
Enjoy the free plan forever. If you have more usage requirements than are available in the free plan, go to Project > Billing and select from available plans. Each plan has an option to bill monthly, or save 10% by choosing an annual plan. If you need more usage, reach out to Cosmic sales.
Add-ons
Add-ons are available in Project > Billing > Add-ons. Add-ons include:
- Webhooks
- Localization
- Revision History
- Automatic Backups
- Additional team seats
- Additional Buckets
- Additional Objects
Bundle all of the add-ons to save 50%.
The Additional Objects add-on increases your Object and Object Type limits in packs of 10,000 objects, with each pack also adding 25 object types, for $10/month. Add as many packs as you need from Project > Billing > Add-ons. See the pricing page for details.