
Stefan Kudla
September 20, 2022
Note: This article has been archived as it may contain features or techniques not supported with the latest version of Cosmic.
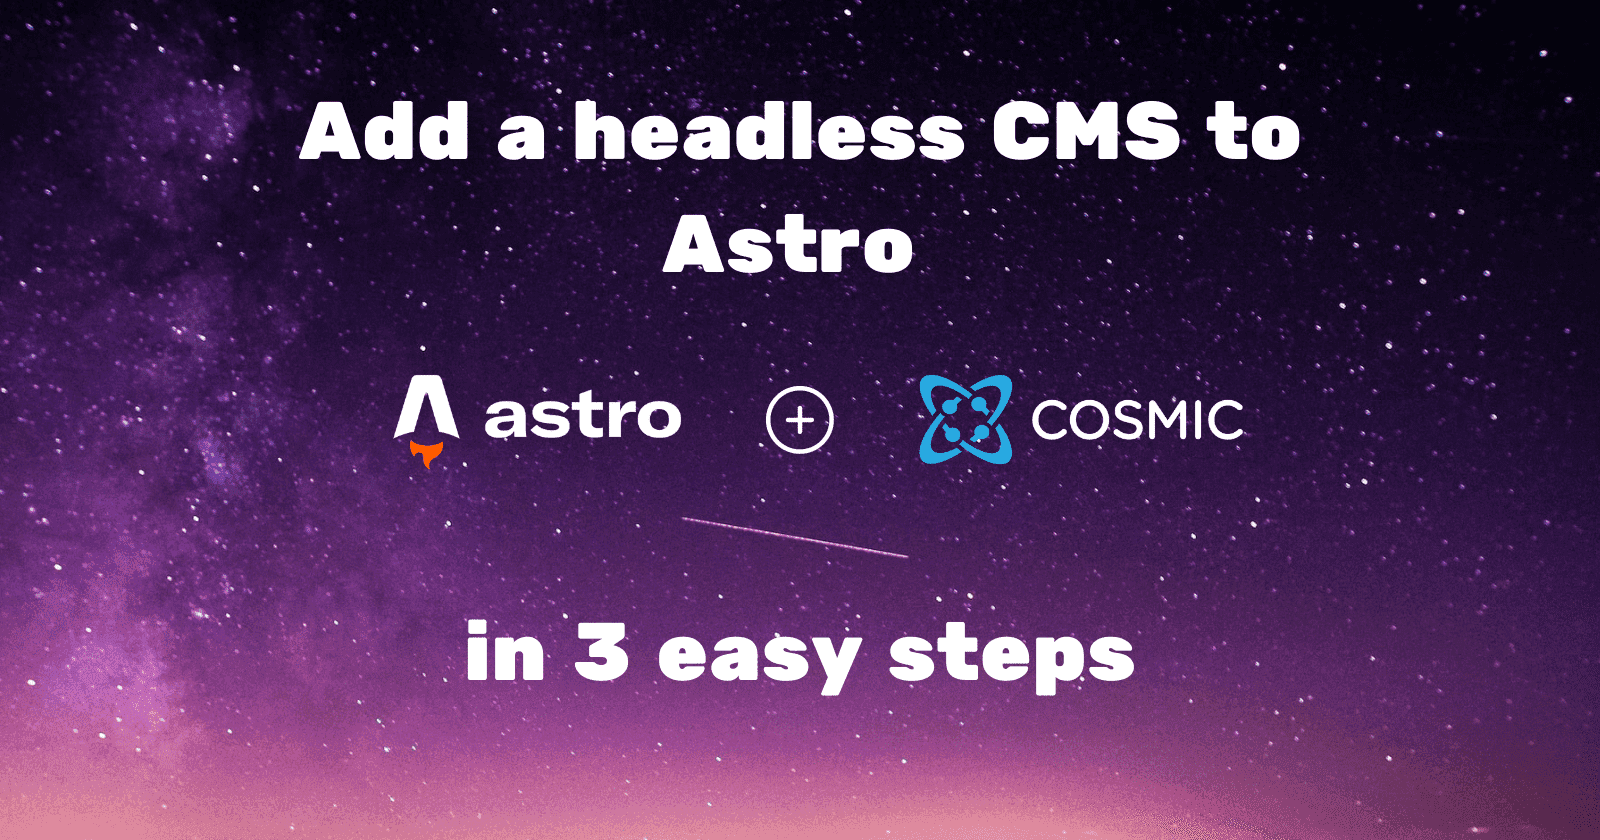
Astro is a lightweight web framework capable of shipping highly performant websites with minimal (or non-existent) JavaScript bundles. In this guide, we’re going to create our content with Cosmic and retrieve it in our Astro project, allowing for quick and easy content creation and collaboration. The end result will be a clean and composable website that aces the lighthouse scores all across the board.
TL;DR
Install the Simple Astro Blog Cosmic template.
Download the Simple Astro Blog source code.
Step 1: Configure your Astro project
To create a new Astro project, run . Astro provides a convenient CLI tool to set up some boilerplate code and get your project configured quickly. You can choose from a few different templates, but in our case, we’re keeping it simple with the “Just the Basics” option configuring a nice organized directory, a few Astro components to reference, and an Astro config file.
If you are using Cosmic in this guide, make sure you install the Cosmic NPM package:
Next, we will create two items in our project directory. First, create a lib folder in the src folder, and then create a cosmic.js file. After you’ve created this file, create a .env in the root of your directory. Here, we will store our environment variables from the Cosmic Bucket we’re about to set up, and in our cosmic.js file we will import the environment variables and create our API calls to retrieve our data.
Once you’ve created these two items, put them aside for now, as we go on to creating our Content Model in Cosmic.
Step 1.5 (Optional): Adding Astro Integrations
Astro provides some useful integrations, allowing you to quickly configure your favorite UI libraries, SSR adapters, and other tools like Astro Image and Tailwind CSS. For this guide, we encourage using both the Astro Image and Tailwind CSS integrations as they will improve website performance and developer experience.
Using the Astro CLI, we can run the commands and , and Astro will install each individual package and update the astro.config.mjs file to support the integration.
Step 2: Configure a Cosmic Bucket
What is a headless CMS?
With a headless CMS, content is created using a dashboard and then delivered using an API. The content layer is separated from the presentation layer, making content flexible, reusable, and scalable. If you’d like to learn more about what a headless CMS is, we created this concise article explaining it.
Create an account
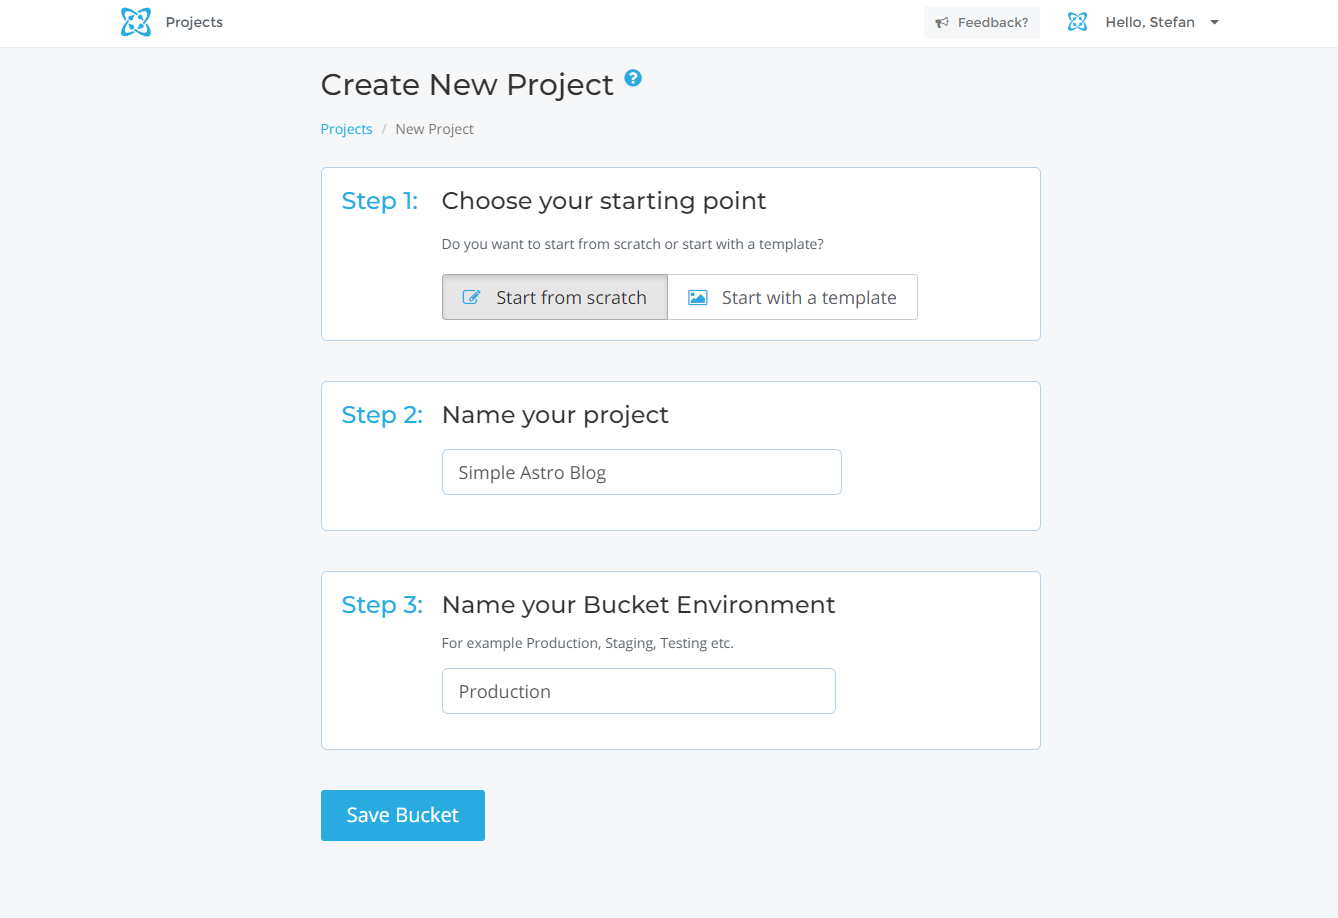
If you haven’t already, create a Cosmic account. Then navigate to the dashboard to create a new project. We’re going to start from scratch here, but you choose from a wide variety of templates by selecting “Start with a template” and clicking “Select Template” on the desired template. Name your project and Bucket Environment, then click “Save Bucket.”
Creating an Object
Let’s create a simple Object, click “Add Object Type” and then you will see that we can now setup our first Object. We’re going to call this Object “Posts”, which will contain multiple blog posts, so go ahead and select “Multiple” then under “Singular Name” type in “Post.”
Our default fields will contain the Slug field and the Content field, so you can leave these as they are.
Content Model
The Content Model is where we design the structure of our content. We can use different Metafields like strings, numbers, and even media (images). From this structure, we can craft our API calls to retrieve this specific data and render it onto our application.
Our Object will consist of:
- An Excerpt (text)
- A Cover Image (media)
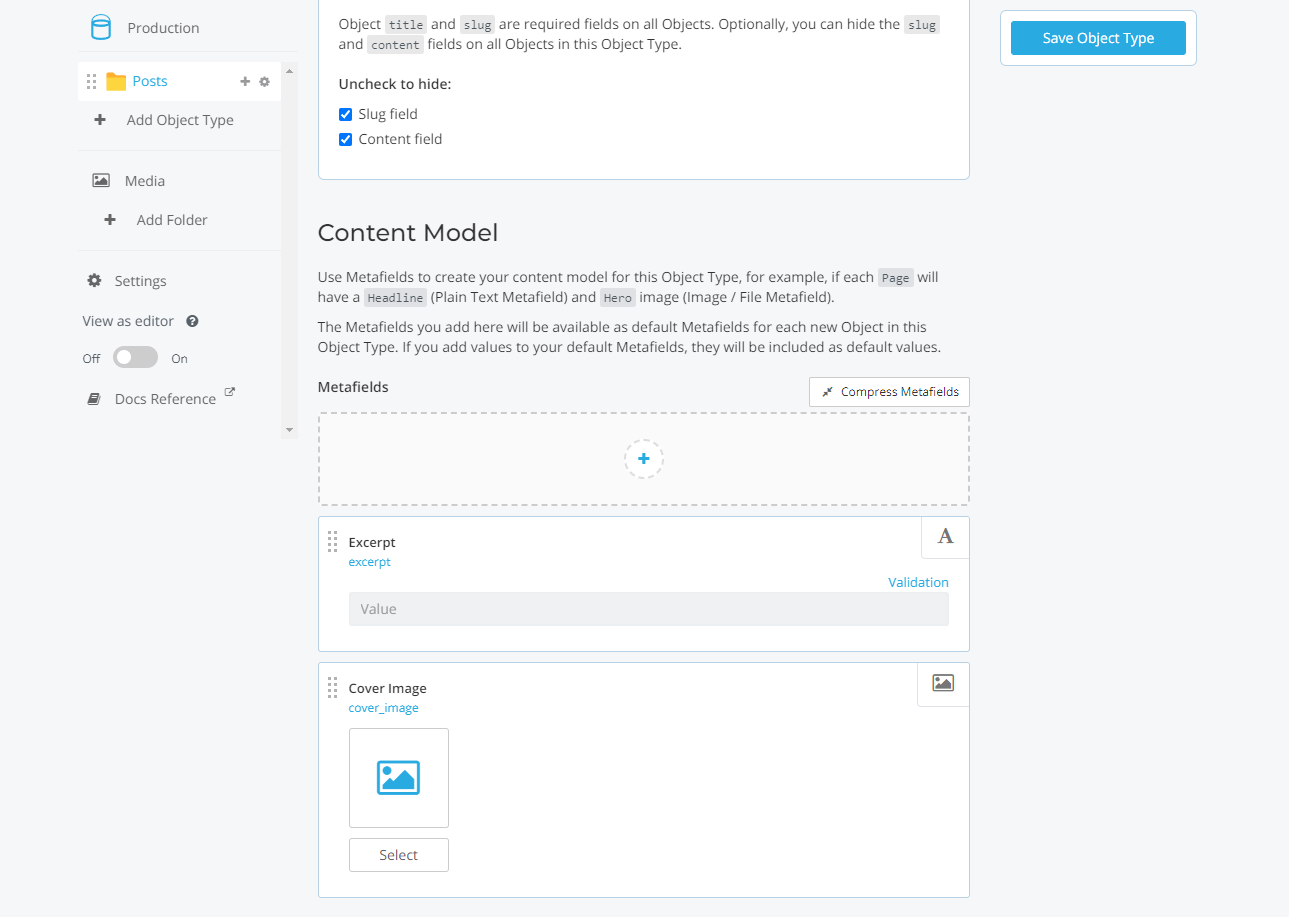
Once you’ve created these Metafields, click “Save Object Type.”
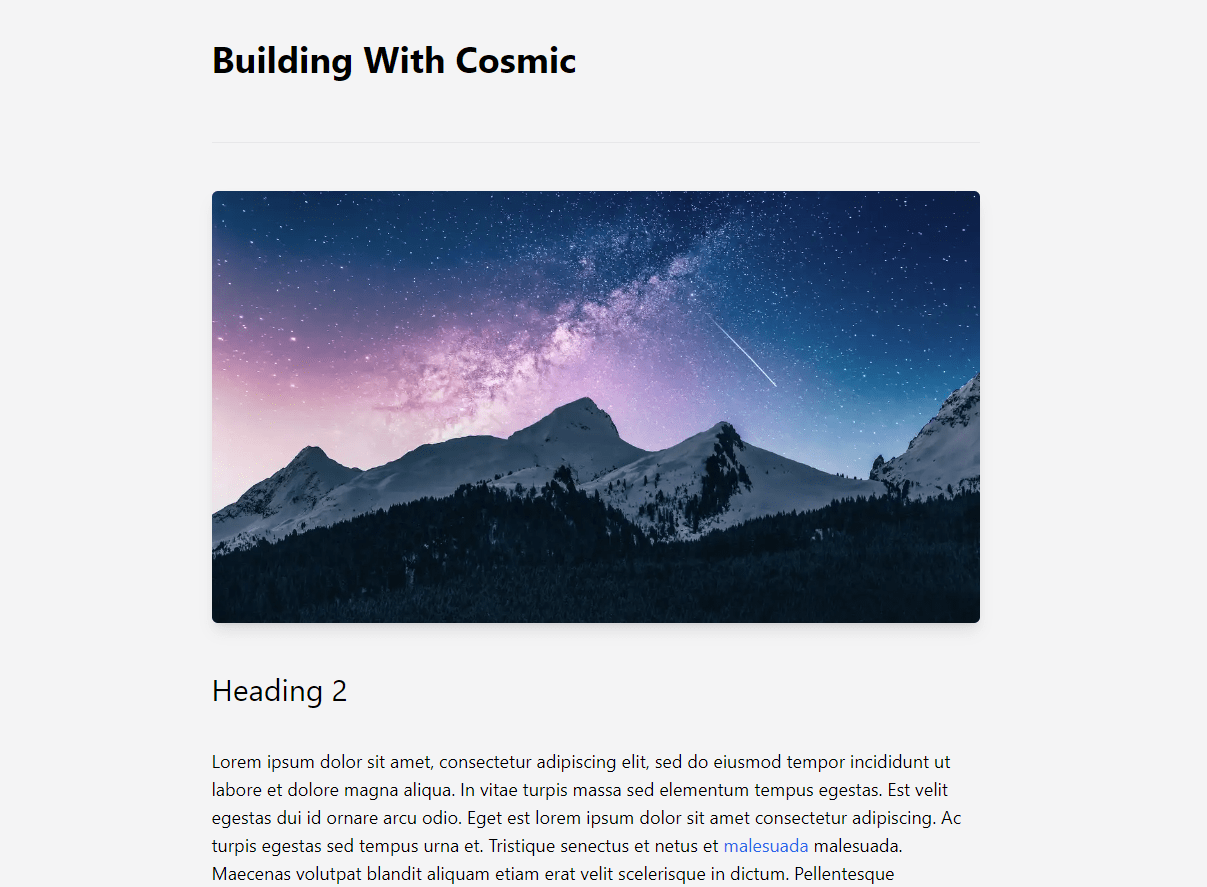
Let’s create our first Post! Navigate to “Posts” in the sidebar and click “Add Post.” Fill in the Title, Excerpt, and Content with some sample text. Then, upload an image for the Cover Image and select “Publish.”
Now that we’ve got our first published Object, we’re ready to tie it all together and get this data into our Astro application.
Step 3: Retrieve data from the Cosmic API
Before we leave the Cosmic dashboard, we need to grab a couple of things. On the sidebar, click on Settings>API Acess. To make this easier, I’m going to rename the Bucket Slug to something like my-astro-blog then click “Save Settings”.
Now we’re going to take the Bucket Slug and Read Key values and place them into our .env file in our Astro app.
Once set, let’s go into the cosmic.js file we created in Step 1. We will import the Cosmic module, instantiate an api variable and import our environment variables. Refer to these docs for setting environment variables in Astro.
Now that we’re all set up, let’s write our API call to get the Post we made in our dashboard.
Using Cosmic’s chaining methods, we can find the specific type of Object in our API, which is “posts” (the slug of the Object itself), and set the props to all of the parameters we set up when we created our Object earlier. In our case, we want to retrieve the title, slug, content, and the Cover Image, which lives inside of the metadata.
Remember that the default parameters are accessible at a higher level than the metadata, and the metadata itself comes from the custom metafields you create within an Object. Grabbing the Cover Image would look like this: metadata.cover_image.imgix_url.
Rendering the data
Now we can pull in the API call onto one of our Astro pages. By calling the function in the “helmet” of our Astro page or component, we can access all of the content we create in Cosmic.
To render out a list of the posts we make, we can create a minimal Card component like this:
Note that this is an Astro component. We can pass props to it by defining a de-structured object to Astro.props. This functionality is done within the dashes at the top of the component, or the “helmet.”
Going back to our index.astro page, let’s pass the data from Cosmic and render the card.
You’ll notice that we are passing the slug of our Cosmic post into the href prop. We can generate dynamic routes easily with Astro. We do this using getStaticPaths, which will generate dynamic page routes at build time.
Using getStaticPaths, we are generating the path for each “Post” in Cosmic using it’s slug. This happens at build time and uses the data stored in params. We then pass the data for each “Post” through to the props and further set the { post } object to Astro.props. We can re-use our HTML template below the helmet for each blog post we render.
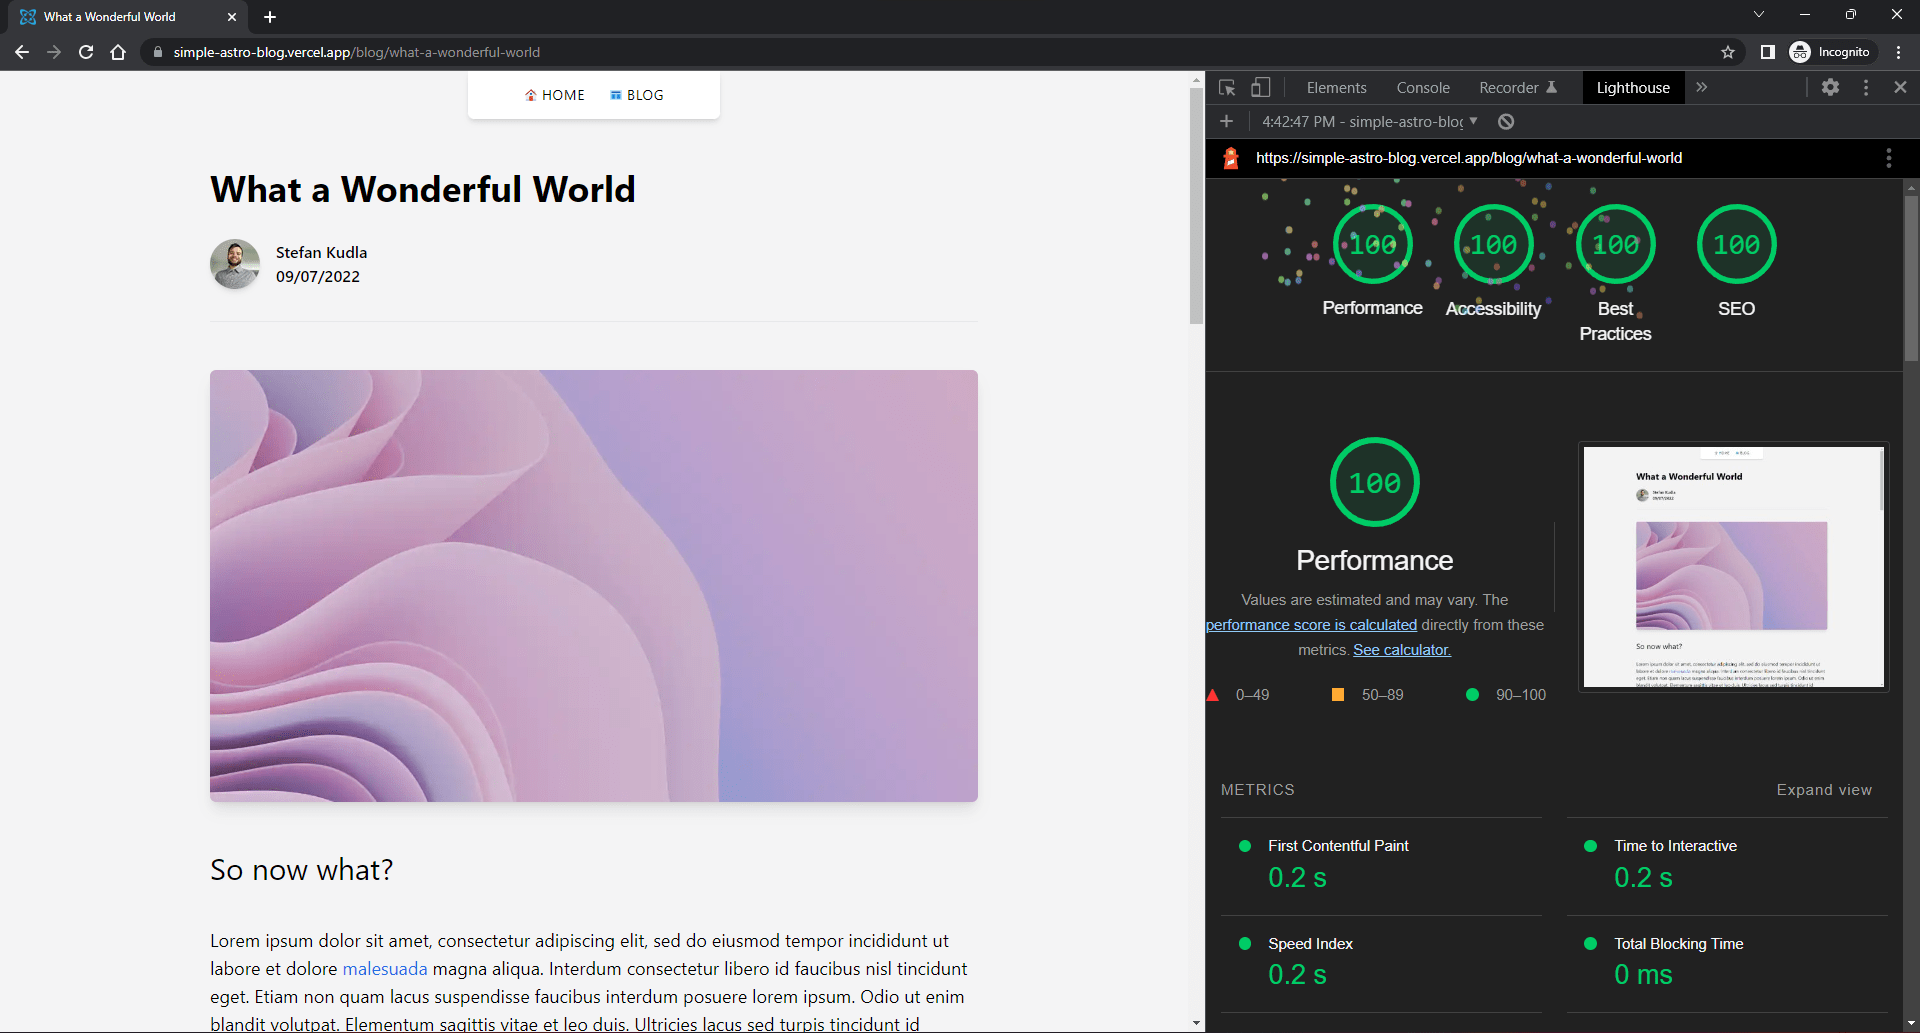
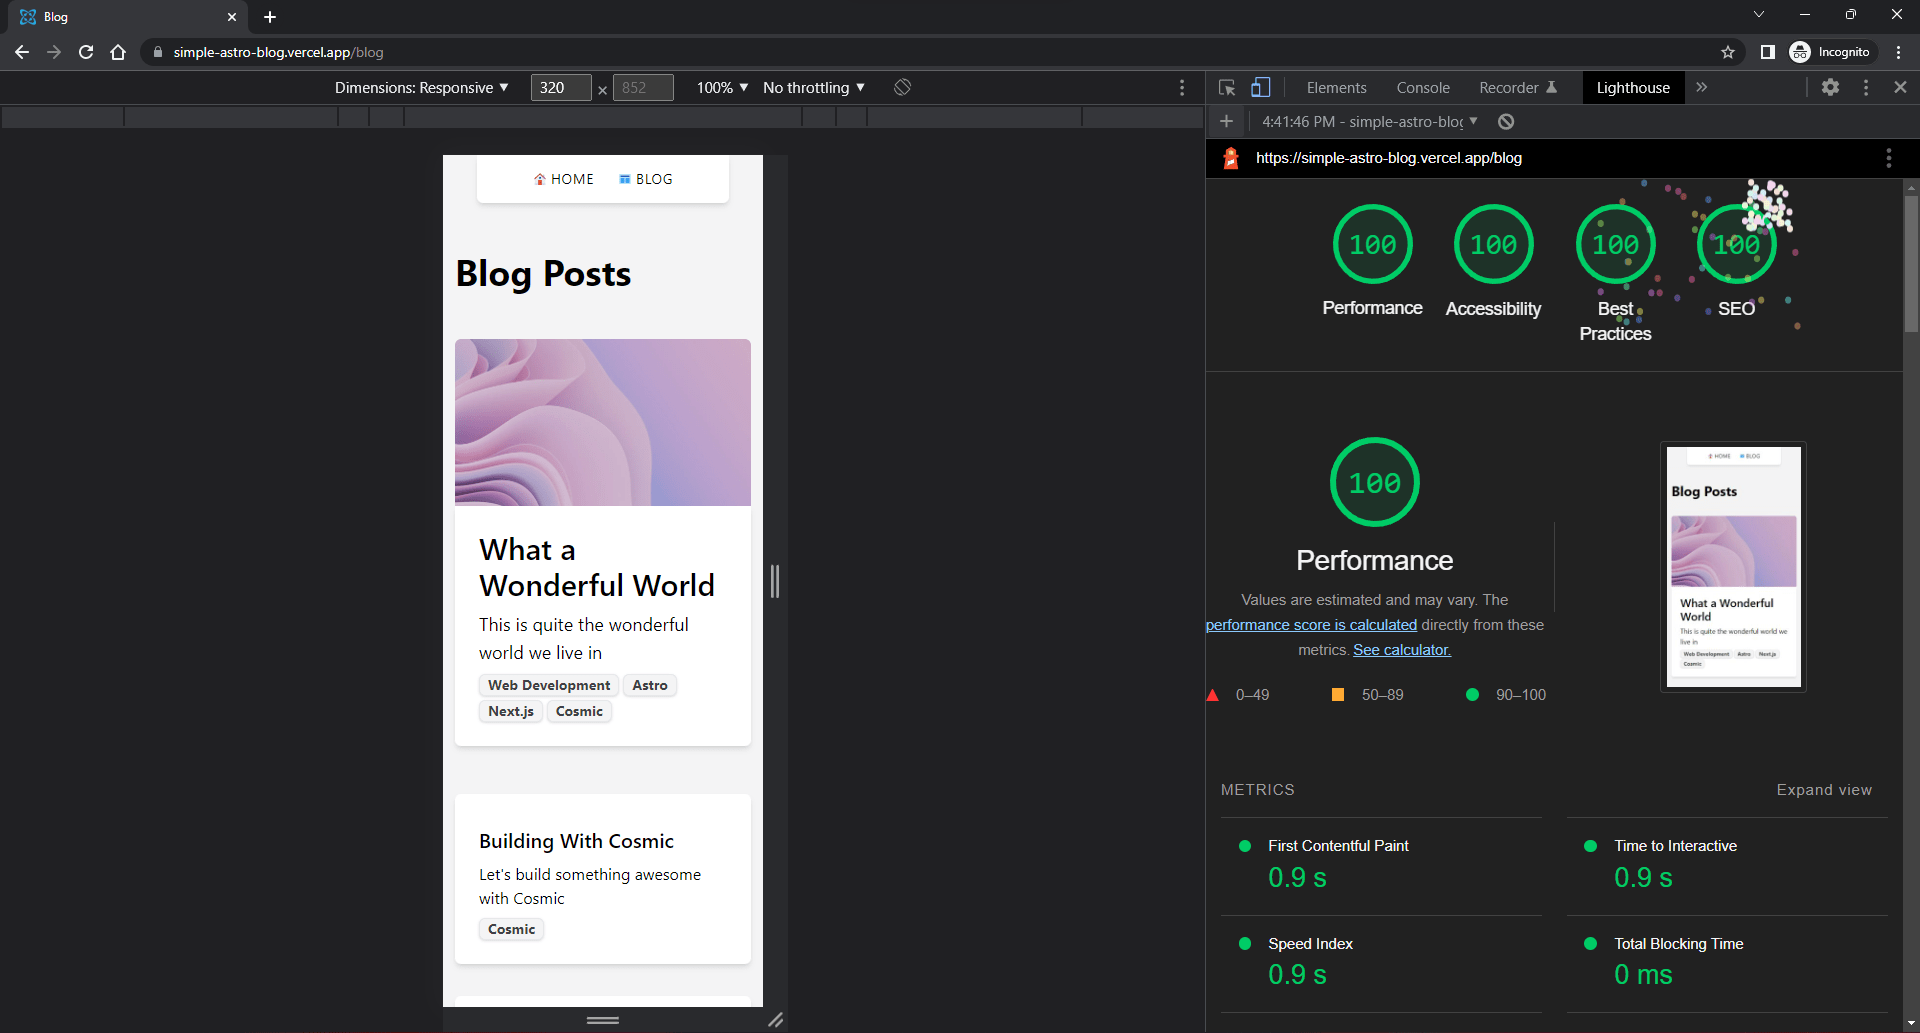
After running a mobile Lighthouse report for the application, we have achieved 100s all across the board with little effort.
Conclusion
We hope you found this guide helpful to learn how Astro provides ease of use in development, easy integration with a headless CMS, and the capability to achieve high-performing Lighthouse scores out of the box. For more info on Astro and headless CMS, read our Astro knowledge base page. For a hands on example using Cosmic with Astro, view our Simple Astro Blog template that we used in this tutorial. You can tune into our podcast, Build Time, where we cover topics like headless CMS, Next.js, React, and many many more.
Continue Learning
Ready to get started?
Build your next project with Cosmic and start creating content faster.
No credit card required • Free forever