Cosmic
September 5, 2017
A couple of weeks ago I wrote an article about building a static website with Gulp, and why it’s so fantastic,
as well as a couple of things I learned on the way.
But one of the things I failed to touch on was how to manage dynamic content with static websites. In a dynamic website, pulling locale data is often taxed with multiple AJAX requests, as well as the time it takes to process the data being pulled from the remote server.
But what if I told you there is a faster, and more optimized way to bundle the language data for your small web-application? And what if, I also told you that you can use a remote Content Management System (CMS), that can manage your website’s content?
Enter Cosmic JS
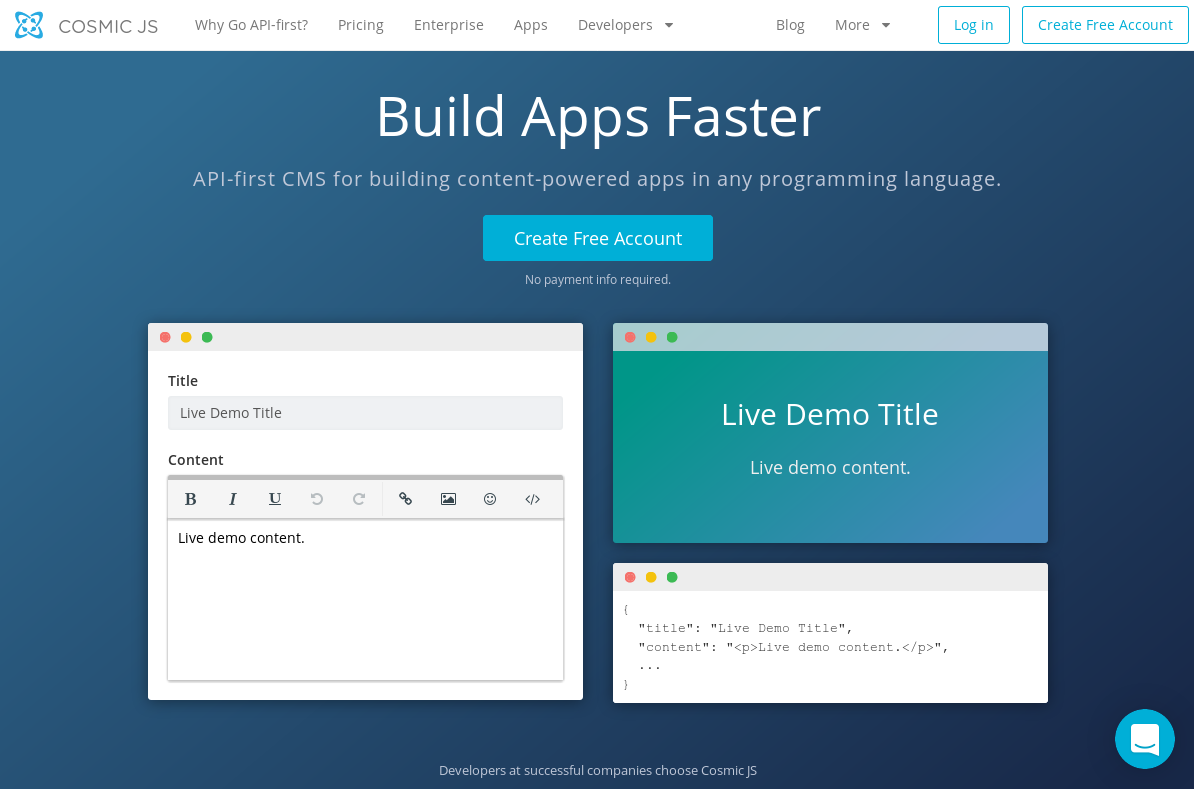
Cosmic is an API-first CMS system made to help bridge the gap between developers and editors. Unlike WordPress or Drupal, the Cosmic API lives independently from your code. This allows it to be implemented in a numerous amount of ways to accomplish an awesome amount of things.
There are several benefits to this (which you can read in detail about here), but the one I will be focusing right now will be the flexibility it can give us when approaching unique challenges.
One of these challenges that we can overcome is trying to manage content on a static web-application. Because Cosmic at it’s heart uses JSON data to deliver content to your website, we can take advantage of this to filter and embed the content we need.
Let me show you how it’s done.
Before we begin…
If you intend on modifying the app content you’ll have to create a Cosmic account. They offer free plans that you can use, as well as a 2 week trial to test it out without any restrictions.
Regardless, you’ll need to have a working development environment with Node.js and npm installed. We need it in order to run the Gulp build tooling as well as the development server. Once you have both Node.js and npm installed, we can begin working on the demo application.
Installing the demo
The demo GitHub project is located at cosmicjs/static-multi-language-app. Either clone the repository with git clone or download the project manually using the download button on the repository page.
Once the project is downloaded (and extracted if you downloaded an archive), cd into the project directory and then download the project dependencies with the command npm install. Once that is done, you should now be able to
build the project.
Before we go through some the project details, build the developmentversion with the command gulp dbuild. The built application should then be available inside the build/ directory.
Running the App
At this point, you’d probably want to run the application locally. To do so, make sure the project is built and start the development server with gulp server. Your default browser should open with the web app, located by accessing localhost:8080on
your web browser.
App structure
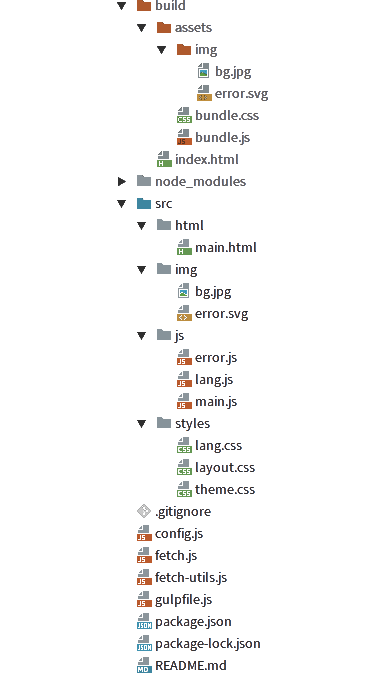
The main structure of the application is split into two segments (like many web applications). There is the build/ section, which contains the built project files, which also acts as the additional web root for our development server. And the src/ section, which contains the source code for the project.
Key files in the root project directory include the config.js file, which contains the configuration for both the Cosmic API fetcher script fetch.js, as well as the Gulp build-file gulpfile.js.
The file fetch-utils.jscontains a helper function for filtering through specific objects.
The fetcher-utils is fairly powerful, and I’m considering porting a more robust version to it’s own mini npm module. Follow me on Twitter or GitHub if you’d like updates about my open source projects.
There is also a README.md if you’d like more detailed explanations and examples of how to take advantage of the API provided in the app.
Setting up for additional content
// The config.js file
module.exports = {
    // Cosmic specific configuration...
    lang: {
        defaultLocale: 'en-US'
    },
    fetch: {
        file: 'src/cosmic-data.json',
        cache: false,
        NodeWhiteList: ['locale', 'slug', 'content'],
        NodeAllowedTags: ['a', 'b', 'i', 'only-the-tags-you-want']
    }
}
The default language loaded by the application is specified in the lang.defaultLocale key, and is en-US by default. This means that it will attempt to load the language locale en-US when the application first loads unless other-wise specified.
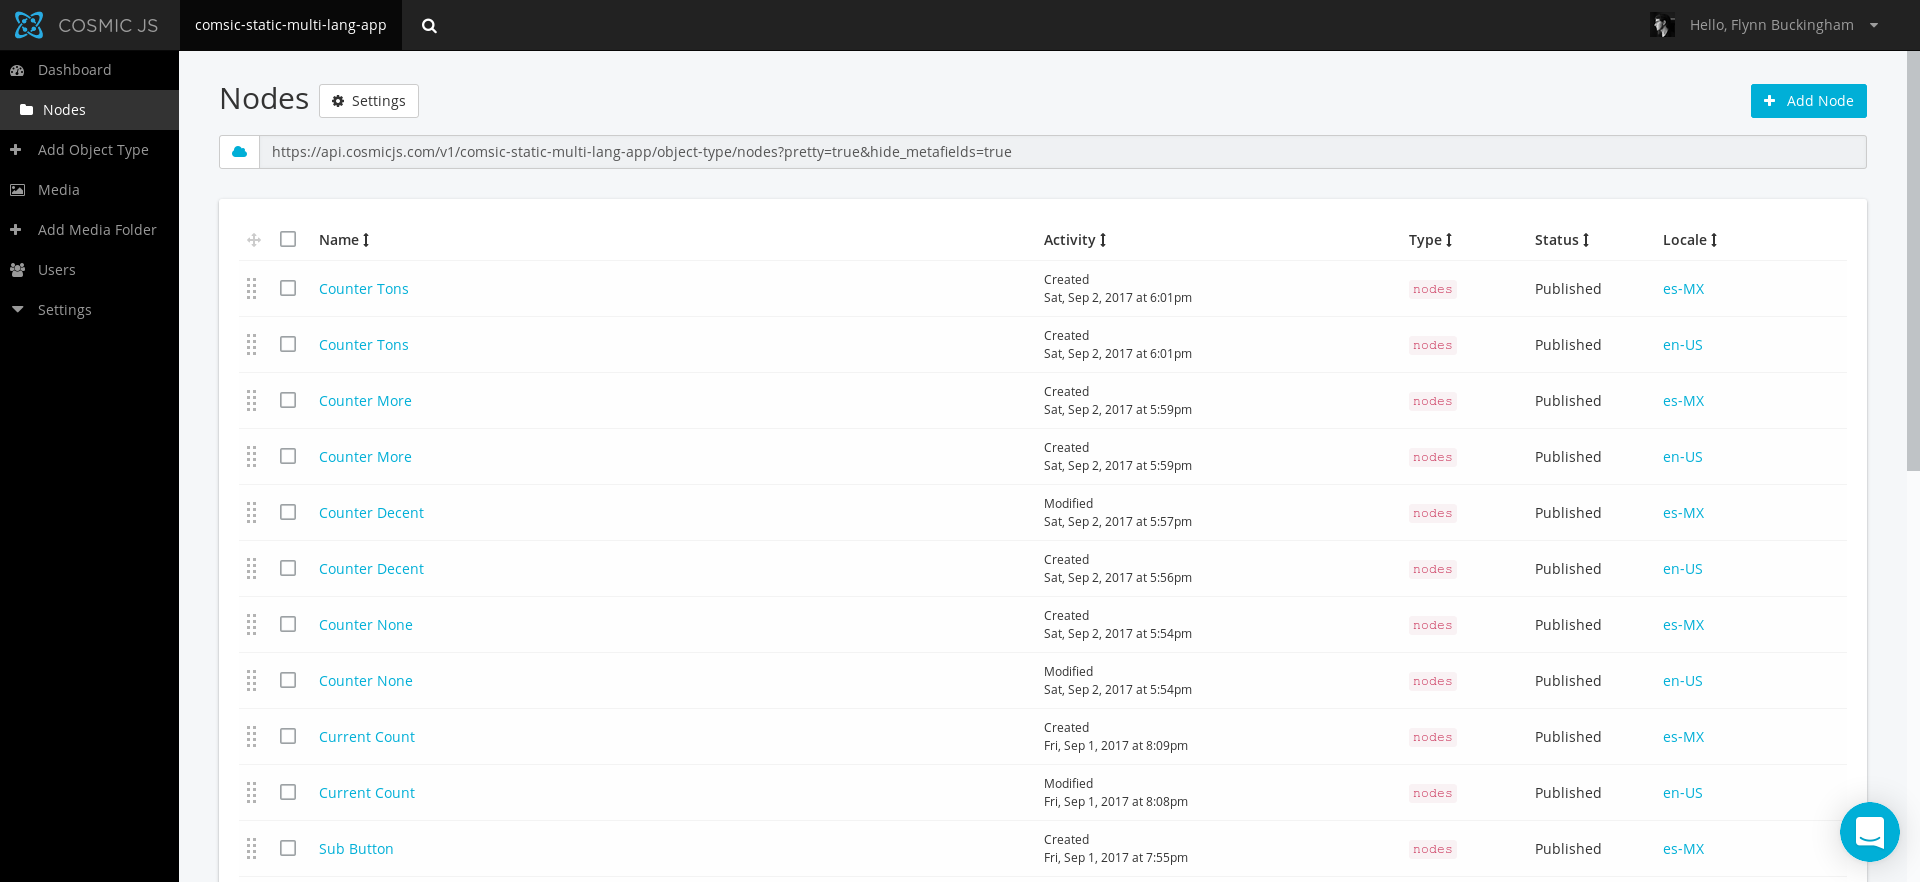
If you activated the demo on the Cosmic website, you should already have a bucket populated with Nodes, which are the default type that the application uses. Each Node contains a specific inline string that gets parsed by fetch.js to be embedded in your application.
Creating a new Node with the Cosmic API is fairly simple. To create a new Node, simply click the button on the top right + Add Node, and it should bring up a fairly simple UI that resembles something
like this:
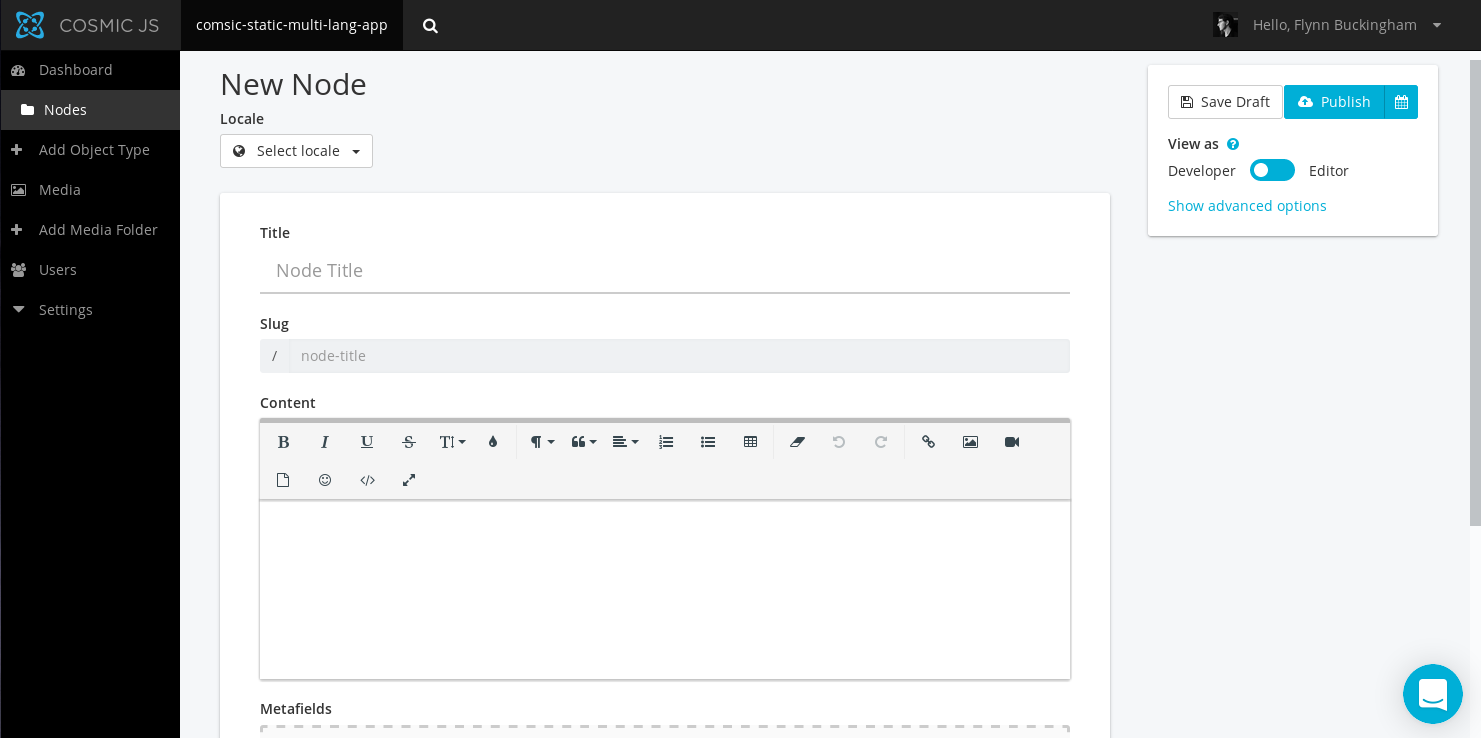
When creating a new Node (for multiple languages) it is best to first select a locale with the Select Locale drop-down. This ensures that your data gets loaded with the correct locale when the app loads.
To name the Node, simply type a name into the Node Title field. A Slugfield (which will be mentioned again later) should auto-populate as you are creating the Title of the Node. Note that you cannot create a new Node with the same Slug unless the locale is different. This
is to prevent accidental duplicate values within your app.
Once that’s done, enter in the content you’d like your Node to represent. This should be consistent between locales of your app.
When done, make sure to publish the Node by clicking the Publish button located at the top right of the page.
That’s it. You’ve created a new Node with the locale specified. For consistency, make sure to repeat this for each locale, so you have a set Node value for the locale specified.
So, now that you have all the locales set for a particular slug, you can start including the newly available data into your static web application.
To bundle the newly created Node, make sure you have an active internet connection. If you do, then run gulp dbuild or gulp build to fetch and embed the data into the bundle.js file located in build/assets/bundle.js
Adding static content to the markup
I created two main ways of adding content to your static website. The first is a static method, which involves adding a custom data-cosmic-node attribute to your application. The string value of the attribute should be equivalent to the slug name generated by the Cosmic API.
Navigate to the src/html/main.html and replace the default markup of :
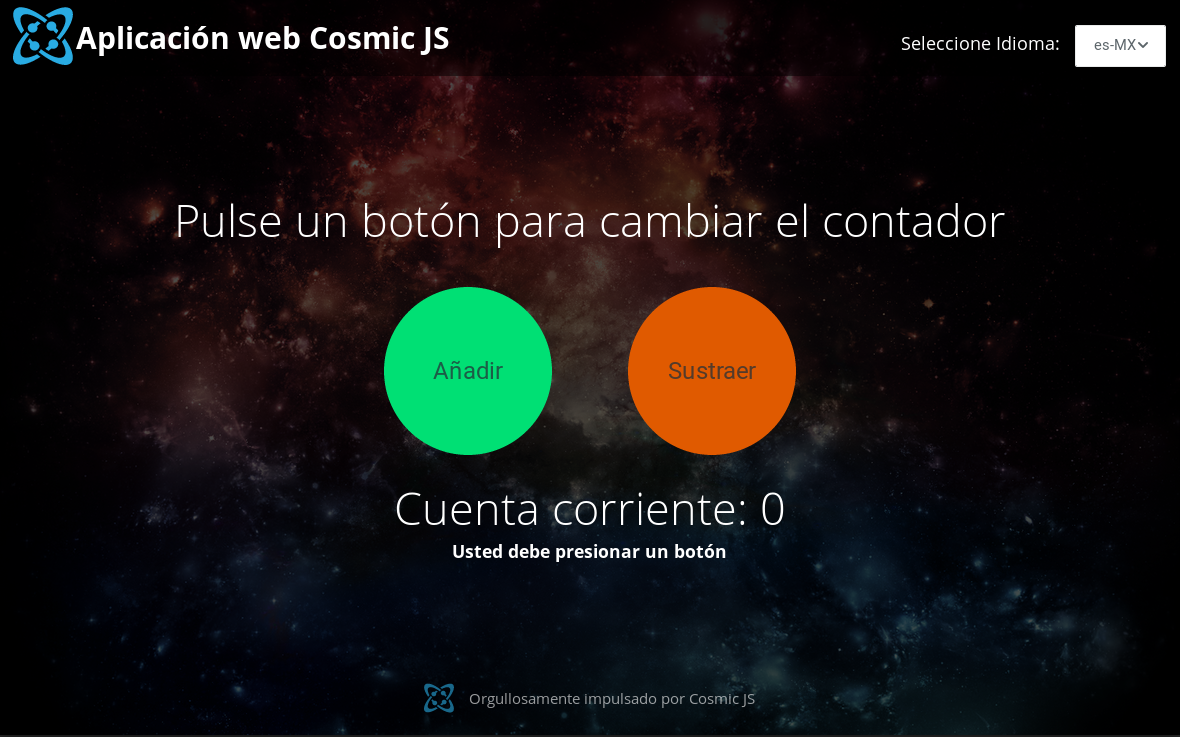
<div class="app-container">
<div class="cosmic-app">
<h2 data-cosmic-node="button-press-prompt"></h2>
<div>
<button id="add-button" class="cosmic-app-button">
<span data-cosmic-node="add-button"></span>
</button>
<button id="sub-button" class="cosmic-app-button">
<span data-cosmic-node="sub-button"></span>
</button>
</div>
<h2 class="cosmic-app-current-count">
<span data-cosmic-node="current-count"></span>
<span id="current-count"></span>
</h2>
<h3 id="count-message"></h3>
</div>
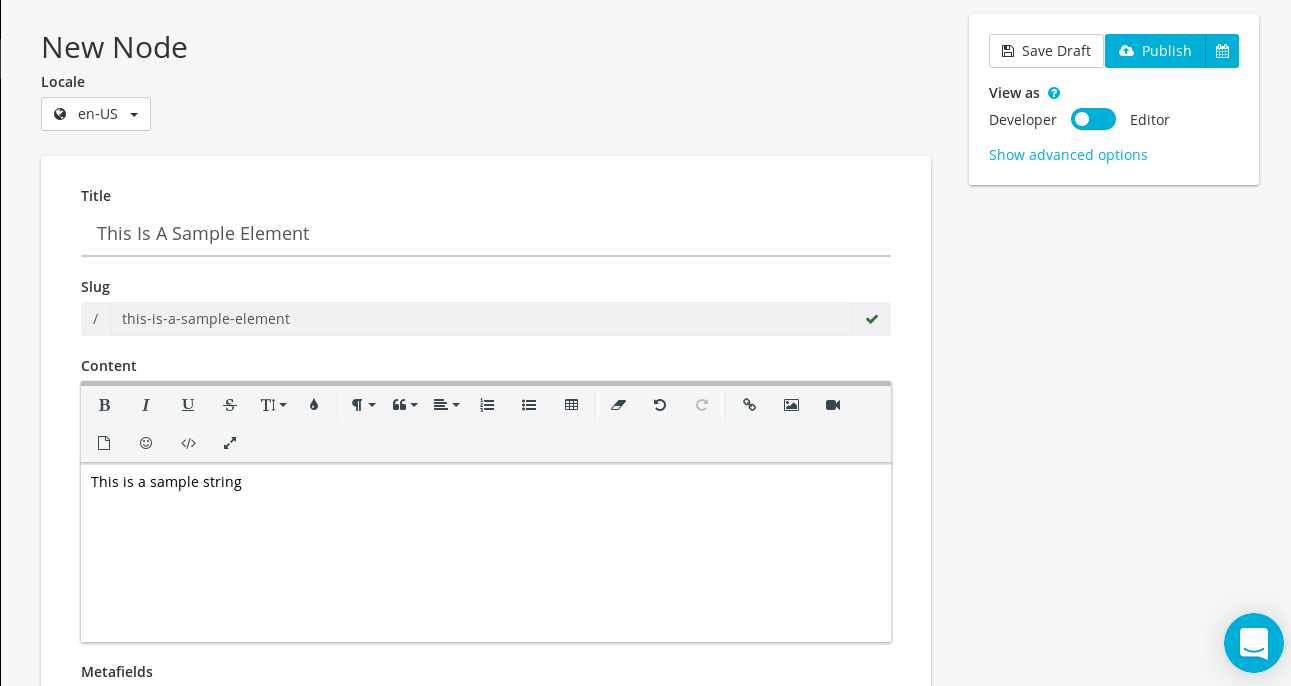
</div>With this:
<div class="app-container">
    <h2 data-cosmic-node="this-is-a-sample-element"></h2>
</div>
Now simply rebuild the application with gulp dbuild. You should now get something that looks like this:
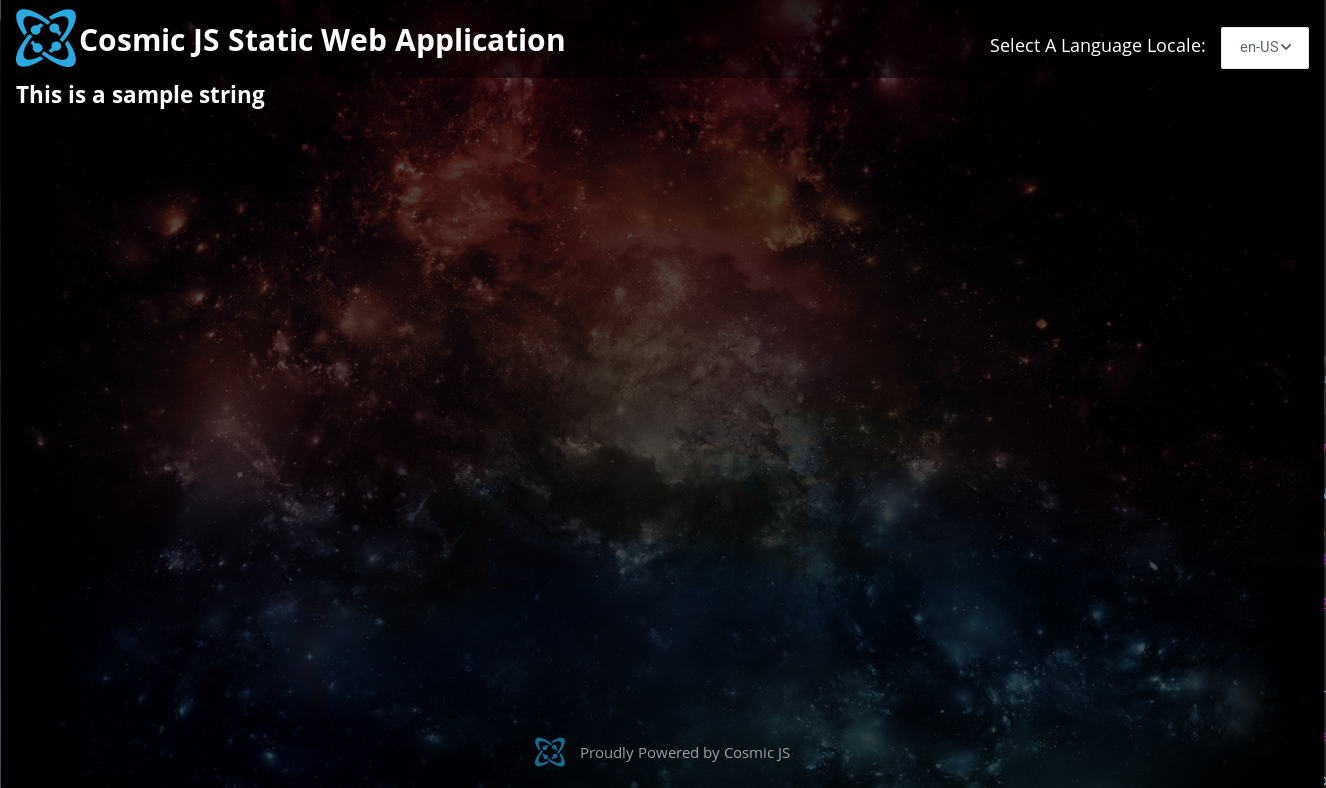
Assuming you made a Node for the locales appropriate for your app, you should see the contents of the element update whenever you switch locales. This is done through a element caching technique that searches the DOM for elements with the attribute data-cosmic-node, and will attempt to each one with the matching language value (if it exists).
Adding dynamic content to your app
Obviously, a static implementation alone is not enough for a useful web app, and being somewhat seasoned in this area I knew exactly what needed to be done.
I created a minimal language API for the application located at src/js/lang.js. It is not only responsible for caching and updating elements when the language changes, but it also provides methods that allows developers to manually get stored
language strings, as well as execute custom events whenever the language locale successfully changes.
The documentation as well as a working implementation can be found within the demo itself (at src/js/main.js), in addition to the README.md file.
But in case you’d rather me explain it here, this is the simple rundown of methods that will help you manage locale state in the application.
CosmicLanguage.getString
The method CosmicLangauge.getStringmethod does exactly what it sounds like. It attempts to fetch a specific value of a Node from the stored content. If found, it will return the filtered HTML content for the currently selected
locale.
Here is an example of the method at work at work inside of a closure:
So, you can potentially loop this method, conditionally rendering different Node values depending on the conditions set forth by your logic. But as you may have figured, what would happen in the event that the locale changes throughout the app?
CosmicLanguage.addUpdateEvent
As the name probably suggests, this is an event handler. Whenever a locale change event is invoked (via the loadFromLocale method), an additional array of event handlers are also fired. These are bound with the aforementioned addUpdateEvent.
While simple in practice, you’ll most likely need this if you plan on setting any sort of dynamic multi-language content within your web app.
The example on the official repository shows a slightly more advanced means of managing the content of an Element based on state. I’d recommenced that you go check it out to get a better feel of how to implement the event.
In closing…
I could go on about the multiple ways to implement the mini language API I made. But the best way to learn is to simply throw yourself at it, and learn it at your own pace. Go ahead and try it out!
Personally, I really enjoyed writing the language API. It felt cool to accomplish something new, and provide a means to help other developers build their own applications.