
Abey Joy
August 30, 2018
Cosmic is a great content management tool which gives you the ability to upload, access, and edit your data and media files easily. These properties make it a prime candidate to use when building web-based video games as they heavily incorporate a large combination of media images, files, and data objects. In this tutorial, we’ll go over how to make a simple role-playing adventure game built in Vue.JS whilst using Cosmic to manage our content.
TL;DR:
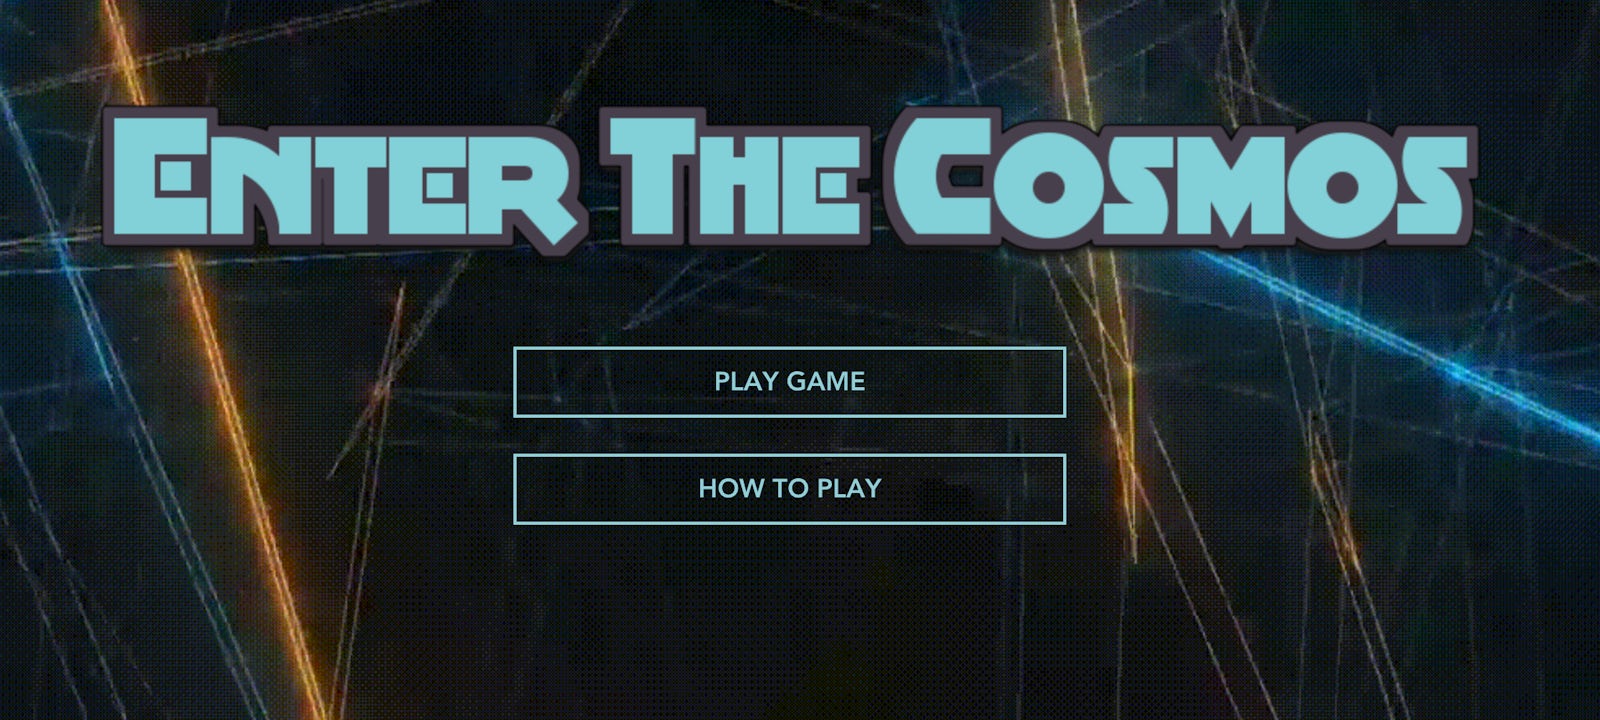
RPG Game
RPG Game Demo
RPG Game Github
Intro
As there are many articles on this site to help you get started using Cosmic, this tutorial will assume you have a basic understanding of how Cosmic works. Refer to the Getting Started Guide.
Integrating with third party applications is usually one of the most frustrating tasks of setting up a new a project. However, by making a few simple calls to Cosmic’s API, we can retrieve our data very easily.
Setting Up Your Project
In this tutorial, we will use vue-cli to quickly get our project up and running. We can also easily install Cosmic using npm as well:
$ npm install -g vue-cli
$ vue init webpack cosmic-game
$ cd cosmic-game
$ npm install --save vuex cosmicjs
$ npm install
$ npm run dev
We will then edit /config/config.js to add our bucket and add our read and write keys for authorization:
Uploading and Compartmentalizing our Game Assets using Cosmic
To populate our game with its story, environment and characters, we will compartmentalize data in three buckets.
The first Bucket will be “Story”, and will contain anything related to the actual story and environment of the game. We can easily enter and edit story text, and add assets such as environment background images here. Notice how easily we can use the Cosmic CMS to edit our data!
The next Bucket will be titled “Hero”. Here, as its name implies, we can add all the assets and metadata relating to the main character. This Bucket can contain all the hero’s sprites (for example: animations for movement, actions, and idling) as well metadata such as the hero’s character stats.
The next and final Bucket will be “Enemies”, and as its name suggests will have all the enemies assets and character stats.
Being able to split up our RPG game into these three Buckets gives us a couple of unique advantages. Firstly, all assets are neatly filed away and are easily accessible. Secondly, the Cosmic CMS allows us to easily add and edit storylines, just as easily as one would edit a blog post.
Accessing Data in our Game from Cosmic
We can easily access our content from Cosmic using the Cosmic API, and populate them into three Vue.JS components which reflect the three Buckets we made for the story, hero, and enemies.
We can reference the following function in each of our components mounted calls, so that when the component loads our data from our Buckets is ready to use:
Before our game starts, we can give our players exposition by pulling in the story from our ‘Story’ Bucket. We can also use the story bucket to further set the scene by setting up the environment:
As you can see in the above snippet, we easily convert data hosted on Cosmic via REST API, and can store them for use in VueJS’s data object.
Using the same approach, create hero.vue and enemy.vue components and load in their metadata from their respective buckets.
To make component to component dialogue easier (for example, an attack method in hero.vue affecting an enemies health), you can use state management via store, provided by Vuex – which we already installed earlier using NPM. Here is an example file of how Vuex can use the data obtained from Cosmic to manage our store:
Now that we have all our necessary game data loaded, we can populate our game! We can load in environment images as background images in our components, add hero and enemy sprites to their respective components, and use our newly created store to handle our battle, leveling up, and other state change logic.
Here is some example code for your home screen menu, where you can see just how we populate and update data received from Cosmic:
Conclusion
Building a video game, whether in a browser or elsewhere, requires a whole lot of data management. In this tutorial, not only did we explore how easy it is to manage the data by separating it into three different Buckets – we also saw how quickly and easily that same data can be accessed and modified. Furthermore, integration was exceptionally simple: all one had to do was run a bash command, and make sure environment keys were properly set up.
Cosmic is a lightweight, but powerful platform – and I hope this tutorial was able to properly display its many strengths.
If you have any comments or questions about building apps with Cosmic, reach out to us on Twitter and join the conversation on Slack.
Continue Learning
Ready to get started?
Build your next project with Cosmic and start creating content faster.
No credit card required • Free forever