
Cosmic AI
February 13, 2025
In this comprehensive guide, we'll explore how to create a modern blog using Next.js, style it with Tailwind CSS, and manage content using Cosmic CMS. This powerful combination allows for a seamless, maintainable, and scalable blogging platform.
Setting Up the Project
First, let's create a new Next.js project with Tailwind CSS:
npx create-next-app@latest my-blog --typescript --tailwind cd my-blog
Connecting to Cosmic CMS
Install the Cosmic npm package:
npm install @cosmicjs/sdk
Create a new .env.local file in your project root:
COSMIC_BUCKET_SLUG=your-bucket-slug COSMIC_READ_KEY=your-read-key
Configuring Cosmic CMS Client
Create a new file lib/cosmic.ts:
import { createBucketClient } from '@cosmicjs/sdk' const cosmic = createBucketClient({ bucketSlug: process.env.COSMIC_BUCKET_SLUG as string, readKey: process.env.COSMIC_READ_KEY as string }) export default cosmic
Creating Content Types in Cosmic
In your Cosmic dashboard, create a new "Posts" Object type with the following fields:
- Title (Plain text)
- Slug (Slug)
- Content (Rich text)
- Featured Image (Image)
- Author (Single Object)
- Published Date (Date)
And add an "Author" Object type with the following fields:
- Title (Plain text)
- Slug (Slug)
- Avatar (Image)
Fetching Blog Posts
Create a new file lib/posts.ts:
import cosmic from './cosmic' export async function getAllPosts() { const posts = await cosmic.objects .find({ type: 'posts', }) .props('title,slug,metadata,created_at') .depth(1) .sort('-created_at') .limit(10) .status('published') return posts.objects } export async function getPostBySlug(slug: string) { const post = await cosmic.objects .findOne({ type: 'posts', slug: slug, }) .props('title,slug,metadata,created_at') .depth(1) return post.object }
Creating the Blog Layout
Create a new file app/layout.tsx:
import "@/app/globals.css"; import Navbar from "@/components/Navbar"; import Footer from "@/components/Footer"; export const metadata = { title: "My Blog", description: "A blog powered by Cosmic CMS", }; export default function RootLayout({ children, }: { children: React.ReactNode; }) { return ( <html lang="en" className="light"> <body> <div className="min-h-screen bg-gray-50 dark:bg-gray-950"> <Navbar /> <main className="container mx-auto px-4 py-8">{children}</main> <Footer /> </div> </body> </html> ); }
Creating the Navbar component
Create a new file components/Navbar.tsx:
import Link from "next/link"; const Navbar = () => { return ( <nav className="bg-white dark:bg-gray-900 shadow-md"> <div className="container mx-auto px-4 py-4"> <div className="flex justify-between items-center"> <Link href="/" className="text-xl font-bold text-gray-800 dark:text-white hover:text-gray-600 dark:hover:text-gray-300" > My Blog </Link> </div> </div> </nav> ); }; export default Navbar;
Creating the Footer component
Create a new file components/Footer.tsx:
const Footer = () => { return ( <footer className="bg-white dark:bg-gray-900 shadow-md mt-8"> <div className="container mx-auto px-4 py-6"> <div className="text-center text-gray-600 dark:text-gray-400"> <p>© {new Date().getFullYear()} My Blog. All rights reserved.</p> </div> </div> </footer> ); }; export default Footer;
Creating the Blog Home Page
Create app/page.tsx:
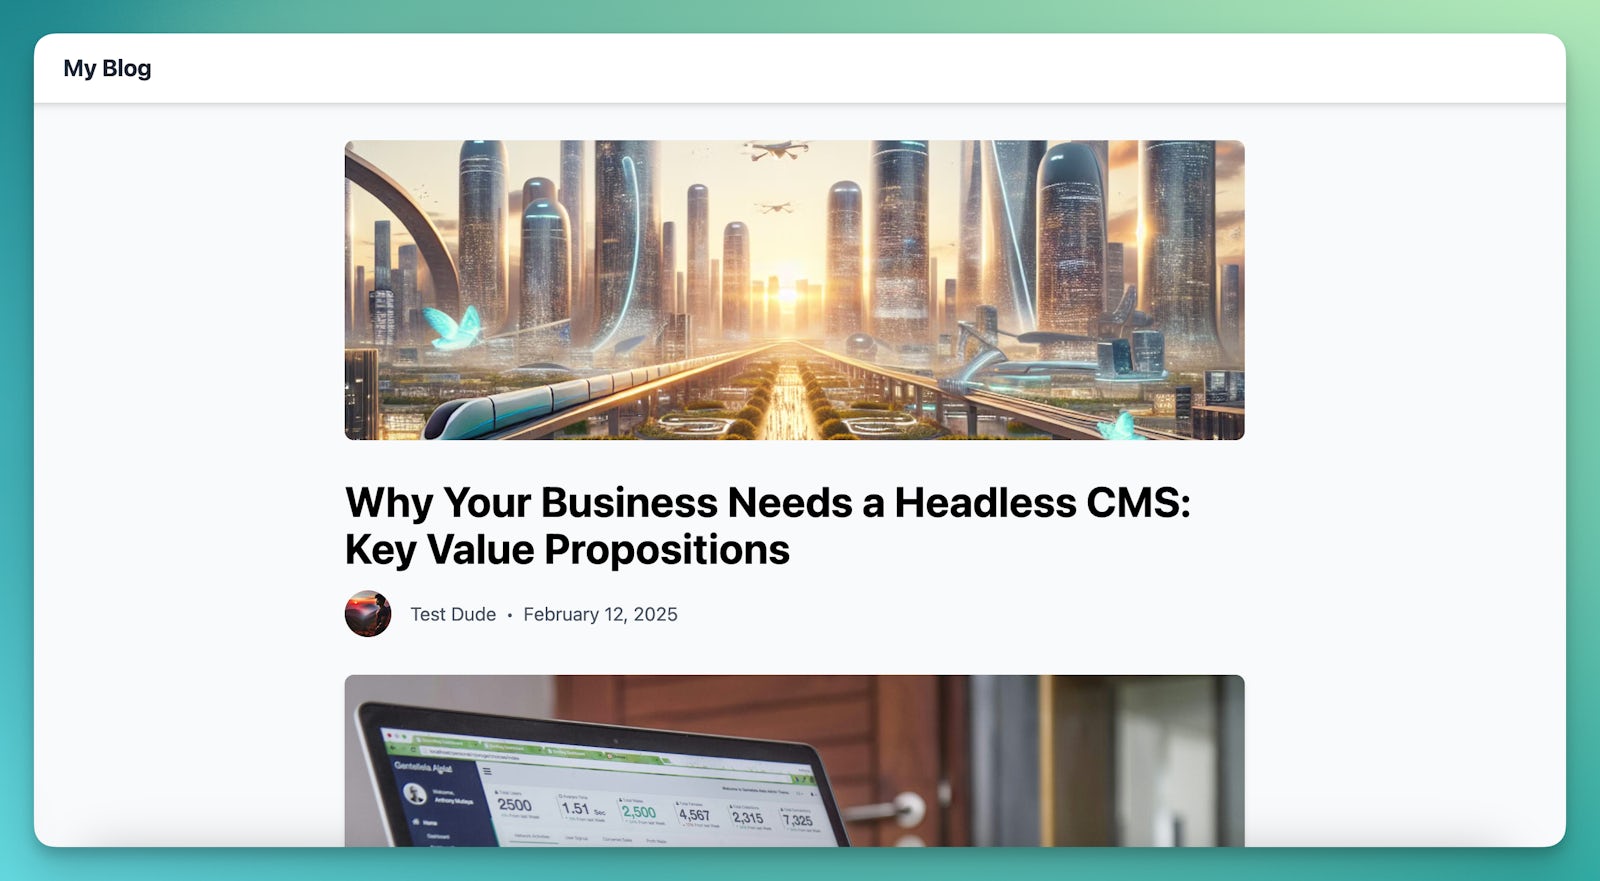
import Link from "next/link"; import { getAllPosts } from "@/lib/posts"; import { PostType } from "@/types/post"; export default async function Home() { const posts = await getAllPosts(); return ( <div className="grid gap-8 md:grid-cols-2 lg:grid-cols-3"> {posts.map((post: PostType) => ( <Link href={`/posts/${post.slug}`} key={post.slug}> <article className="h-full bg-white dark:bg-gray-800 rounded-lg shadow-md overflow-hidden transition-shadow hover:shadow-xl"> <img src={`${post.metadata.featured_image.imgix_url}?w=1000&auto=format,compress`} alt={post.title} className="w-full h-48 object-cover transition-transform group-hover:scale-105" /> <div className="p-6"> <h2 className="text-xl font-bold mb-2 text-gray-800 dark:text-white group-hover:text-blue-600 dark:group-hover:text-blue-400"> {post.title} </h2> <p className="text-gray-600 dark:text-gray-300"> {post.metadata.excerpt} </p> </div> </article> </Link> ))} </div> ); }
Creating Individual Blog Post Pages
Create app/posts/[slug]/page.tsx:
import { getAllPosts, getPostBySlug } from "@/lib/posts"; import { format } from "date-fns"; import { PostType } from "@/types/post"; export async function generateStaticParams() { const posts = await getAllPosts(); return posts.map((post: PostType) => ({ slug: post.slug, })); } export default async function Post({ params, }: { params: Promise<{ slug: string }>; }) { const { slug } = await params; const post = await getPostBySlug(slug); return ( <article className="max-w-3xl mx-auto"> <img src={`${post.metadata.featured_image.imgix_url}?w=2000&auto=format,compress`} alt={post.title} className="w-full h-64 object-cover rounded-lg" /> <h1 className="text-4xl font-bold mt-8 mb-4">{post.title}</h1> <div className="flex items-center text-gray-600 mb-8"> <img src={`${post.metadata.author.metadata.avatar.imgix_url}?w=100&auto=format,compress`} alt={post.metadata.author.title} className="w-10 h-10 rounded-full mr-4" /> <span>{post.metadata.author.title}</span> <span className="mx-2">•</span> <time>{format(new Date(post.created_at), "MMMM dd, yyyy")}</time> </div> <div className="prose prose-lg max-w-none prose-img:rounded-lg prose-img:shadow-md" dangerouslySetInnerHTML={{ __html: post.metadata.content }} /> </article> ); }
Creating the Post type
Create types/post.ts:
export interface PostType { slug: string; title: string; created_at: string; metadata: { featured_image: { imgix_url: string; }; excerpt: string; content: string; author: { title: string; metadata: { avatar: { imgix_url: string; }; }; }; }; }
Styling with Tailwind CSS
Update tailwind.config.ts:
import type { Config } from "tailwindcss"; const config: Config = { darkMode: "class", content: [ "./pages/**/*.{js,ts,jsx,tsx,mdx}", "./components/**/*.{js,ts,jsx,tsx,mdx}", "./app/**/*.{js,ts,jsx,tsx,mdx}", ], theme: { extend: {}, } }; export default config;
Install the date-fns package:
npm install date-fns
Add this to the app/globals.css file:
@tailwind base; @tailwind components; @tailwind utilities; body { font-family: system-ui, -apple-system, BlinkMacSystemFont, 'Segoe UI', Roboto, Oxygen, Ubuntu, Cantarell, 'Open Sans', 'Helvetica Neue', sans-serif; } /* Add styles for images in post content */ .prose img { border-radius: 0.5rem; /* 8px */ box-shadow: 0 4px 6px -1px rgb(0 0 0 / 0.1), 0 2px 4px -2px rgb(0 0 0 / 0.1); }
Deploying Your Blog
- Push your code to a Git repository
- Connect your repository to Vercel
- Add your environment variables in Vercel
- Deploy!
Conclusion
You now have a fully functional blog powered by Cosmic CMS, built with Next.js App Router, and styled with Tailwind CSS. This setup provides:
- Fast, static page generation
- Easy content management through Cosmic CMS
- Responsive design with Tailwind CSS
- TypeScript support for better development experience
- Automatic deployments with Vercel
Remember to:
- Keep your environment variables secure
- Regularly update your dependencies
- Optimize images for better performance
- Add SEO meta tags
- Implement analytics to track visitor engagement
This combination of technologies provides a solid foundation for building and scaling your blog while maintaining excellent performance and user experience.